Home Appliances / Refrigerators
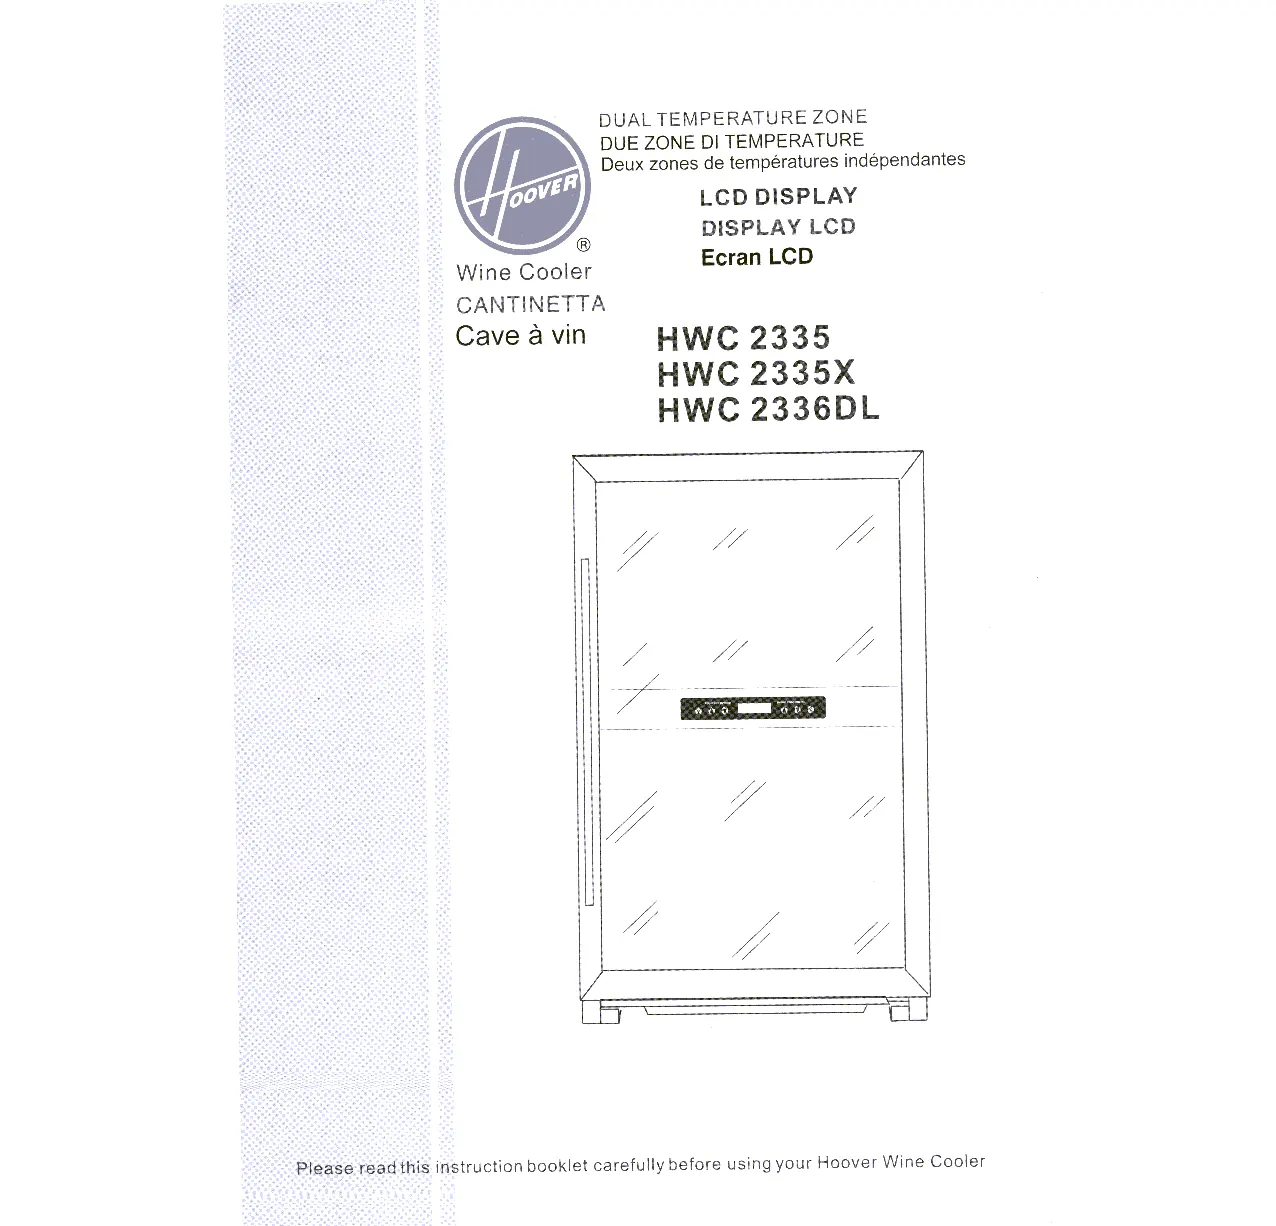
User Manual for Hoover Wine Cooler HWC 2336DL
Quick guide for the Hoover Wine Cooler HWC 2336DL. Includes installation, door reversal instructions, temperature settings, maintenance, and troubleshooting.
Quick answers from the manual
Quick answer
- The Hoover HWC 2336DL is a dual-zone wine cooler. It requires 2 hours of rest after installation before being plugged in. It features independent temperature control for the upper (10-18°C) and lower (3-10°C) compartments. p. 2, 3, 6, 7
Key actions
- Reverse the door opening direction p. 5
- Adjust temperature settings p. 6, 7
First start
- Let the appliance stand upright for 2 hours before connecting to power. p. 3
Show 4 more answers Show less
Problems and fixes
Wine cooler not working
Check power connection, circuit breaker, or fuse.
p. 11Maintenance and reset
- Clean interior with warm water and baking soda solution (2 tablespoons per liter). p. 9
Technical specifications
| Parameter | Value | Meaning | Pages |
|---|---|---|---|
| Upper Compartment Range | 10-18°C | Adjustable temperature range | p. 7 |
| Lower Compartment Range | 3-10°C | Adjustable temperature range | p. 7 |
Where to find it in the PDF
- Safety and Installation p. 3, 4
- Door Reversal p. 5
- Operation and Settings p. 6, 7
- Maintenance p. 9
- Troubleshooting p. 11
Table of contents
Manual images
Click an image to enlargeImportant Information
Before using your Hoover Wine Cooler, please note the following critical requirements:
- Rest Period: After installation, let the appliance stand upright for approximately 2 hours before plugging it into the power supply to prevent cooling system failure.
- Clearance: Ensure a minimum of 12.5 cm of space at the rear and sides for proper compressor ventilation.
- Environment: Place the unit on a stable, level surface away from direct sunlight, heat sources (radiators, stoves), and high humidity to prevent frost buildup.
Installation
Follow these steps to prepare your wine cooler:
- Remove all internal and external packaging, including the door protection film.
- Verify the contents: 4 removable shelves, 1 removable bottle rack, and the user manual.
- Clean the interior with warm water and a soft cloth.
- Connect to a grounded power outlet. Never cut or remove the grounding wire.
Door Reversal
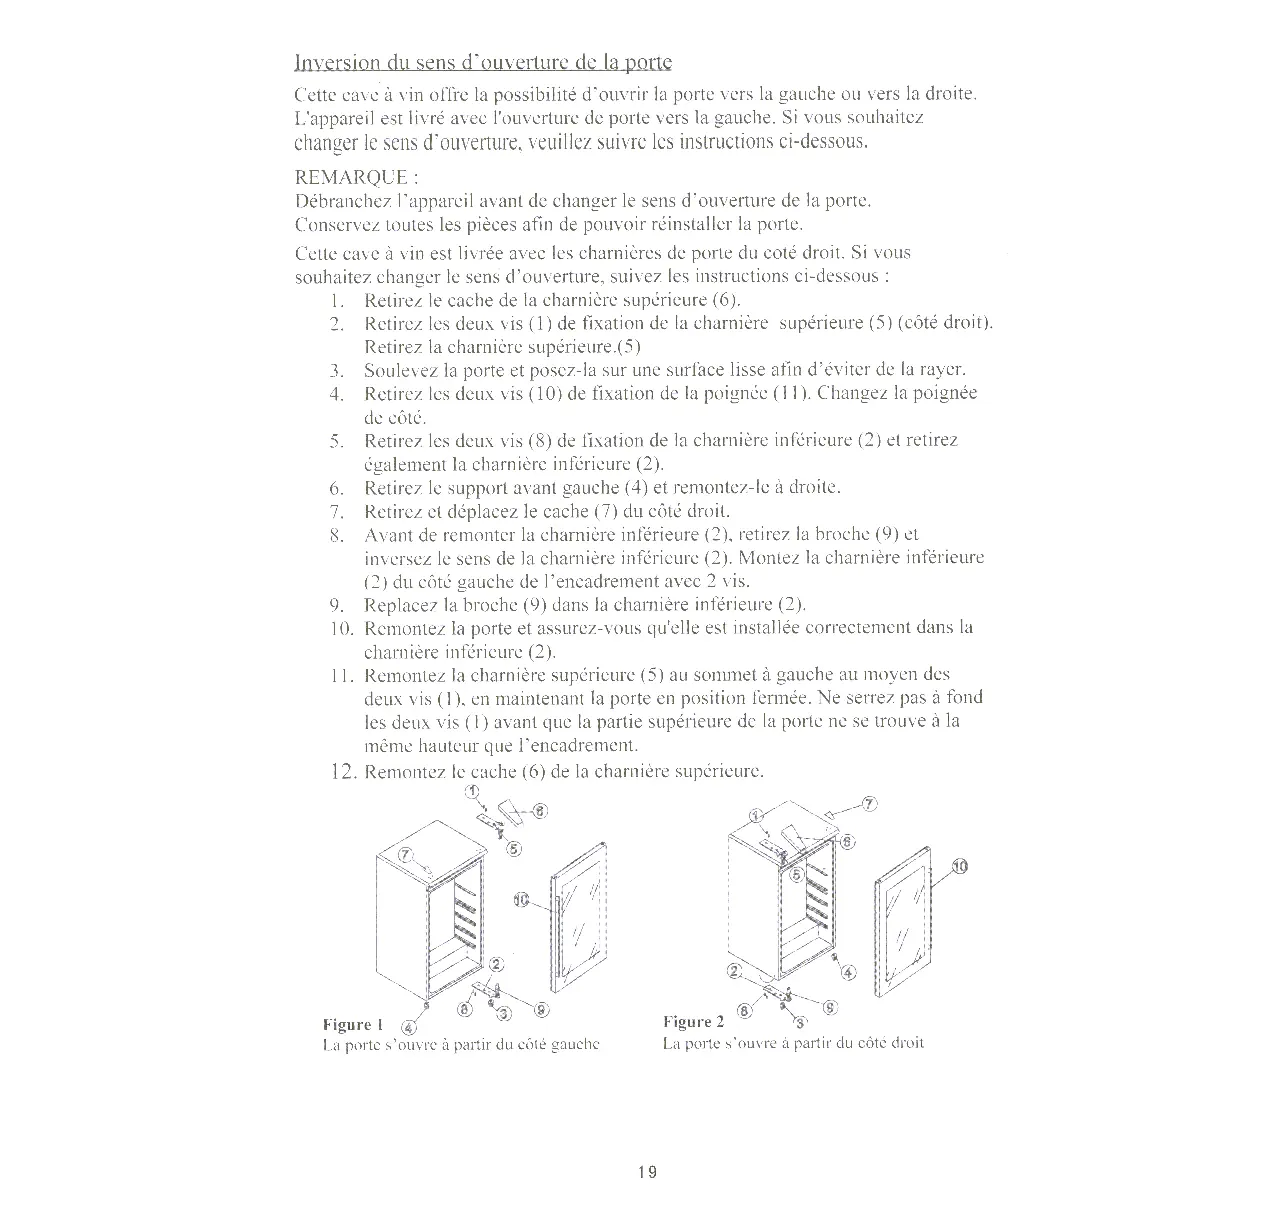
The appliance is delivered with the door opening to the left. To change the opening direction:
- Unplug the appliance.
- Remove the upper hinge cover (6).
- Remove the two screws (1) securing the upper hinge (5) and remove the hinge.
- Lift the door and place it on a smooth surface to avoid scratching.
- Remove the two screws (10) securing the handle (11) and move the handle to the opposite side.
- Remove the two screws (8) securing the lower hinge (2) and remove the hinge.
- Move the front support (4) to the other side.
- Move the cover (7) to the right side.
- Before reassembling the lower hinge (2), remove the pin (9) and reverse the hinge direction. Mount the lower hinge on the left side of the frame with 2 screws.
- Replace the pin (9) in the lower hinge (2).
- Reinstall the door, ensuring it is correctly seated in the lower hinge (2).
- Reinstall the upper hinge (5) at the top left using the two screws (1). Do not fully tighten until the door is aligned.
- Replace the upper hinge cover (6).
Operation and Temperature Settings
The wine cooler features dual temperature zones controlled independently.
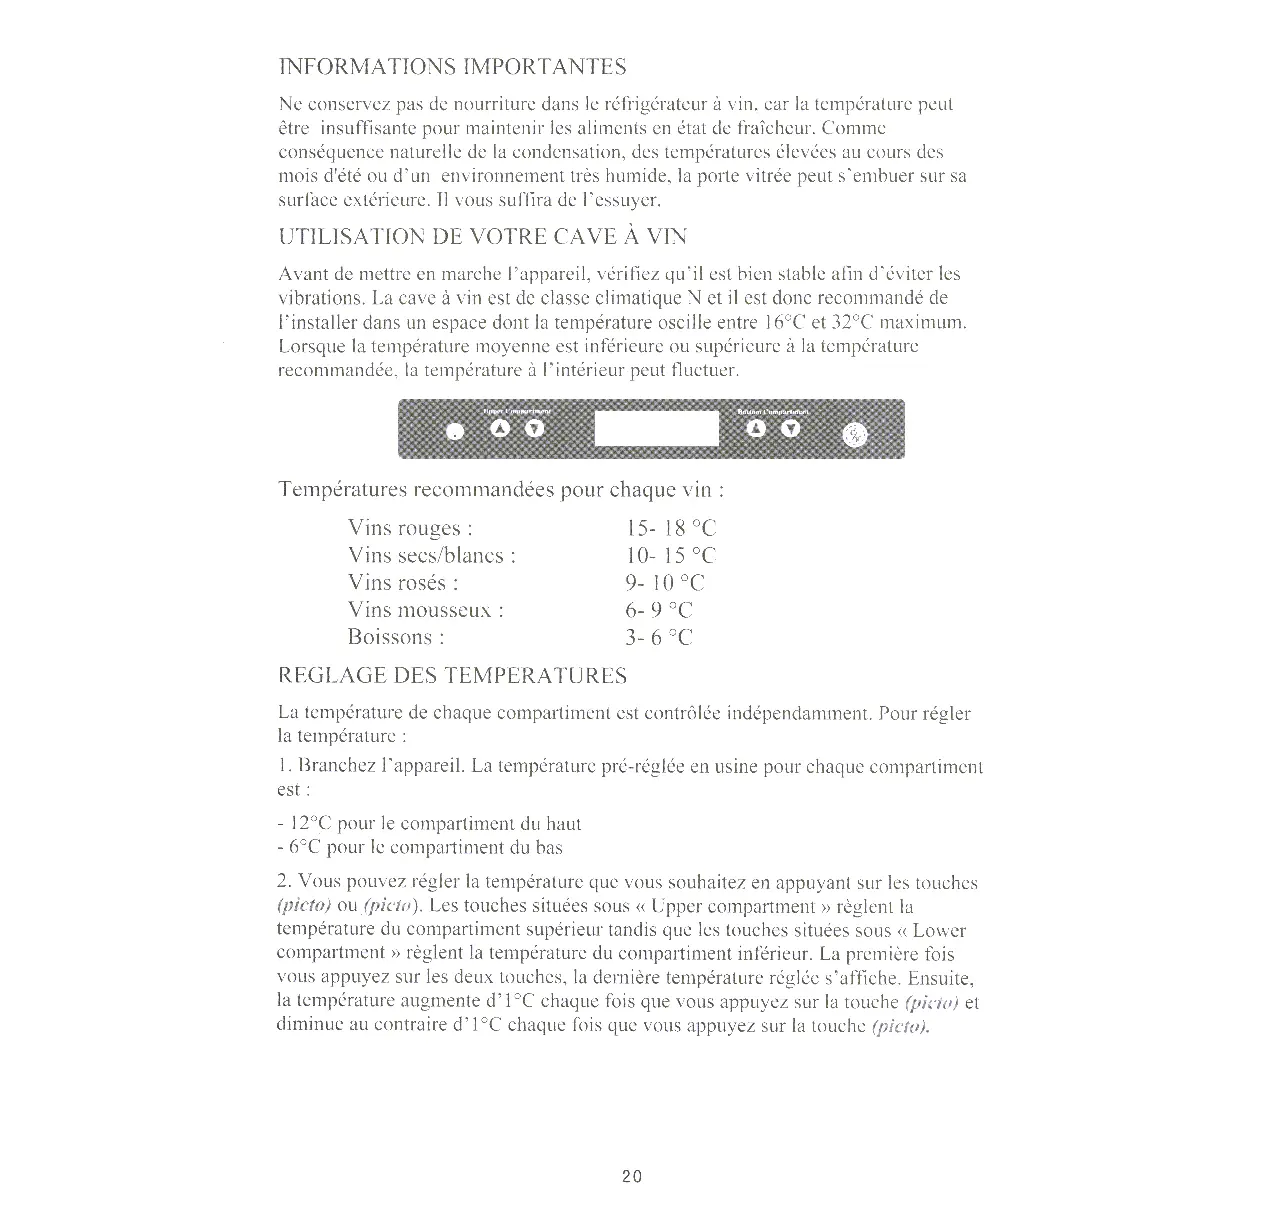
- Upper Compartment: 10°C to 18°C.
- Lower Compartment: 3°C to 10°C.
- Recommended Temperatures: Red wines (15-18°C), Dry/White wines (10-15°C), Rosé (9-10°C), Sparkling wines (6-9°C), Drinks (3-6°C).
- Adjustment: Use the buttons under "Upper compartment" and "Lower compartment" to adjust settings. The display flashes during adjustment and shows the current temperature when fixed.
- Display: Press the F/C button to toggle between Fahrenheit and Celsius.
- Lighting: Use the ON/OFF button to control interior LED lights.
Maintenance
- Cleaning: Unplug the unit and remove bottles. Clean the interior with warm water and a baking soda solution (2 tablespoons per liter). Clean the exterior with a mild detergent.
- Power Outage: Most outages are resolved within a few hours. Keep the door closed to maintain temperature.
- Vacation: For long absences, remove all bottles, unplug the unit, clean it, and leave the door slightly ajar to prevent mold and odors.
- Moving: Remove all bottles, tape down removable parts, and retract the adjustable feet. Transport in an upright position.
Manufacturer information
Hoover
Practical help
Common problems
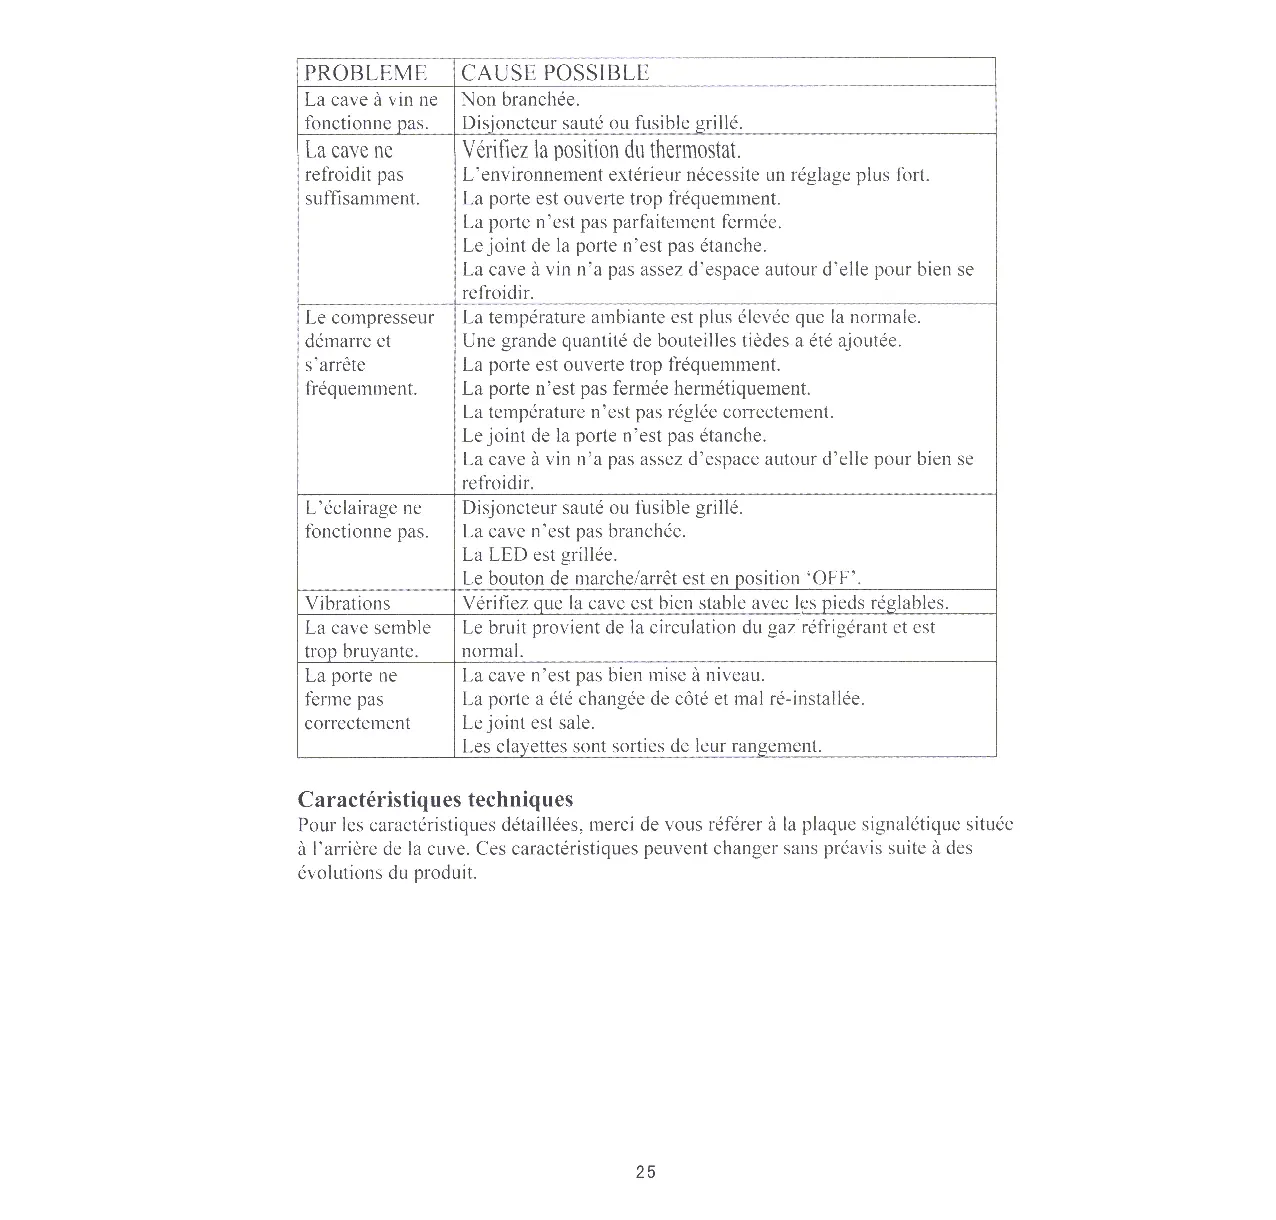
Wine cooler does not work
Check if it is plugged in, or if the circuit breaker/fuse has tripped.
Not cooling sufficiently
Check thermostat setting, ensure the door is closed properly, check the door seal, or ensure there is enough space around the unit for ventilation.
Compressor starts and stops frequently
Check if ambient temperature is high, if too many warm bottles were added, or if the door is opened too frequently.
Noisy operation
Ensure the unit is stable and level. Some noise from refrigerant circulation is normal.
Before use
- Remove all packaging materials.
- Verify all components (4 shelves, 1 bottle rack) are present.
- Let the appliance stand upright for 2 hours before plugging in.
- Clean the interior with warm water and a soft cloth.
- Ensure the floor is level and strong enough to support the unit.
Show more Show less
Specs in practice
- Upper Compartment
- Temperature range 10-18°C.
- Lower Compartment
- Temperature range 3-10°C.
- Climate Class
- N (Normal).
Images and diagrams
- Figure 1 & 2: Illustrates the door reversal procedure, showing the removal and reinstallation of hinges, handle, and covers.
Model compatibility
- Designed for wine storage only; do not store food as temperatures may not be sufficient for preservation.

Manual page author
Michael Turner
Technical manual editor