Furniture / Storage Shelving
Furinno JAYA 16-Shelf Multimedia Storage Tower Assembly Guide
Assembly guide for the Furinno JAYA 16-Shelf Multimedia Storage Tower. Includes step-by-step instructions for frame assembly, back panel installation, shelf placement, and mandatory wall-mounting safety procedures.
Table of contents
Manual images
Click an image to enlargeQuick guide from the manual
This document provides the assembly instructions for the Furinno JAYA 16-Shelf Multimedia Storage Tower. The assembly process involves connecting the side and middle panels, inserting the back panels, and securing the unit to the wall for safety. Please ensure you have all parts and hardware listed before beginning.
Parts and Hardware
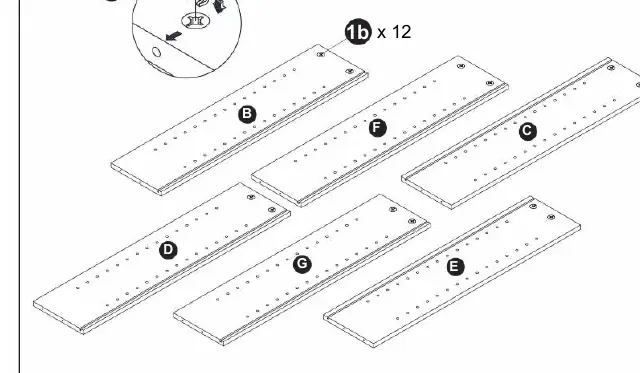
The unit consists of panels labeled A through K. Hardware includes cam bolts (1a), cam locks (1b), screws (2), shelf pins (3), wall anchor kit (4a-d), and additional fasteners (5, 6). Ensure all components are present before starting assembly.
Assembly Steps

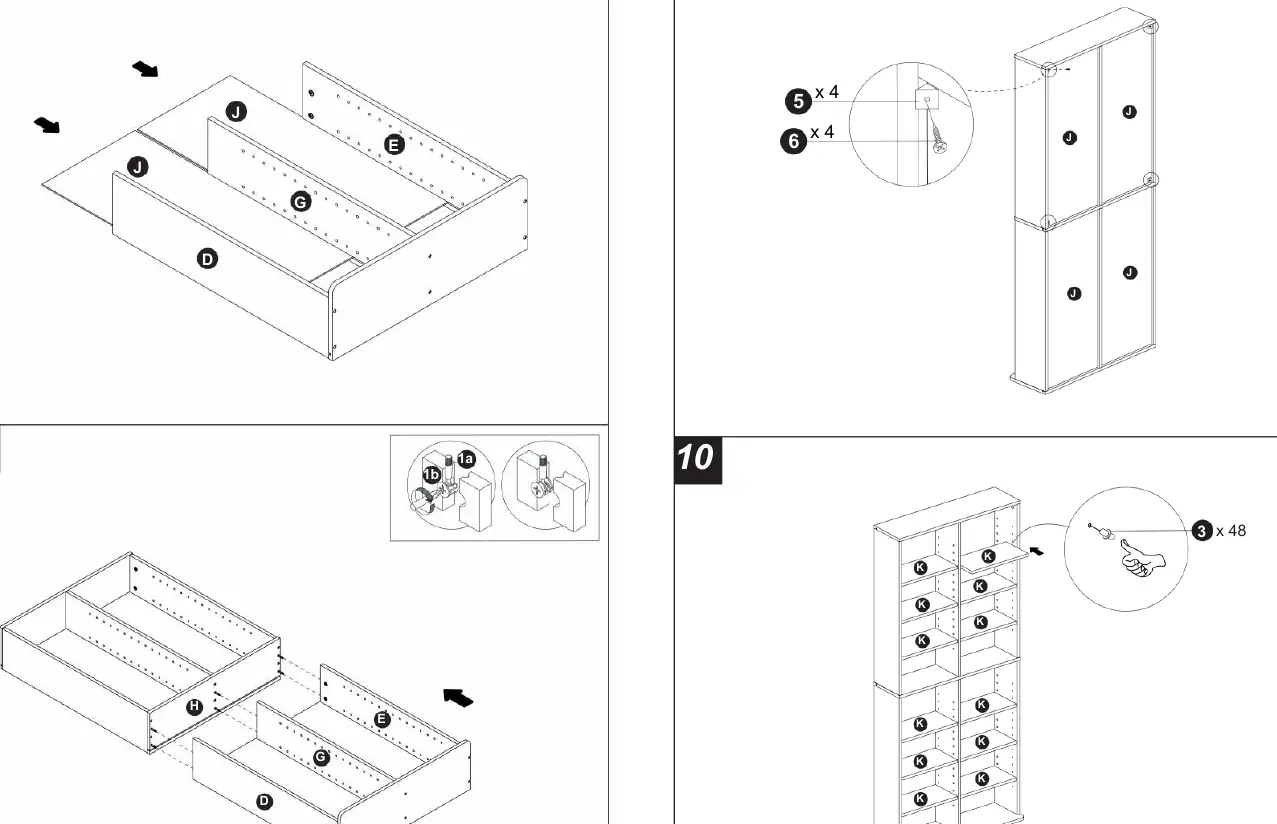
- Frame Preparation: Insert cam bolts (1a) into panels H and A.
- Panel Assembly: Connect panels B, C, D, E, F, and G using cam locks (1b) and screws (2) as shown in steps 3 through 8.
- Back Panel Installation: Slide the back panels (J) into the grooves of the assembled frame.
- Wall Mounting: Secure the unit to the wall using the provided wall anchor kit (4a-d) to prevent tipping.
- Shelf Installation: Insert shelf pins (3) into the desired holes and place the shelves (K) onto the pins.
Safety and Weight Limits
For safety, the unit must be anchored to the wall. Observe the following weight limits to prevent damage or injury:
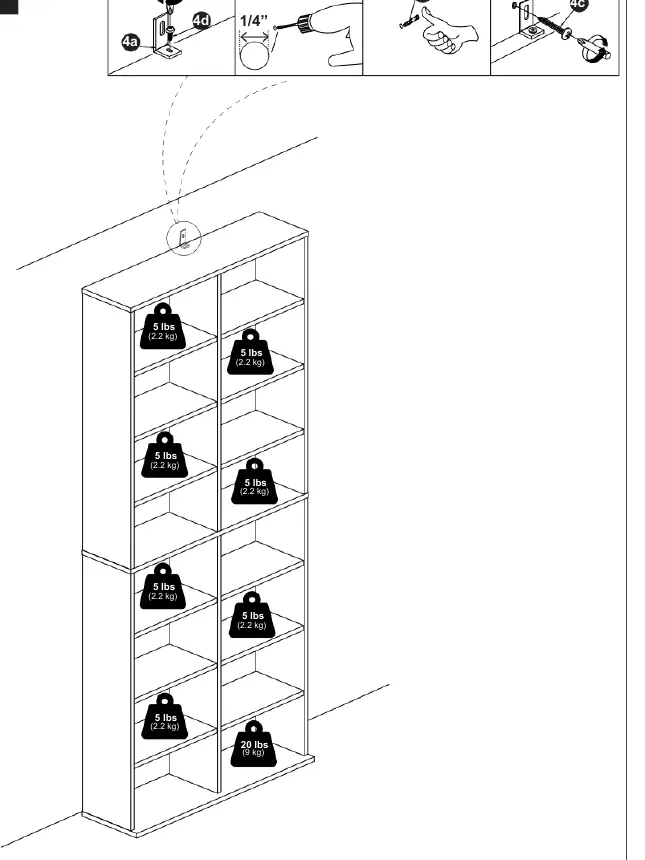
- Standard Shelves: Maximum 5 lbs (2.2 kg) per shelf.
- Bottom Shelf: Maximum 20 lbs (9 kg).
Practical help
Common problems
Unit feels unstable or wobbly
Ensure the unit is properly secured to the wall using the included wall anchor kit (4a-d). Check that all cam locks (1b) are fully tightened.
Shelves are not level
Verify that all shelf pins (3) are inserted into the same level holes on both sides of the unit.
Before use
- Verify all panels (A-K) and hardware (1-6) are present.
- Prepare a screwdriver for assembly.
- Clear a workspace on a flat, clean surface to avoid scratching panels.
- Identify the wall type to determine the correct installation method for the wall anchor (4a-d).
- Ensure the assembly area is near the final location of the unit.
Specs in practice
- Shelf Weight Limit
- 5 lbs (2.2 kg) per individual shelf.
- Bottom Shelf Limit
- 20 lbs (9 kg) for the bottom-most shelf.
Images and diagrams
- Steps 1-8: Structural assembly of the frame and back panels.
- Step 9: Wall mounting procedure using the anchor kit.
- Step 10: Final shelf placement using pins.
Model compatibility
- Wall mounting is required for safety and stability.

Manual page author
David Miller
Documentation analyst
Organizes user manual content into clear summaries, with attention to model details, product context, and everyday usability.