Furniture / Media Furniture
User Manual for Belleze Vinyl Record Player Stand 014-HG-43004
Quick guide for assembling and maintaining your Belleze Vinyl Record Player Stand (014-HG-43004). Includes step-by-step assembly instructions, safety warnings, and care tips.
Table of contents
Manual images
Click an image to enlargeImportant Information
This guide provides instructions for the assembly and maintenance of the Belleze Vinyl Record Player Stand. The estimated assembly time is 70 minutes and requires two people. Please ensure all parts are present before beginning assembly. The product must be permanently fixed to a wall to prevent tipping.
Assembly Preparation
Before starting, prepare your workspace:
- Assemble the furniture on an empty carton, carpet, or rug to prevent scratches.
- Keep pets and children away from the assembly area.
- Lay out all components and hardware separately on a flat surface.
- Verify all parts are present and undamaged.
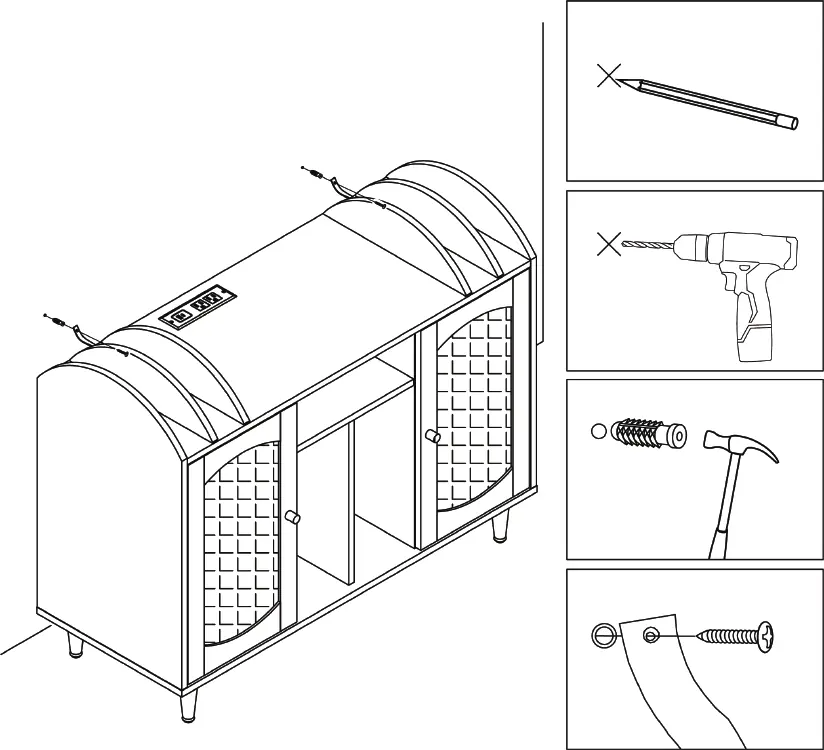
- Required tools (not included): Screwdriver, hammer, and drill.
Assembly Steps
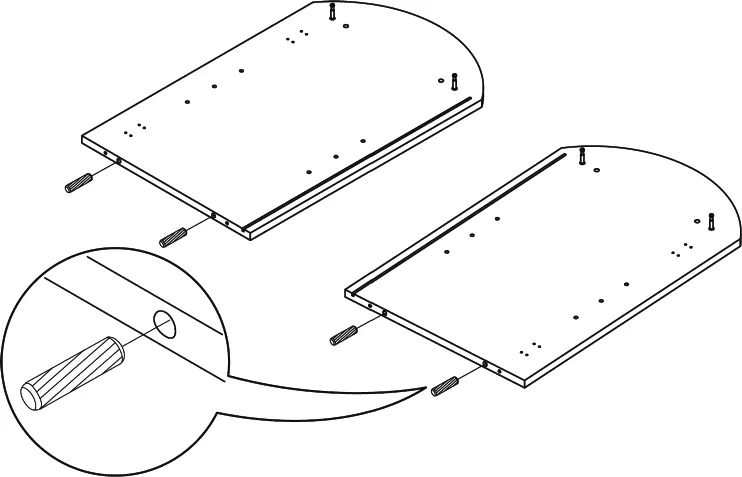
The assembly process involves connecting various panels using cam bolts, wood dowels, and screws. Key steps include:
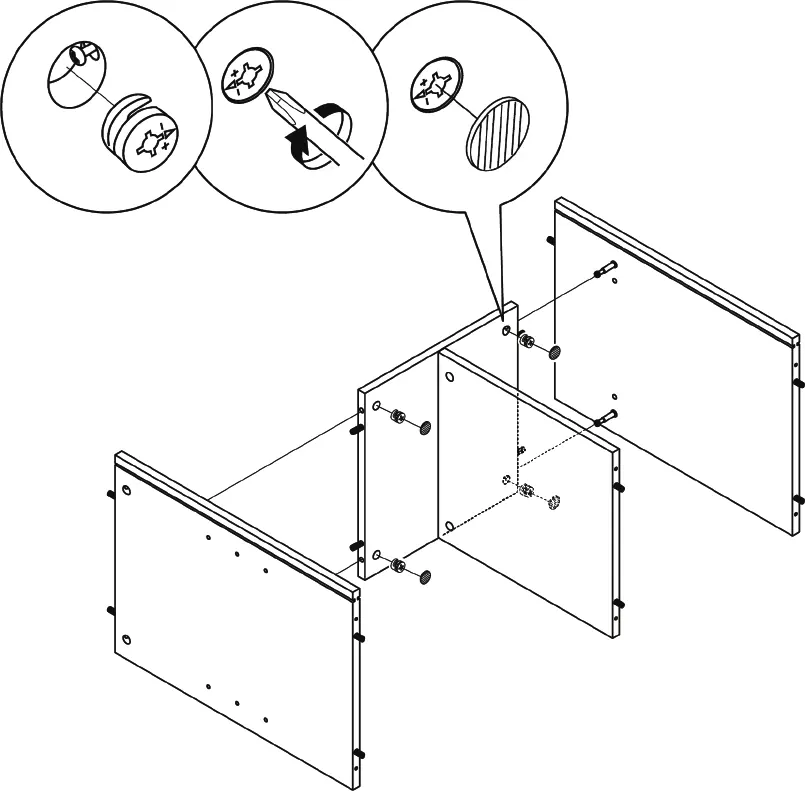
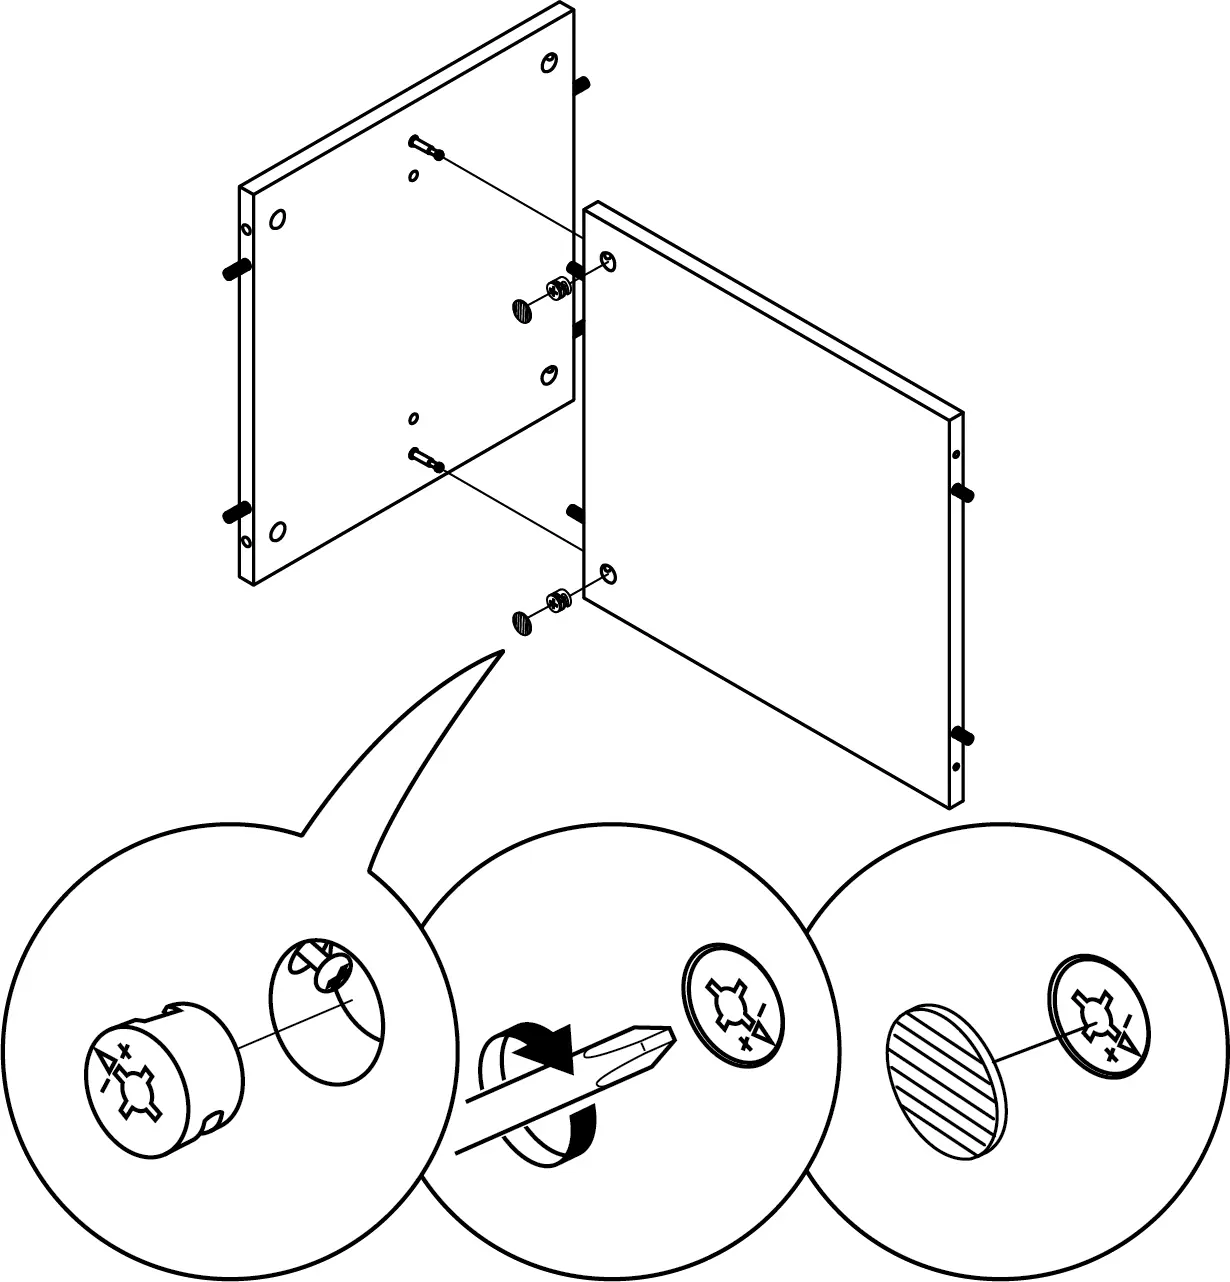
- Cam Lock System: Insert cam bolts into panels. When connecting panels, insert the cam lock (B) into the hole, align with the bolt, and turn clockwise to secure.
- Structure: Assemble the center storage shelf, medial panels, and top panel.
- Back Panels: Slide the back panels into the grooves of the stand assembly.
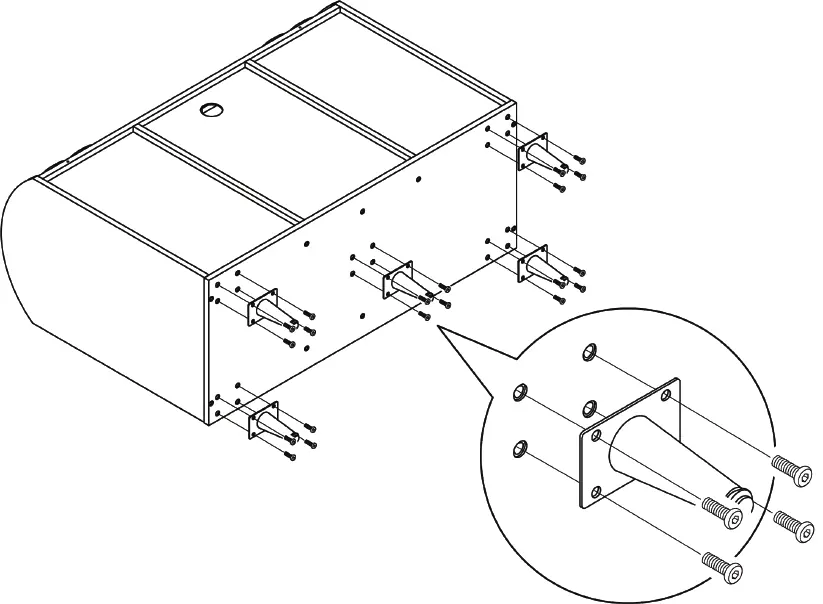
- Legs: Attach the legs to the bottom panel.
- Power Hub: Install the power hub into the top panel.
- Doors: Attach hinges to the cabinet doors and mount them to the stand.
Door Adjustments
If the cabinet doors are not aligned, you can adjust them using the hinge screws:
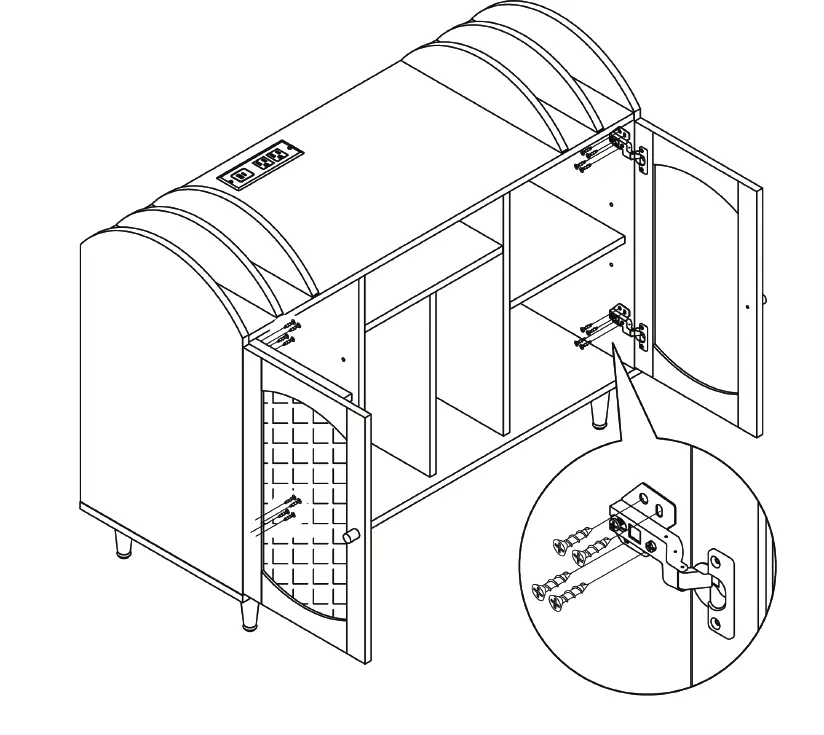
- Up and down: Loosen the screws on the mounting plate.
- In and out: Loosen the screws on the hinge arm.
- Side to side: Use the front adjustment screw on the hinge.
Safety Warnings
To ensure safety and prevent injury:
- Tipping Hazard: Serious or fatal crushing injuries may occur if the furniture tips over. The unit must be permanently fixed to the wall using the included anti-tipping device.
- Weight Limits: Do not exceed the maximum load of 50 lb for the top surface and 30 lb for the shelves.
- Usage: Do not climb or step on the product.
Care and Maintenance
To keep your furniture in good condition:
- Tightening: Tighten all bolts and screws within the first 2 weeks of assembly. Check the tightness of all bolts every 2 months.
- Cleaning: Clean the MDF surface with a lightly dampened cloth. A small amount of mild soap can be used if necessary. Dry immediately.
- Restrictions: Do not use bleach or alcohol. Do not apply wood treatment to MDF parts.
Manufacturer information
Belleze Furniture
Practical help
Common problems
Missing parts or hardware
Contact support at 1-800-682-6376 or email [email protected] for replacements.
Furniture tipping over
The unit must be permanently fixed to the wall using the included anti-tipping device. Use appropriate wall anchors for your specific wall type.
Doors are misaligned
Adjust the door position using the hinge screws (up/down, in/out, or side-to-side adjustment).
Before use
- Check all parts against the package contents list.
- Ensure you have 2 people for assembly.
- Prepare a flat, clean surface (carpet or rug recommended).
- Verify you have the required tools (screwdriver, hammer, drill).
- Do not tighten screws fully until the structure is aligned.
Specs in practice
- Maximum Load (Top)
- 50 lb
- Maximum Load (Shelves)
- 30 lb
- Assembly Time
- Approximately 70 minutes
Images and diagrams
- Cam lock system: Insert cam bolt, align, insert cam lock, and turn clockwise to secure.
Model compatibility
- Wall mounting: Requires specific anchors based on your wall material (not included).

Manual page author
Emily Carter
User documentation editor
Prepares concise manual descriptions and highlights the most useful setup, operation, and maintenance information for readers.