Furniture / Dining Room
Installation Guide for George Oliver 2-Person Patio Conversation Set
Assembly instructions and care guide for the George Oliver 2-Person Patio Conversation Set. Includes a complete parts list, hardware identification, and step-by-step assembly procedures for the chairs, footstools, and table.
Quick answers from the manual
Quick answer
- This guide provides assembly instructions for the George Oliver 2-Person Patio Conversation Set, including parts identification and step-by-step assembly for chairs, footstools, and the table. p. 1, 2, 3, 4
Key actions
- Assemble chairs p. 3
- Assemble footstools and table p. 4
Problems and fixes
Difficulty assembling parts
Do not fix screws tightly before all screws and holes are connected.
p. 1Maintenance and reset
- Cushion care p. 1
Where to find it in the PDF
- Assembly tips and care p. 1
- Parts list p. 2
- Chair assembly p. 3
- Footstool and table assembly p. 4
Table of contents
Manual images
Click an image to enlargeQuick guide from the manual
For easier assembly, do not fix screws tightly before all screws and holes are connected. Keeping all screws half-tightened allows for easier alignment of parts. Ensure you protect the cushions from prolonged sun exposure and store them indoors during rain or snow.
Parts and hardware
Before beginning assembly, verify that you have all the necessary components:
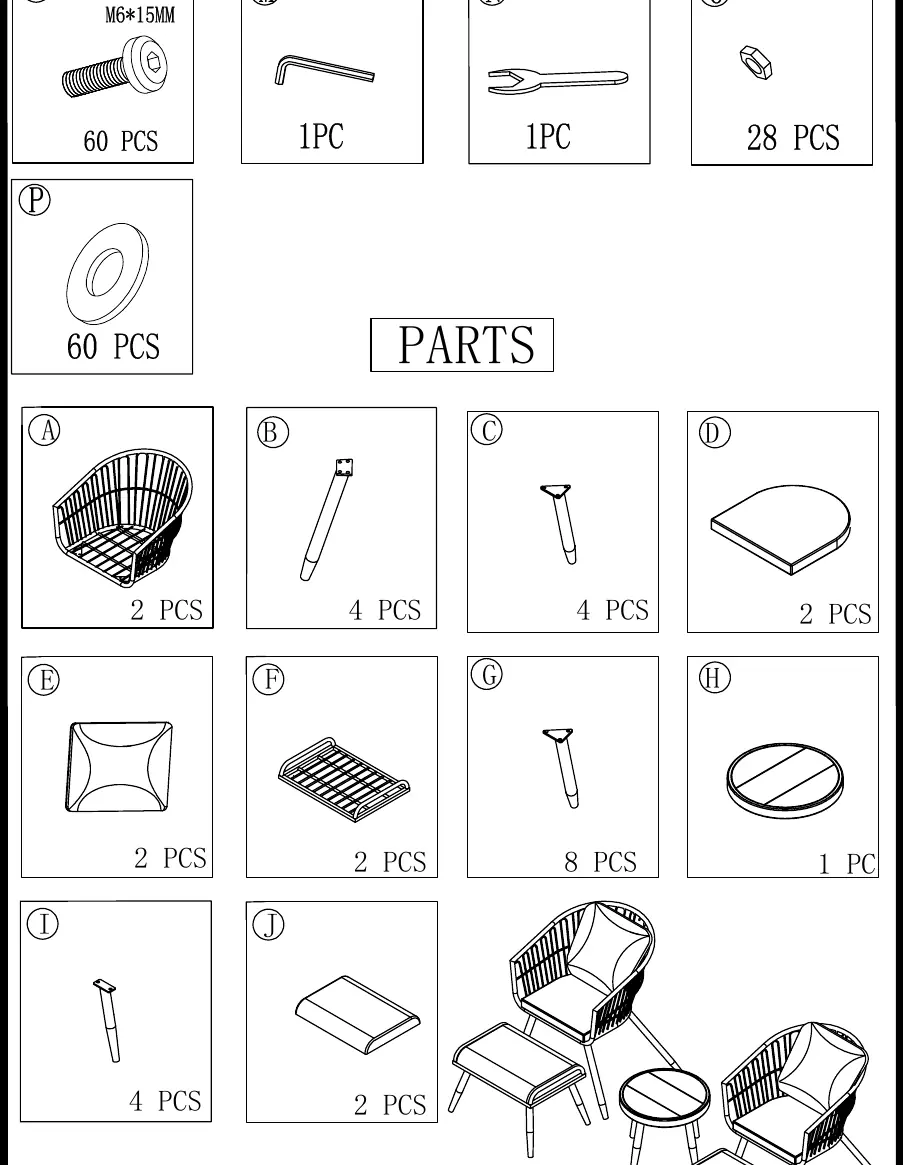
- Hardware: M6*15mm screws (L), Allen key (M), Wrench (N), Nuts (O), Washers (P).
- Parts: Chairs (A), Legs (B, C, G, I), Cushions (D, E, J), Table top (H), Footstool frame (F).
Assembly instructions
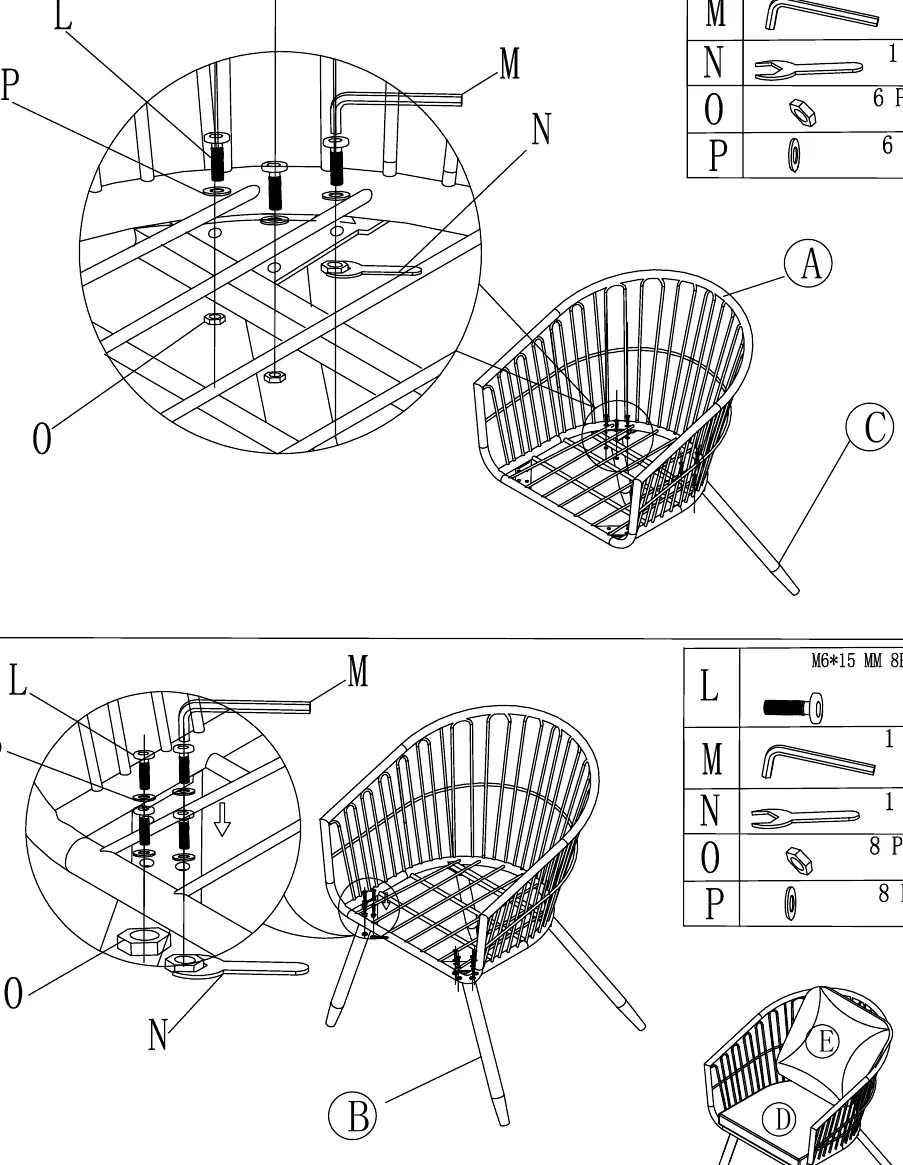
Chair assembly
Follow the diagrams on page 3 to attach legs (C) to the chair frame (A) using screws (L), washers (P), and nuts (O). Use the provided Allen key (M) and wrench (N) to secure the connections.
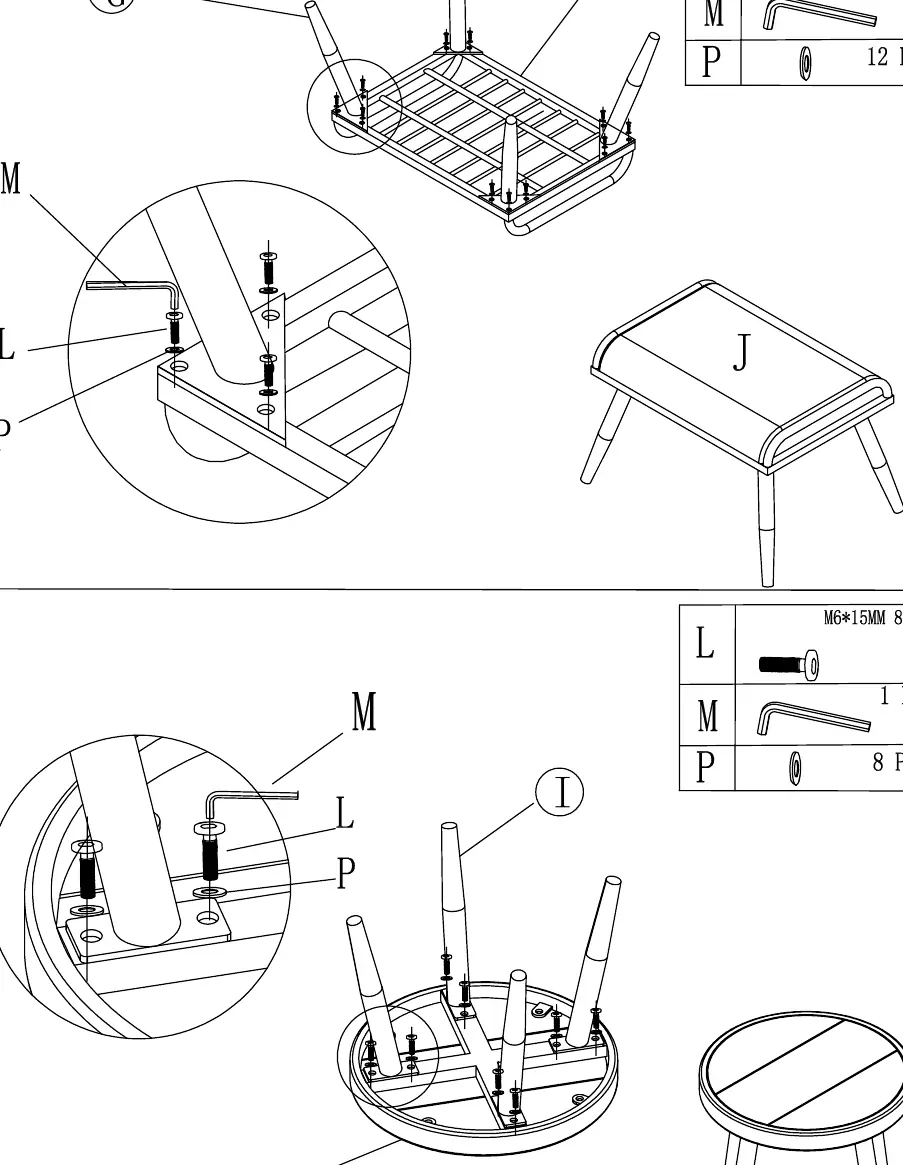
Footstool and table assembly
Refer to page 4 for the assembly of the footstool and table. Attach legs (G) to the footstool frame (F) and legs (I) to the table top (H) using the specified hardware.
Care and maintenance
To prolong the life of your furniture:
- Do not expose cushions to direct sunlight for long periods.
- Cover the set or store cushions indoors when rain or snow is expected.
Practical help
Common problems
Difficulty aligning parts during assembly
Keep all screws half-tightened until all holes are connected to allow for adjustment.
Before use
- Check all parts against the list (A-J)
- Verify hardware count (L-P)
- Clear a flat assembly area
- Do not fully tighten screws initially
Images and diagrams
- Page 2 shows the inventory of all parts and hardware.
- Page 3 details the chair assembly process.
- Page 4 details the footstool and table assembly process.

Manual page author
Emily Carter
User documentation editor
Prepares concise manual descriptions and highlights the most useful setup, operation, and maintenance information for readers.