Garden / Outdoor Furniture
Assembly & Instruction Manual for George Oliver Edvardo 2-Person Dining Set
A comprehensive assembly and instruction guide for the George Oliver Edvardo 2-Person Dining Set. Includes parts lists, hardware specifications, step-by-step assembly diagrams, and essential care and safety instructions.
Quick answers from the manual
Quick answer
- This manual provides assembly instructions for the George Oliver Edvardo 2-Person Dining Set, including parts lists and safety guidelines for domestic use. p. 1, 2
Key actions
- Assemble the table by attaching legs to the tabletop. p. 5
- Assemble the chair frames and attach backrests and seats. p. 6, 7, 8
Maintenance and reset
- Clean with a soft fabric and regularly remove leaves or water collected on the canvas. p. 2
Where to find it in the PDF
- Safety and Care Instructions p. 2
- Parts and Hardware List p. 4
- Assembly Steps p. 5, 6, 7, 8
Table of contents
Manual images
Click an image to enlargeImportant Information
This manual provides assembly and care instructions for the George Oliver Edvardo 2-Person Dining Set. The product is intended for domestic use only. Please read all instructions carefully before beginning assembly and retain this document for future reference.
Safety and Care
To ensure the longevity and safety of your dining set, please follow these guidelines:
- Placement: Always place the chairs and table on a flat, stable floor.
- Usage: Avoid overloading the chairs. Keep the furniture away from open flames.
- Maintenance: Clean surfaces using a soft fabric. Regularly remove any leaves or water collected on the canvas or seating surfaces.
- Storage: Store fabric components in a completely dry, clean place to prevent the risk of mold.
- Assembly Precautions: Prepare a clean and dry mounting area. Verify that the product is not damaged and check that all pieces are present before starting.
Parts and Hardware
Before beginning assembly, ensure you have all the necessary components:

- Parts: Includes chair frames, backrests, seat panels, and table components (labeled 1-9).
- Hardware: Includes screws M6*25 (A), M6*12 (B), M6*40 (D), M6*30 (E), and an Allen key (C). Spare screws are provided for each type.
Assembly Instructions
Follow these steps to assemble your dining set:
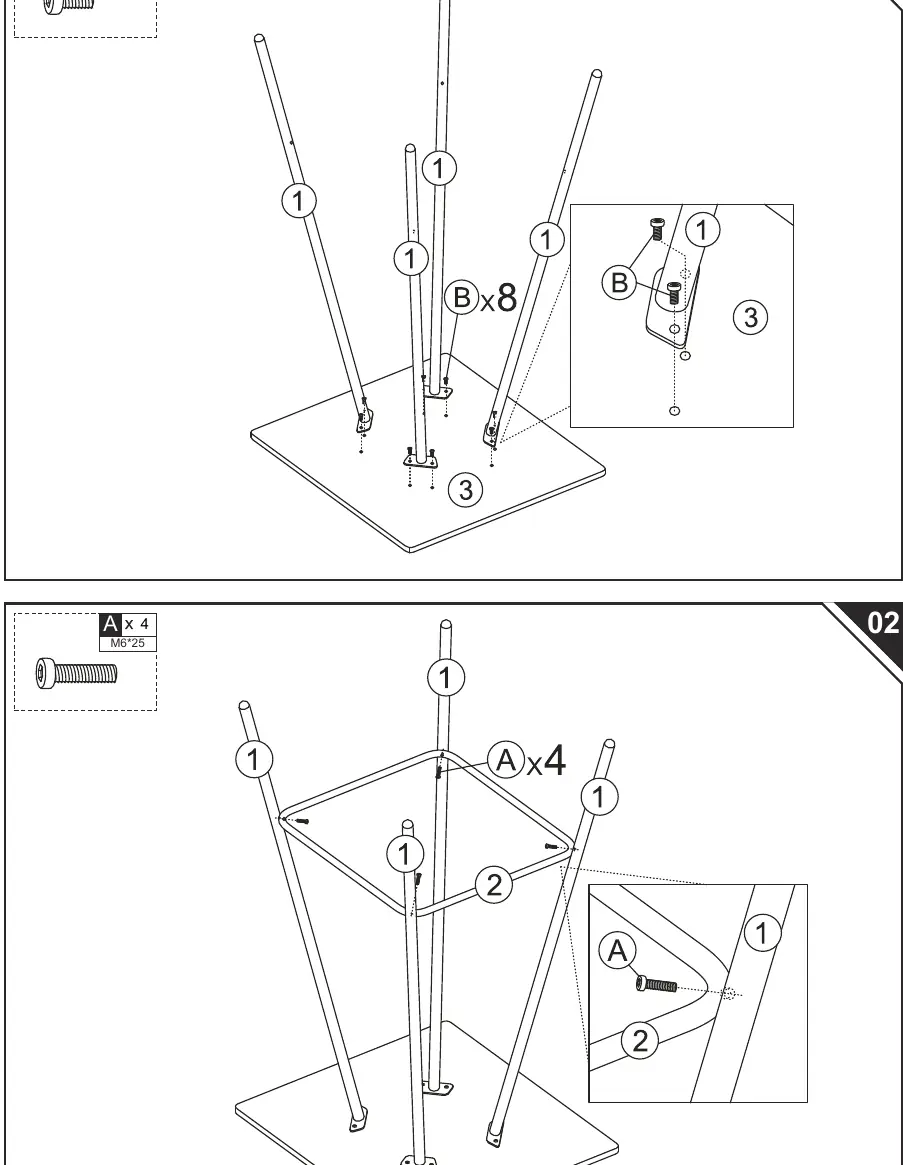
- Table Assembly: Attach the table legs to the tabletop using the provided hardware.
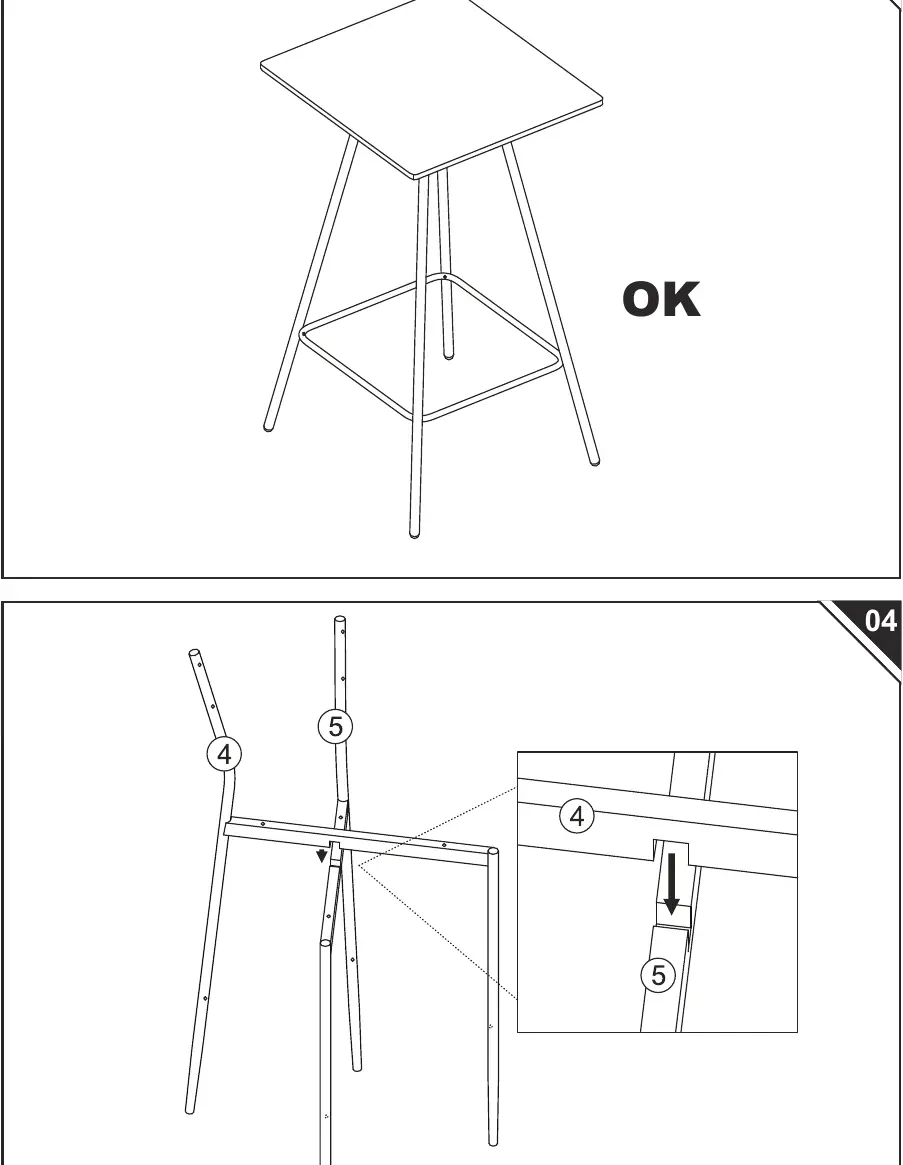
- Chair Frame Assembly: Connect the chair frame components.
- Backrest Installation: Secure the backrest to the chair frame using the specified screws.
- Seat Installation: Attach the seat panel to the frame to complete the chair.
Ensure all screws are tightened securely after assembly. If the seating is fitted with seat height adjustment components with energy accumulators, only trained personnel should perform repairs or replacements.
Practical help
Common problems
Unstable furniture
Ensure the furniture is placed on a flat, level floor and verify that all screws are tightened securely.
Risk of mold on fabric
Store fabric components in a completely dry and clean environment.
Before use
- Prepare a clean and dry mounting area.
- Verify that the product is not damaged.
- Check that none of the pieces are missing.
- Ensure you have the provided Allen key (C) for assembly.
Images and diagrams
- The manual uses numbered diagrams to indicate which parts (1-9) and hardware (A-E) correspond to each assembly step.
- Arrows in the diagrams indicate the direction of insertion or attachment for components.

Manual page author
David Miller
Documentation analyst
Organizes user manual content into clear summaries, with attention to model details, product context, and everyday usability.