Tools / Power Tools
User Manual for HiKOKI G10SS2, G12SS2, G13SS2, G12STA, G13STA Disc Grinder
Quick guide and user manual for HiKOKI G10SS2, G12SS2, G13SS2, G12STA, and G13STA disc grinders. Includes safety instructions, mounting, operation, and maintenance.
Table of contents
Manual images
Click an image to enlargeQuick guide from the manual
This manual provides essential safety and operating instructions for the HiKOKI G10SS2, G12SS2, G13SS2, G12STA, and G13STA disc grinders. Always read the full safety warnings before use.
Safety Warnings
Always wear eye protection. Keep bystanders away from the work area. Ensure the power switch is in the OFF position before connecting the tool to a power source. Use only recommended accessories and guards. Do not use cutting-off wheels for side grinding.
Mounting and Operation
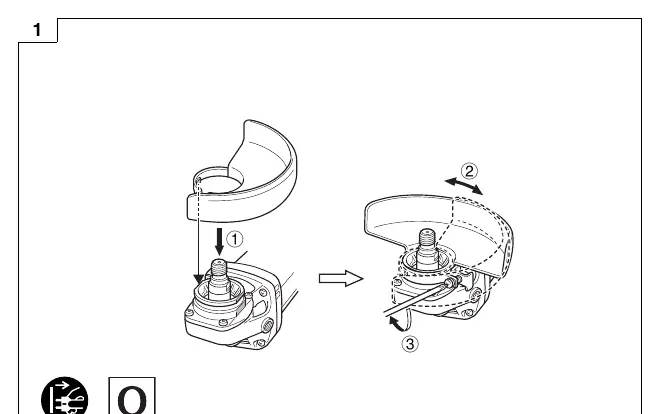
- Wheel Guard: Fit and adjust the guard for maximum safety (Fig. 1).
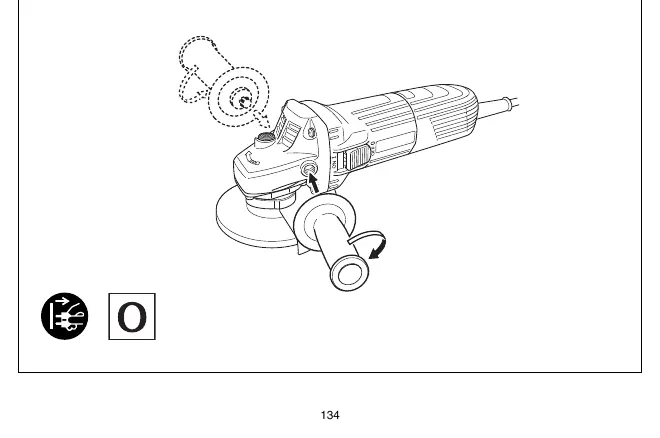
- Side Handle: Fix the side handle securely (Fig. 2).
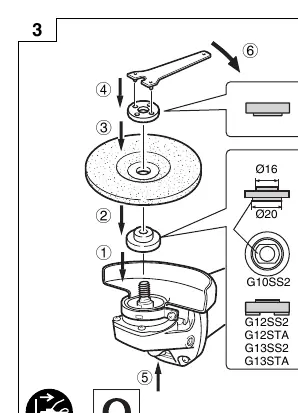
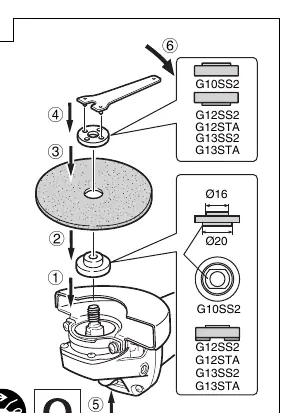
- Assembling Wheels: Follow specific instructions for assembling depressed center wheels (Fig. 3), cutting wheels (Fig. 4), and diamond wheels (Fig. 5).
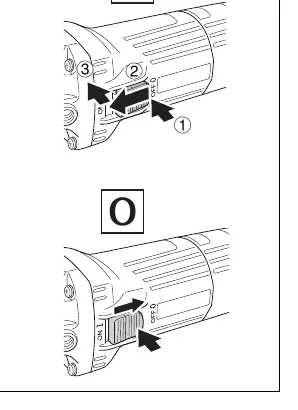
- Switch Operation: Use the switch to turn the tool ON and OFF (Fig. 6).
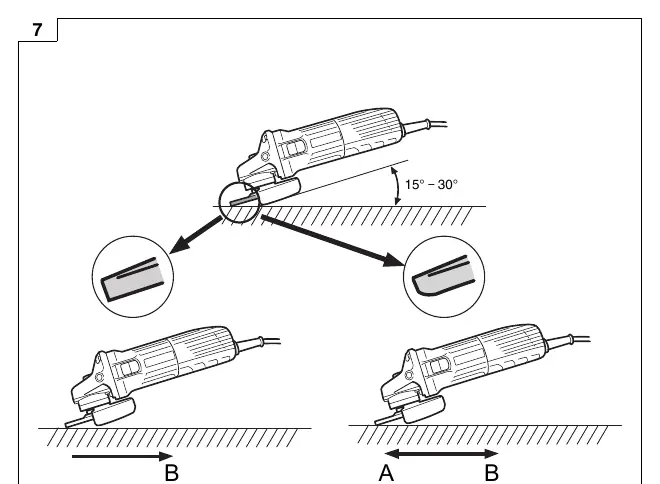
- Grinding: Maintain the correct grinding angle for effective results (Fig. 7).
Maintenance and Inspection
Regularly inspect the grinding wheel for cracks or surface defects. Check all mounting screws and tighten them immediately if loose. Carbon brush inspection and supply cord replacement must be performed by a HiKOKI Authorized Service Center. Keep air vents clear of dust to prevent motor malfunctions.
Manufacturer information
HiKOKI
Practical help
Common problems
Tool vibrates excessively
Check if the wheel is mounted correctly and tightened. Inspect the wheel for damage or cracks.
Wheel binds or kicks back
Ensure proper support for the workpiece. Do not apply excessive pressure during cutting.
Motor malfunctions
Clean air vents regularly to remove accumulated dust and metal particles.
Before use
- Check that the power source matches the nameplate.
- Ensure the switch is in the OFF position before plugging in.
- Inspect the grinding wheel for cracks or surface defects.
- Ensure the wheel guard is securely attached.
- Confirm the push button is disengaged.
Specs in practice
- Rated voltage
- Ensure it matches your local power supply.
- Wheel outer diameter
- The size of the compatible grinding wheel.
Images and diagrams
- Fig 1: Fitting and adjusting the wheel guard.
- Fig 2: Fixing the side handle.
- Fig 3: Assembling depressed center wheel.
- Fig 4: Assembling cutting wheel.
- Fig 6: Switch operation.
Model compatibility
- Use only recommended wheel types.
- Do not use cutting-off wheels for side grinding.
- Use the correct guard for the specific wheel type.

Manual page author
Michael Turner
Technical manual editor
Reviews PDF manuals for structure, safety notes, and practical product details so readers can find the right information quickly.