Toys / Ride-on Toys
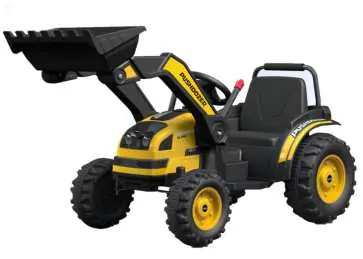
Homcom Pushdozer Ride-on Toy 370-167V90
Quick guide for the Homcom Pushdozer ride-on toy (370-167V90). Includes assembly instructions, battery charging procedures, safety warnings, and troubleshooting steps.
Table of contents
Manual images
Click an image to enlargeQuick Guide
This guide provides essential information for the Homcom Pushdozer ride-on toy. Always ensure the vehicle is assembled by an adult before use. The toy is designed for children aged 3-5 years with a maximum weight capacity of 25kg. Never use the vehicle on roads, near motor vehicles, steep inclines, steps, or swimming pools.
Specifications
- Battery: 6V/7AH
- Motor: 15W x 2
- Speed: 1.5-2.5 km/h
- Charging Time: 8-12 hours
- Usage Time: Approximately 0.58 hours
- Charger Input: AC 220V, 50Hz
- Charger Output: DC 6V 1000mA
Safety Warnings
- Adult Assembly Required: Contains small parts. Keep children away during assembly.
- Supervision: Never leave a child unattended.
- Environment: Use only on flat surfaces like inside the house, garden, or playground. Do not use in the dark or on rough terrain.
- Operation: Always wear shoes. Only one rider at a time.
- Maintenance: Periodically inspect wires and connections. Do not modify the electrical circuit.
Assembly Instructions
Before assembly, identify all parts using the parts list. Wipe metal parts with a paper towel to remove excess lubricant.

Wheel Assembly
- Insert a pin into the hole of the axle and bend it into an M-shape using pliers.
- Snap the hubcap into the center.
- Repeat for all wheels.
Steering Wheel and Body
- Plug the connectors and press the steering wheel onto the turning shaft.
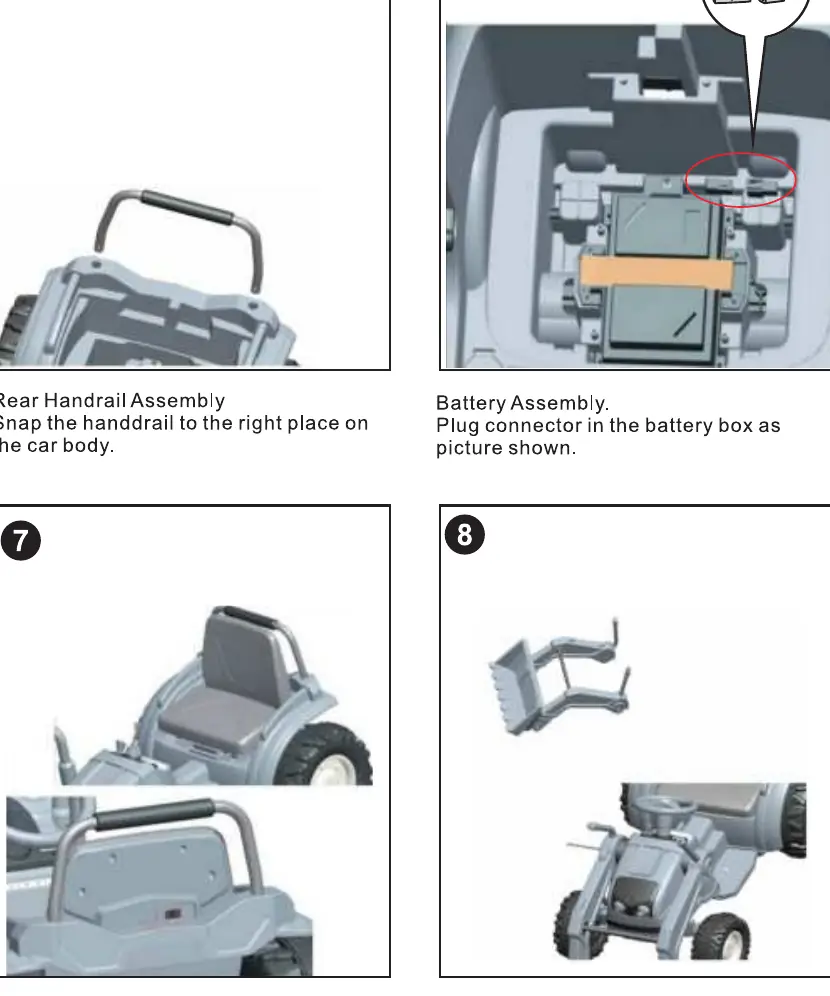
- Snap the rear handrail onto the car body.
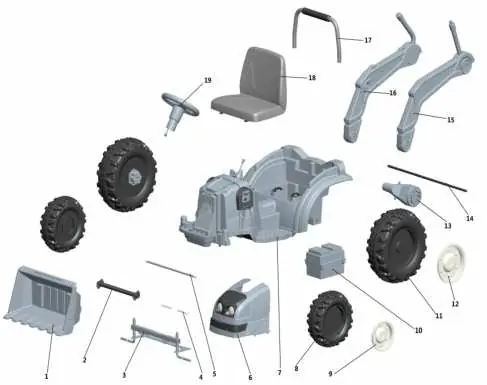
- Insert the seat into the slots on the main body and press into place.
- Attach the scraper bucket to the main body and fasten with the nut using the provided tool.
Battery Installation
- Plug the battery connector into the battery box.
- Ensure the battery is secured.
Operating Instructions
- Power Switch: Use the button to turn the vehicle ON and OFF.
- Forward/Reverse: Push the shifter to the upward position for forward or downward for reverse, then press the accelerator slowly.
- Speed: The vehicle is pre-set to low speed. High speed can be used once the child has mastered safe driving.
- Stop: The vehicle stops automatically when the accelerator is released.
- Sound Effect: Press the button on the steering wheel.
- Safety Device: If the motor is overloaded, an automatic circuit breaker will cut power. It will reset after approximately 10 seconds.
Battery Maintenance
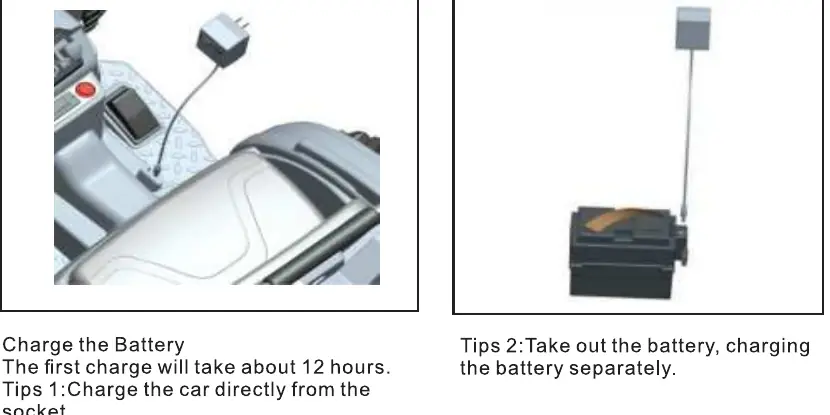
- Charge the battery for 8-12 hours before the first use.
- Recharge the battery for 8-10 hours after each use. Never charge for longer than 24 hours.
- Charge the battery at least once a month if the vehicle is not in regular use.
- Always charge in a well-ventilated, dry area.
- Do not short-circuit battery terminals.
- If the battery is damaged, do not use it.
Troubleshooting
If the vehicle does not move, check the following:
- Circuit Breaker: May have tripped due to overload. Wait 10 seconds for it to reset.
- Connections: Check all wires and connectors to ensure they are tight.
- Battery: Ensure the battery is charged and the charger is working.
- Switch: If the switch is damaged due to water or moisture, contact service.
Manufacturer information
HOMCOM
Practical help
Common problems
Car does not move
Check if the circuit breaker tripped, ensure all wires are connected, or check if the battery is dead/undercharged.
Car suddenly stopped
Circuit breaker may have tripped due to overload. Wait 10 seconds for it to reset. Do not exceed 25kg weight limit.
Short operating time
Ensure battery is charged for 8-10 hours after use. Do not charge for more than 24 hours. Replace old battery if necessary.
Vehicle is sluggish
Check if the vehicle is overloaded, battery needs charging, or if the battery is old and needs replacement.
Before use
- Charge battery for 12 hours before first use.
- Verify all parts are present according to the parts list.
- Ensure all wires and connectors are tight.
- Check that the battery is secured in the battery box.
- Ensure the child is wearing shoes and is supervised.
- Verify the vehicle is on a flat surface.
Specs in practice
- Charging Time
- 8-12 hours required for full charge.
Images and diagrams
- Parts list identifies 19 components including the main body, wheels, seat, and scraper bucket.
- Assembly diagrams show the sequence for wheel installation, steering wheel, and seat attachment.
- Battery connection diagram highlights the correct plug orientation.
Model compatibility
- Suitable for children aged 3-5 years.
- Maximum weight capacity is 25kg.
- Use only on flat, level ground.
- Not for use on roads, near water, or steep inclines.

Manual page author
Michael Turner
Technical manual editor
Reviews PDF manuals for structure, safety notes, and practical product details so readers can find the right information quickly.