Home / Pet Supplies
Hoselink 1003-WG Auto-fill Pet Water Bowl User Manual
Quick guide for the Hoselink 1003-WG Auto-fill Pet Water Bowl. Learn how to assemble, connect to a water supply, and use the P.E.T. bottle feature for your pet.
Table of contents
Manual images
Click an image to enlargeQuick guide from the manual
This manual provides instructions for the Hoselink 1003-WG Auto-fill Pet Water Bowl. The device is designed to provide a constant supply of water for pets, either via a direct hose connection or a P.E.T. drink bottle. Ensure the bowl is placed on a flat, horizontal surface for proper operation.
Kit Contents

- 1 x Pet Bowl
- 1 x Float Valve
- 1 x Cover
- 1 x Hoselink Accessory Connector
Assembly
- Open the box and remove all parts from inside the bowl.
- Clean the bowl thoroughly with soap and water before first use.
- Screw the Hoselink Accessory Connector into the float valve.
Connecting Water Supply
Note: To connect your hose with Hoselink fittings, please refer to the website for specific fitting instructions.
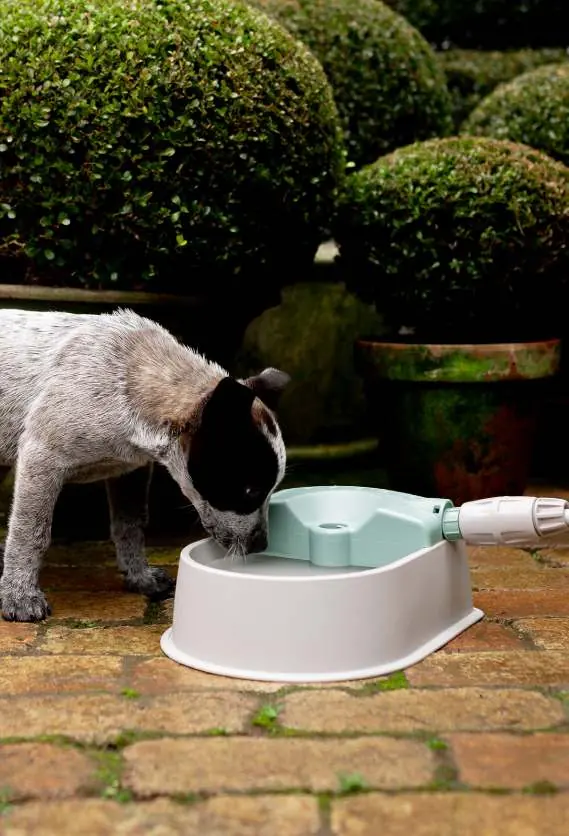
- Fill the pet bowl with water directly from the hose to about 2cm from the rim to save time.
- Attach the Hoselink hose to the pet bowl and place the bowl on a flat horizontal surface.
- Turn the tap on to start filling. Note: The bowl only requires very low water pressure to operate. Only turn the tap on lightly.
Use with P.E.T. Drink Bottle
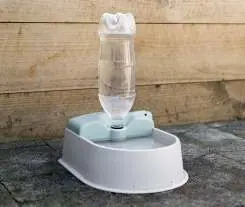
- Fill the pet bowl with water to 2cm from the rim.
- Fill a P.E.T. bottle with water.
- Turn the bottle upside down and screw it into the PET hole. Ensure you are in an area that can get wet during this step.
- The P.E.T. bottle will empty until it reaches the fill line. The water will then dispense out of the bottle whenever your pet drinks from the bowl.
Practical help
Common problems
Water not filling or overflowing
Ensure the tap is turned on only lightly. The bowl requires very low water pressure to operate correctly.
Spillage during P.E.T. bottle setup
Ensure you are in an area that can get wet when filling and screwing the bottle into the bowl.
Before use
- Clean the bowl with soap and water.
- Verify all parts are present: Pet Bowl, Float Valve, Cover, and Hoselink Accessory Connector.
- Ensure you have a flat, horizontal surface for placement.
- Fill the bowl to 2cm from the rim before connecting the water supply or bottle.
Specs in practice
- Low water pressure
- The system is designed for low pressure; do not turn the tap on fully to avoid issues.
Model compatibility
- Compatible with standard Hoselink hose fittings.
- Compatible with standard P.E.T. drink bottles.

Manual page author
Michael Turner
Technical manual editor
Reviews PDF manuals for structure, safety notes, and practical product details so readers can find the right information quickly.