Electronics / Two-Way Radios
User Manual for Hunter E-Light Bluetooth 140/155MHz Radio
Comprehensive user guide for the Hunter E-Light Bluetooth 140/155MHz radio. Learn how to operate, configure channels, pair Bluetooth devices, manage battery, and understand technical specifications.
Table of contents
Quick Guide
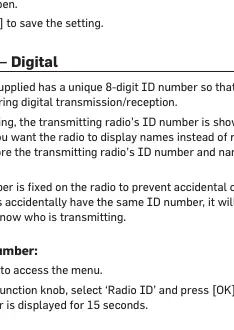
The Hunter E-Light Bluetooth is a professional analogue/digital (DMR) radio. Before use, ensure you have the correct antenna for your region (140MHz for Norway, 155MHz for Sweden/Denmark). The package includes the radio, rechargeable battery, charging cup, mains adapter, two antennas, and a belt clip.
Radio Controls
The radio features a volume/power knob, a channel/function knob, a PTT (transmit) button, and a menu system. The LED indicator provides status: Green for reception, Red for transmission, and Flashing Red for low battery.
Getting Started
Antenna Installation: Screw the antenna onto the connector until flush. Do not overtighten.
Battery Installation: Place the battery against the back of the radio and slide it up until it clicks. To remove, press the battery lock at the bottom.
Charging: Connect the mains adapter to the charging cup and a 230V AC supply. Place the radio or battery in the cup. The indicator lights red while charging and turns green when fully charged. If the indicator flashes red for an extended period, the battery may be faulty.
Basic Operation
On/Off/Volume: Turn the volume knob clockwise to power on and adjust volume. Turn counter-clockwise to power off.
Channel Selection: Rotate the channel knob to select the desired channel. Ensure the correct channel group is selected via the menu for your country.
Transmission: Press and hold the PTT button. Hold the radio 5-10 cm from your mouth and speak normally. The radio has a 60-second transmission limit to prevent accidental interference.
Advanced Features
Dual Channel Monitoring: Allows monitoring of two channels simultaneously. Press [Dual] to start/stop. If a conversation is detected, monitoring pauses for 7 seconds.
Encryption: Digital channels can be encrypted. Ensure all radios in your group have the same key.
Bluetooth: Pair with headsets or hearing protection via the menu. Once paired, the radio will automatically reconnect to the device when turned on.
Scanning: Create a scan list to monitor multiple channels. Use the menu to add/remove channels and start scanning.
Maintenance and Troubleshooting
Clean the radio with a slightly damp cloth; avoid solvents. For long-term storage, charge the battery every three months and remove it from the radio. If the radio is not functioning correctly, you can reset it to factory settings via the menu.
Technical Specifications
The radio operates in the 136-174 MHz range with 5W output power. It is IP54 rated for environmental resistance and uses a 7.4V / 2600mAh Li-Ion battery.
Practical help
Common problems
Radio not charging
Ensure the battery is properly seated in the charging cup and the adapter is connected to a 230V AC supply. If the indicator flashes red continuously, the battery may be faulty.
Cannot hear other users
Verify that the correct channel group is selected for your country and that all radios in the group are using the same PL tone or encryption key.
Bluetooth pairing fails
Keep the radio and headset close together. Ensure the radio is in search mode. If previously paired, delete the old device from the radio's memory first.
Before use
- Install the correct antenna (140MHz for Norway, 155MHz for Sweden/Denmark).
- Charge the battery fully before first use.
- Ensure the battery lock is clicked into place.
- Check that the accessory connector cover is closed if not in use.
Specs in practice
- Frequency range
- 136 – 174 MHz
- Output power
- 5W (fixed to prevent accidental changes).
- Operating time
- More than 17 hours (5% transmit, 5% receive, 90% standby).
Images and diagrams
- 1-2: Volume and Channel knobs.
- 4: PTT (Transmit) button.
- 14: Accessory connector (3.5mm earpiece, 2.5mm mic/PTT).
- 16: LED indicator (Green=receive, Red=transmit, Flashing Red=low battery).
Model compatibility
- Compatible with Bluetooth headsets/ear protection.
- Requires specific channel groups for Sweden, Norway, and Denmark.

Manual page author
David Miller
Documentation analyst
Organizes user manual content into clear summaries, with attention to model details, product context, and everyday usability.