Furniture / Storage Shelving
IKEA KALLAX Shelving Unit Assembly Instructions
Assembly guide for the IKEA KALLAX shelving unit. This manual provides step-by-step instructions for assembly and critical safety information regarding wall mounting to prevent furniture tip-over.
Table of contents
Manual images
Click an image to enlargeImportant Safety Information
Warning: Serious or fatal crushing injuries can occur from furniture tip-over. To prevent this furniture from tipping over, it must be permanently fixed to the wall using the provided wall attachment devices. Screws and plugs for the wall are not included, as they depend on your specific wall material. Please consult a professional if you are uncertain about which hardware to use.
Tools Required
To assemble this unit, you will need the following tools:

- Screwdriver
- Pencil
- Spirit level
- Hammer
Assembly Instructions
The assembly process involves constructing the frame and internal dividers. Follow the steps in the manual sequentially:
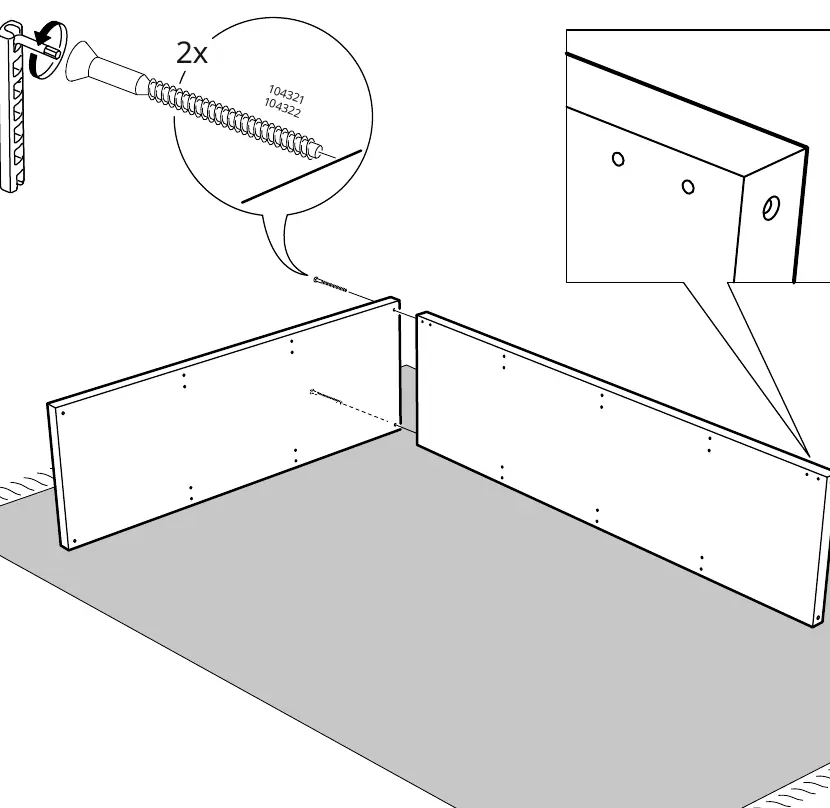
- Frame Assembly: Begin by assembling the outer frame and internal dividers using the provided dowels and screws. Ensure all parts are aligned correctly before tightening.
- Divider Installation: Insert the internal shelves and dividers as shown in the diagrams. Use the hammer to gently tap dowels into place where required.
- Finalizing Frame: Secure the top and side panels to complete the main structure of the shelving unit.
Wall Mounting
Once the unit is assembled, it must be secured to the wall to ensure stability.
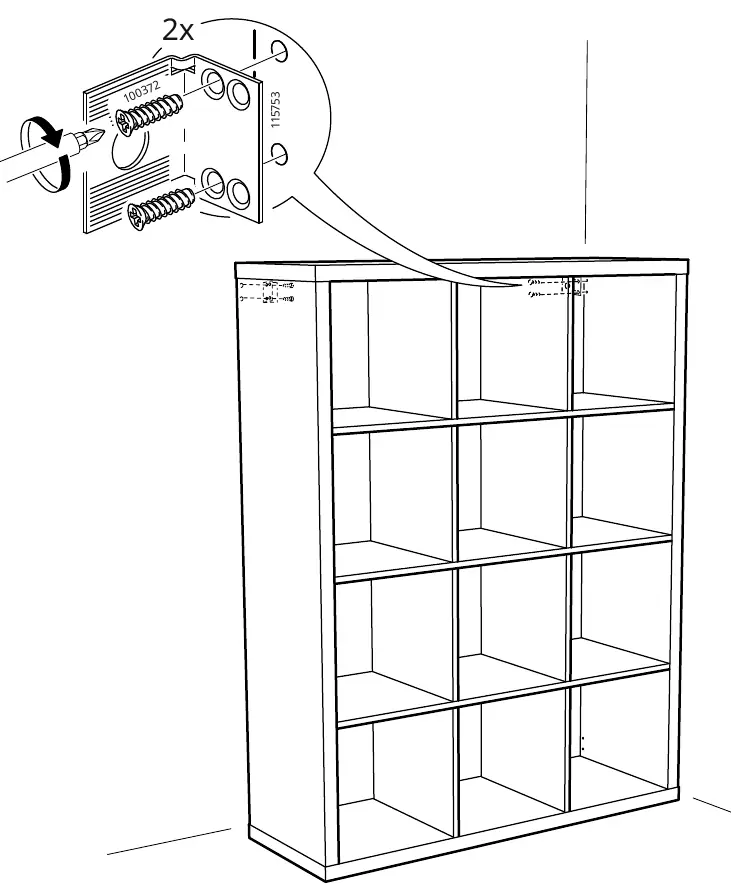
- Position the unit against the wall.
- Use the provided wall brackets to mark the drilling points on the wall.
- Drill holes and insert appropriate wall plugs (not included).
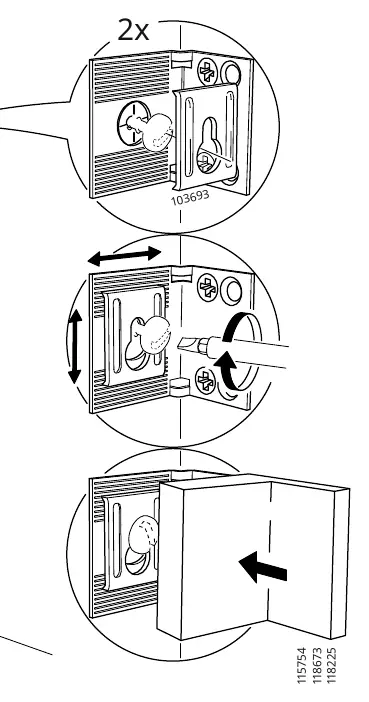
- Secure the unit to the wall using the brackets and screws.
- Adjust the brackets as necessary to ensure the unit is level and firmly attached.
Manufacturer information
IKEA
Practical help
Common problems
Furniture tip-over risk
The unit must be permanently fixed to the wall using the provided wall attachment devices.
Missing wall mounting hardware
Screws and plugs for the wall are not included. You must purchase hardware suitable for your specific wall type (e.g., drywall, concrete, brick).
Before use
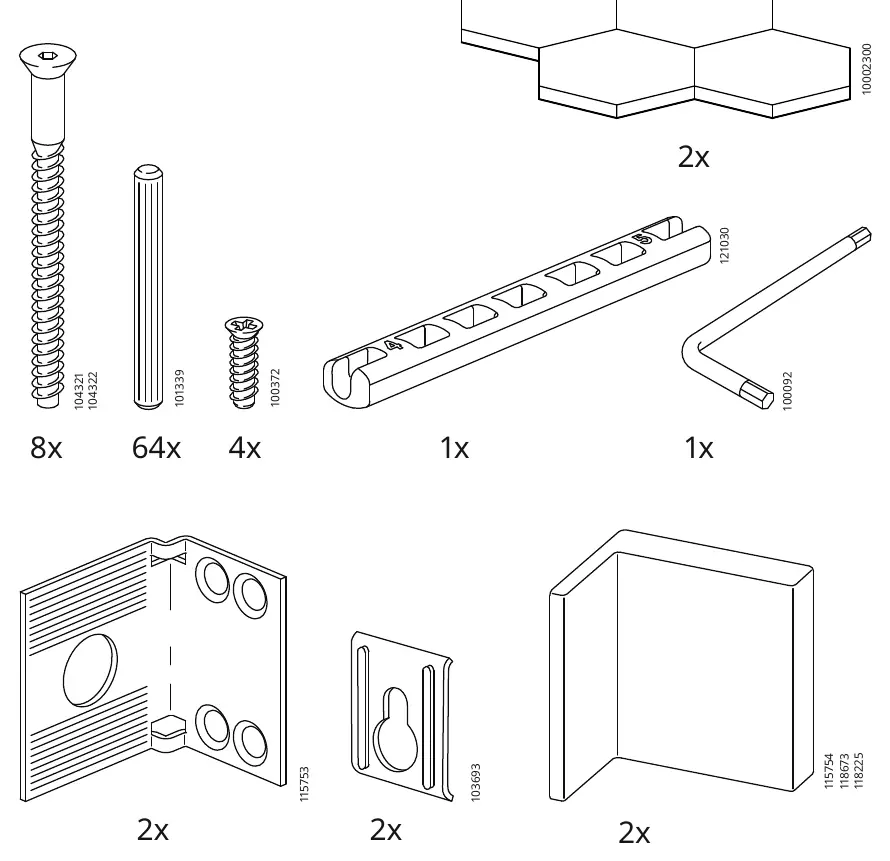
- Verify all parts are present according to the parts list.
- Ensure you have the required tools: screwdriver, pencil, spirit level, and hammer.
- Identify the wall material to purchase appropriate screws and plugs.
- Clear a sufficient workspace for assembly.
Images and diagrams
- Steps 1-12: Detailed sequence for assembling the shelving frame and internal dividers.
- Steps 13-16: Procedure for attaching the wall brackets and securing the unit to the wall.
Model compatibility
- Wall mounting hardware is not included and must be selected based on the wall material in your home.

Manual page author
Michael Turner
Technical manual editor
Reviews PDF manuals for structure, safety notes, and practical product details so readers can find the right information quickly.