Furniture / Kitchen Furniture
IKEA METOD Base Cabinet Frame Installation Guide
Installation guide for the IKEA METOD base cabinet frame. Includes safety warnings, required tools, parts list, and step-by-step assembly instructions for wall mounting.
Quick answers from the manual
Quick answer
- The IKEA METOD base cabinet frame must be assembled and permanently attached to the wall using the provided wall attachment devices to prevent tipping. Screws and plugs for wall mounting are not included. p. 2, 3, 4
Key actions
- Assemble the frame p. 8, 9, 10, 11
- Attach to the wall p. 18, 19, 20, 21
Where to find it in the PDF
- Safety Warnings p. 2, 3, 4
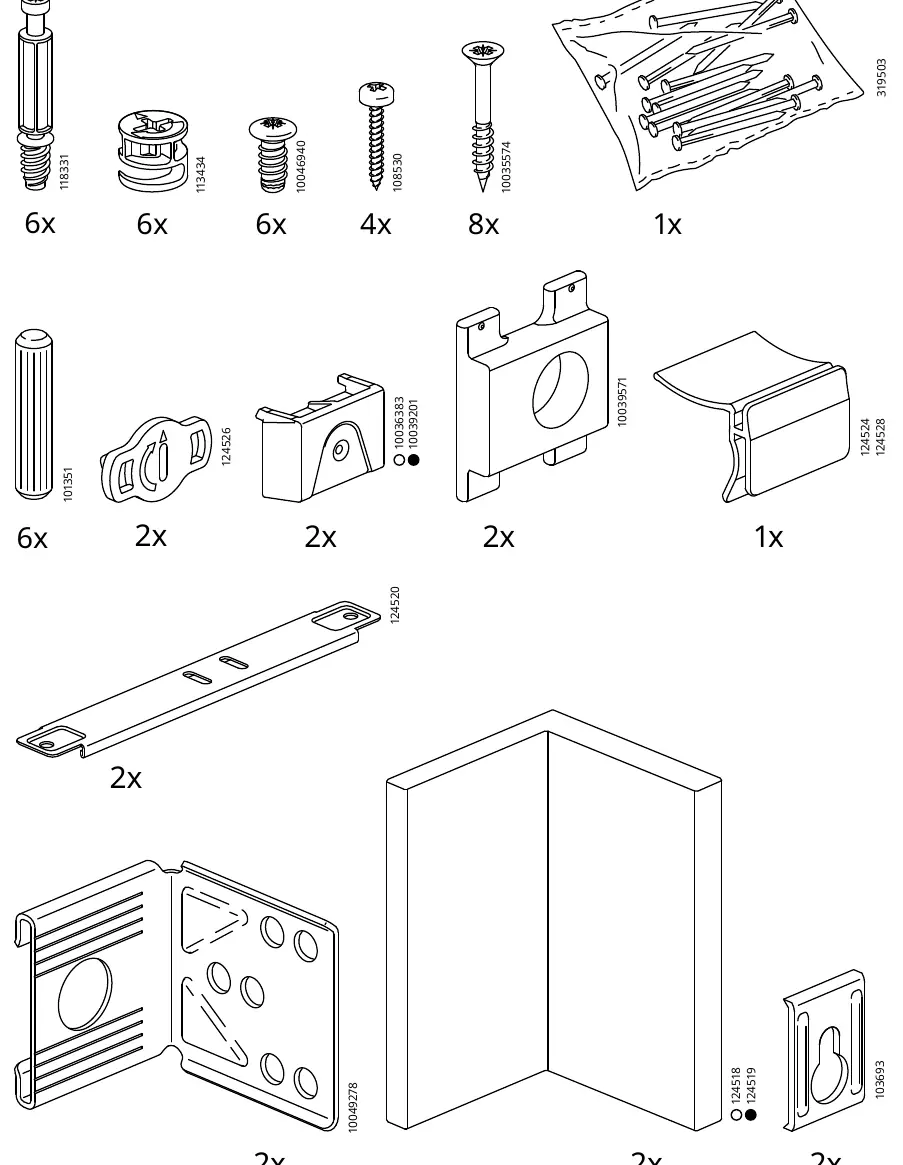
- Parts List p. 7
- Assembly Steps p. 8, 16
- Wall Mounting p. 18, 24
Table of contents
Manual images
Click an image to enlargeImportant information from the manual
This document provides instructions for assembling and installing the IKEA METOD base cabinet frame. The most critical safety requirement is that the furniture must be permanently attached to the wall using the provided wall attachment devices to prevent tipping, which can cause serious or fatal crushing injuries. Screws and plugs for wall mounting are not included, as they must be selected based on the specific wall material in your home.
Tools required
- Screwdriver (flat head)
- Screwdriver (cross head)
- Hammer
- Clamp
Parts list
The package includes various screws, dowels, brackets, and mounting hardware. Ensure all parts listed on page 7 are present before beginning assembly.
Assembly instructions
Follow the numbered steps 1 through 19 to assemble the cabinet frame:
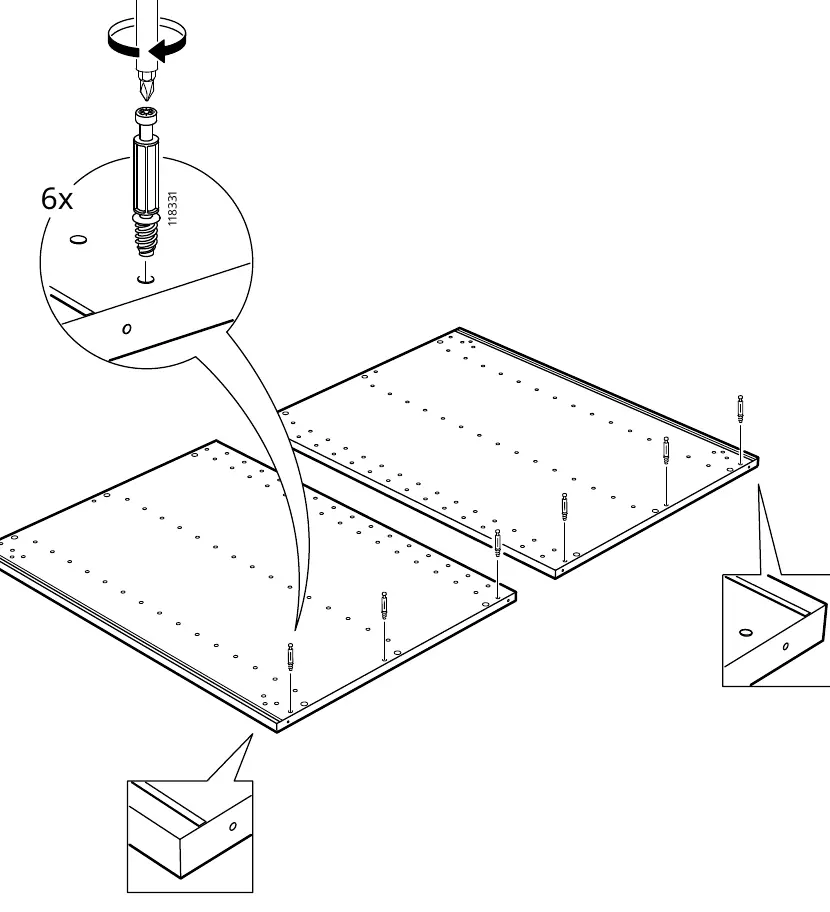
- Steps 1-7: Assemble the main frame components using the provided screws and dowels. Ensure the frame is square.
- Steps 8-10: Attach the necessary mounting brackets and rails to the frame.
- Steps 11-15: Secure the back panel and finalize the frame structure.
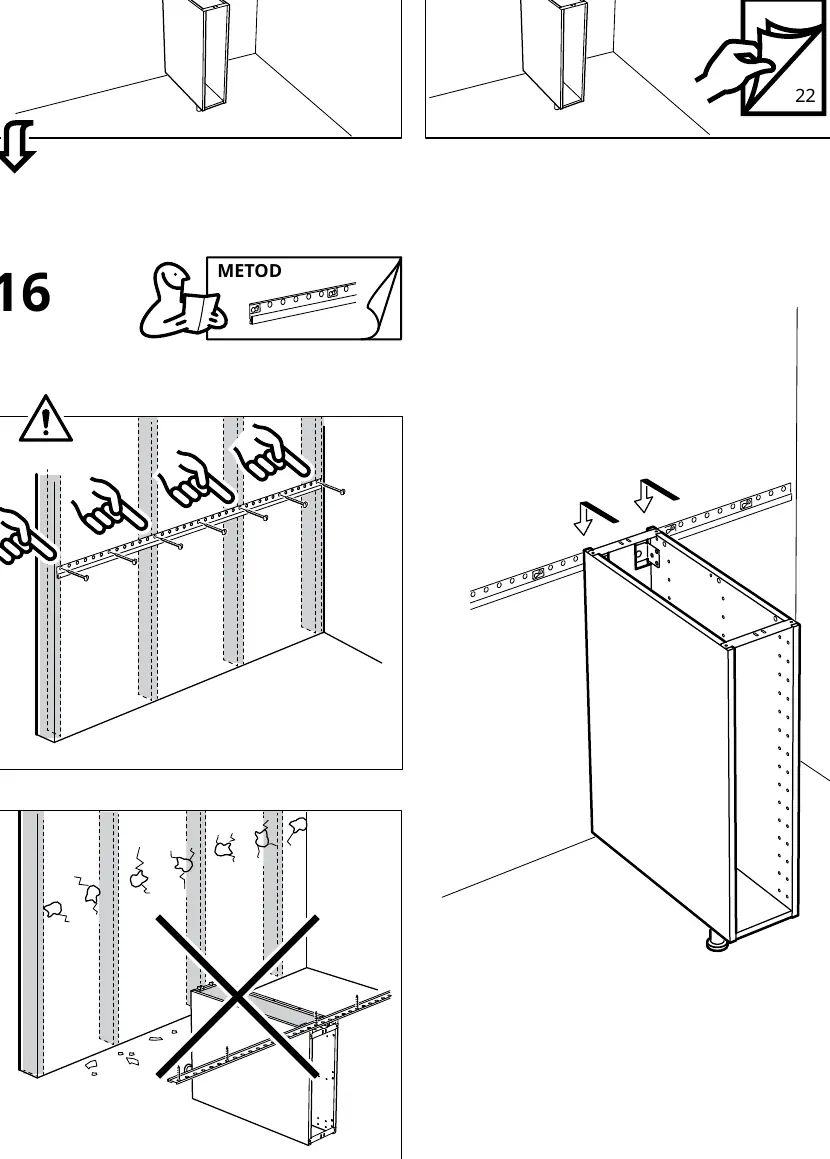
- Steps 16-19: Position the cabinet against the wall and secure it using the wall attachment devices.
Safety and wall mounting
Always use the provided wall attachment device. If you are uncertain about which screws or plugs are suitable for your wall type, consult a professional. Do not attempt to mount the cabinet without securing it to the wall.
Manufacturer information
IKEA
Practical help
Common problems
Furniture tipping over
The furniture must be permanently attached to the wall using the provided wall attachment device.
Unsure about wall mounting hardware
Screws and plugs for the wall are not included. Use hardware suitable for your specific wall type and consult a professional if unsure.
Before use
- Verify all parts are present according to the parts list on page 7.
- Ensure you have the required tools: screwdriver (flat and cross head), hammer, and clamp.
- Identify the wall material to select appropriate screws and plugs (not included).
- Read all safety warnings regarding tip-over prevention.
Images and diagrams
- Steps 1-15: Frame assembly sequence.
- Steps 16-19: Wall mounting and securing procedures.
Model compatibility
- Requires wall-specific screws and plugs (not included).

Manual page author
David Miller
Documentation analyst
Organizes user manual content into clear summaries, with attention to model details, product context, and everyday usability.