Furniture / Bedroom Furniture
Assembly Instructions for IKEA STORKLINTA 2-Drawer Nightstand
Comprehensive assembly guide for the IKEA STORKLINTA 2-Drawer Nightstand. Includes step-by-step installation instructions, safety warnings, and wall-mounting procedures.
Table of contents
Manual images
Click an image to enlargeImportant Safety Information
Warning: Children have died from furniture tip-over. To reduce the risk of furniture tip-over, you must always install the provided anti-tip device. Never put a TV on this product. Never allow children to stand, climb, or hang on any drawers, doors, or shelves. Never open more than one drawer at a time. Place the heaviest items in the lowest drawers.
Tools Required
To assemble this furniture, you will need the following tools:

- Hammer
- Screwdriver
- Power drill
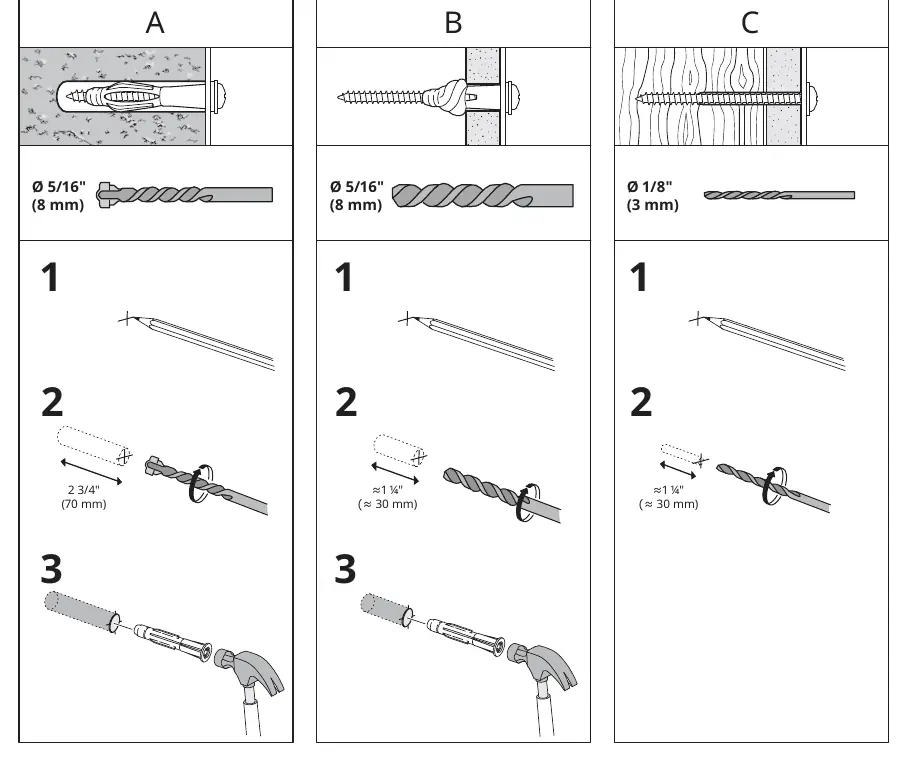
- Drill bits (8mm for solid/hollow walls, 3mm for solid wood)
Assembly Instructions
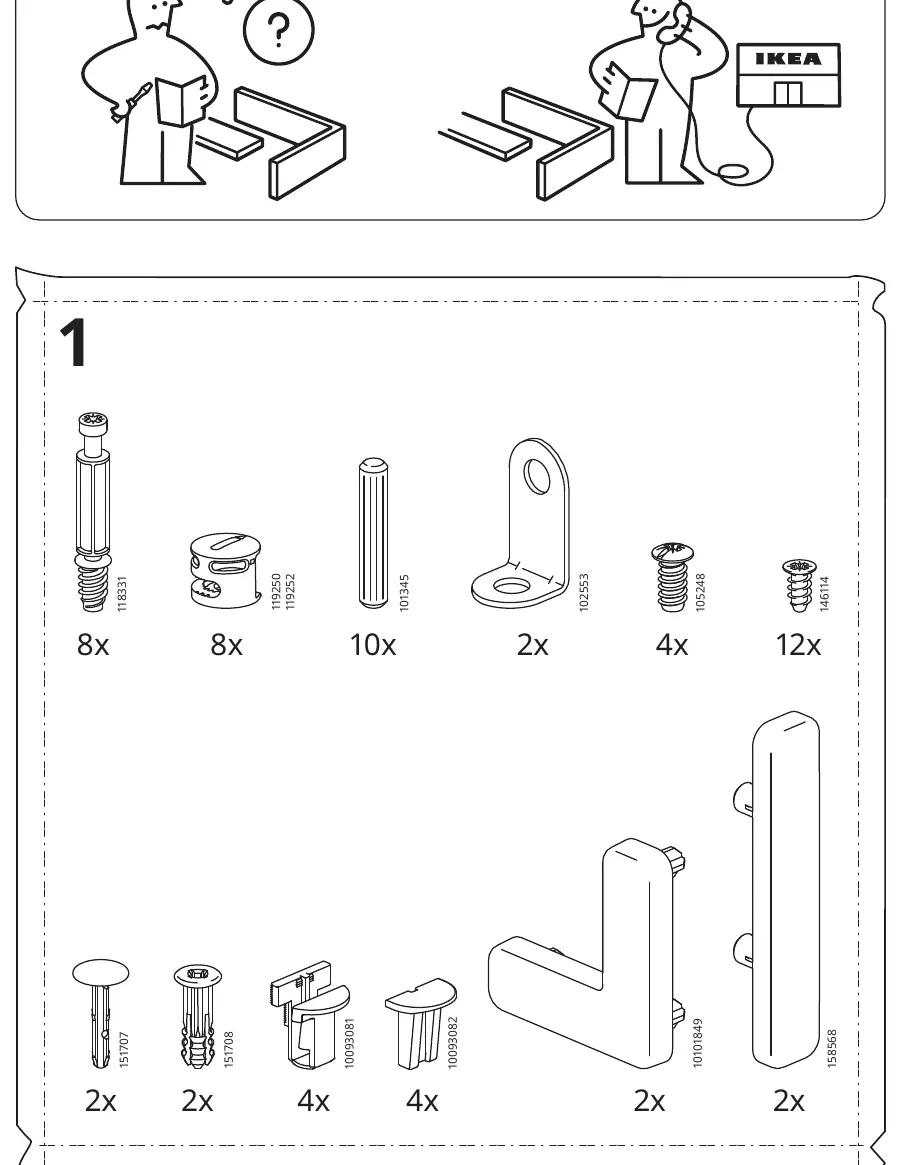
The assembly process involves 31 steps. Ensure you have all parts listed in the inventory before beginning. Follow the steps in numerical order to build the frame and drawers.
- Frame Assembly: Follow steps 1 through 18 to construct the main body of the nightstand. This includes attaching drawer rails and connecting the side panels.
- Wall Anchoring: Steps 19 through 22 cover the critical process of securing the unit to the wall. This is essential for safety.
- Drawer Assembly: Steps 23 through 31 focus on assembling the drawers and installing them into the frame.
Wall Anchoring
The supplied screws and plugs are suitable for most solid and hollow walls. For solid wood, use the screws without plugs. If you are uncertain about your wall type, seek professional advice. Always ensure the unit is securely anchored to the wall to prevent tipping.
Manufacturer information
IKEA
Practical help
Common problems
Furniture tipping over
Always install the provided anti-tip device and secure the unit to the wall.
Before use
- Check all parts against the inventory list on page 4
- Ensure you have a hammer, screwdriver, and drill
- Identify your wall type (solid, hollow, or wood) to select the correct mounting method
- Clear a workspace to assemble the unit on a soft surface to prevent damage
Images and diagrams
- Steps 1-18: Main frame assembly and rail installation
- Steps 19-22: Wall anchoring procedure
- Steps 23-31: Drawer assembly and final installation
Model compatibility
- Supplied screws and plugs are suitable for most solid and hollow walls.
- For solid wood walls, use the screws without plugs.

Manual page author
David Miller
Documentation analyst
Organizes user manual content into clear summaries, with attention to model details, product context, and everyday usability.