Computers / KVM Switches
User Manual for Infobit iSwitch 201HKL 4K60 2x1 HDMI KVM Switcher Lite
Quick guide for the Infobit iSwitch 201HKL 4K60 2x1 HDMI KVM Switcher Lite. Learn how to connect your devices, use hotkey controls, configure RS232 settings, and troubleshoot common switching issues.
Quick answers from the manual
Quick answer
- The iSwitch 201HKL is a 2x1 HDMI KVM switcher that allows control of two computers with one keyboard, mouse, and monitor. Switching is performed via the front panel button, keyboard hotkeys, or RS232 commands. p. 3, 6, 7
Key actions
- Switch between PC1 and PC2 using the front panel button. p. 7
- Change hotkey mode (Scroll, Caps, Num, Ctrl+Shift). p. 7, 8, 9
First start
- Connect HDMI and USB cables from both computers to the switcher, connect the display and peripherals, then connect the power supply. p. 3, 6
Show 3 more answers Show less
Maintenance and reset
- Restore factory default settings using the hotkey combination [Scroll]++[Scroll]+[ESC] (or equivalent in other modes). p. 8, 9
Technical specifications
| Parameter | Value | Meaning | Pages |
|---|---|---|---|
| Resolution | 3840x2160@60Hz 4:4:4 | Maximum supported video resolution. | p. 5 |
| RS232 Baud Rate | 115200 | Communication speed for serial control. | p. 5, 11 |
Where to find it in the PDF
- Panel Layout p. 4
- Specifications p. 5, 6
- Wiring Diagram p. 6
- Hotkey Controls p. 7, 8, 9, 10
Table of contents
Manual images
Click an image to enlargeQuick Guide
The Infobit iSwitch 201HKL allows you to control two computers using a single set of keyboard, mouse, and monitor. You can switch between computers using the front panel button, keyboard hotkeys, or RS232 commands.
Installation
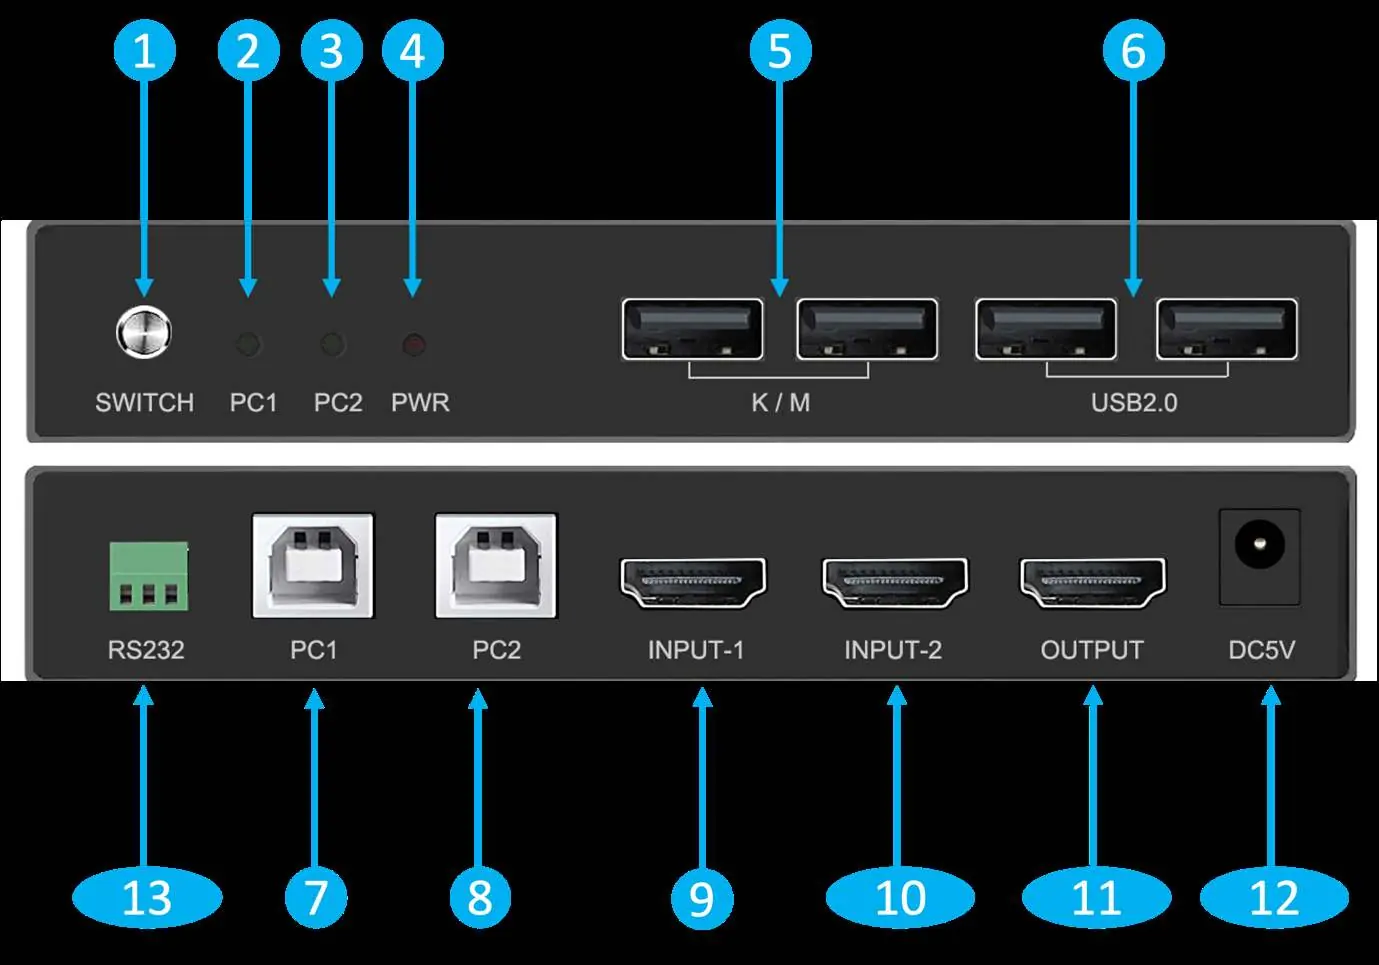
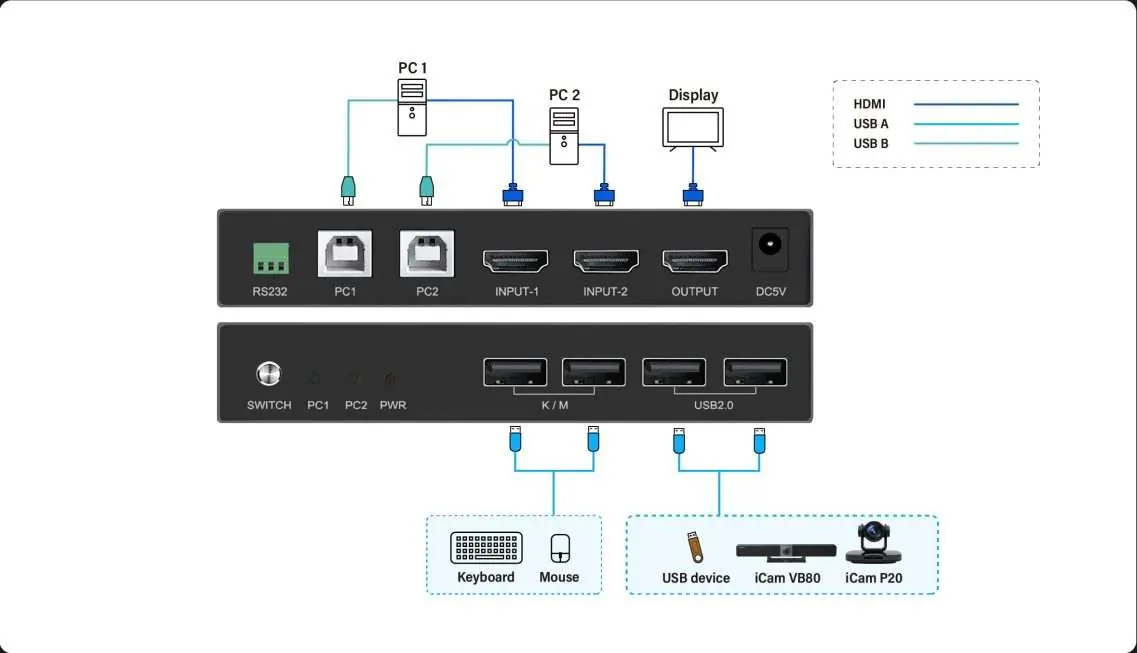
- Connect your display to the HDMI Output port.
- Connect your keyboard and mouse to the K/M USB ports.
- Connect the PC1 and PC2 USB B ports to the respective computers using the provided USB cables.
- Connect the PC1 and PC2 HDMI inputs to the respective computers.
- Connect the 5V power supply.
Control Methods
Front Panel Button
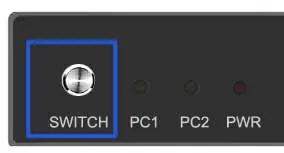
Press the 'SWITCH' button on the front panel to toggle between PC1 and PC2.
Hotkey Control
The device supports four hotkey modes: Scroll (default), Caps, Num, and Ctrl+Shift. To switch modes, follow the specific key combination instructions provided in the manual. Common hotkey functions include:
- Switch to PC1/PC2: Use the designated hotkey combination for your active mode.
- Switch to next/previous PC: Use arrow keys or specific combinations.
- Polling Mode: Turn on/off automatic switching (default interval 5 seconds).
- Restore Factory Defaults: Use the designated hotkey combination.
RS232 Control
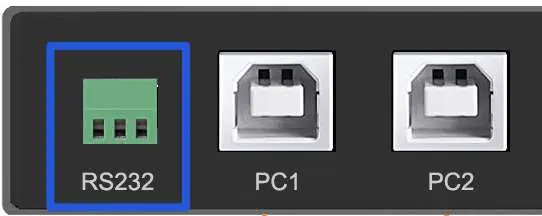
The device supports RS232 control via a 3-pin terminal. Serial communication settings are: Baud rate 115200, 8 data bits, 1 stop bit, no parity.
Specifications
- Resolution: Up to 3840x2160@60Hz 4:4:4
- Protocol: HDMI 2.0, HDCP 2.2
- Bandwidth: 18Gbps
- Power: DC 5V
- Dimensions: 145(L) x 67(W) x 22(H) mm
Practical help
Common problems
Hotkey commands not working
Ensure you are in the correct hotkey mode (Scroll, Caps, Num, or Ctrl+Shift). If you are unsure, try the default Scroll mode or check the manual for the mode-switching sequence.
USB devices not switching
By default, USB switching is synchronized with the keyboard/mouse. If this is disabled, you may need to switch the USB port manually or re-enable synchronization.
Automatic switching not working
Ensure the polling function is enabled using the correct hotkey combination. The default interval is 5 seconds.
Before use
- Ensure all HDMI cables are connected to the correct input/output ports.
- Verify that USB B cables are connected to the host computers.
- Connect the 5V power adapter.
- Confirm the keyboard and mouse are connected to the K/M ports.
- Check that the display is set to the correct HDMI input.
Show more Show less
Images and diagrams
- The wiring diagram shows the connection path from PC1 and PC2 (HDMI + USB) to the switcher, and the output path to the display and peripherals.
- The panel layout identifies the front ports (Switch, Indicators, K/M, USB2.0) and rear ports (RS232, PC1/PC2, Inputs, Output, Power).

Manual page author
Emily Carter
User documentation editor