Electronics / Televisions
Insignia 48" & 55" 1080p LED TV User Guide
Quick guide for the Insignia 48" & 55" 1080p LED TV. Includes setup, connection instructions, menu settings, and troubleshooting.
Table of contents
Manual images
Click an image to enlargeQuick guide from the manual
This guide provides essential information for setting up and using your Insignia 48" or 55" 1080p LED TV. For detailed instructions, please refer to the full user manual.
Installation
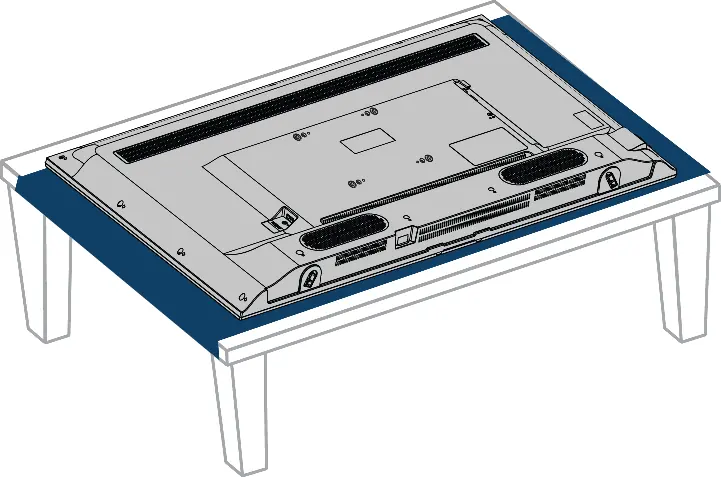
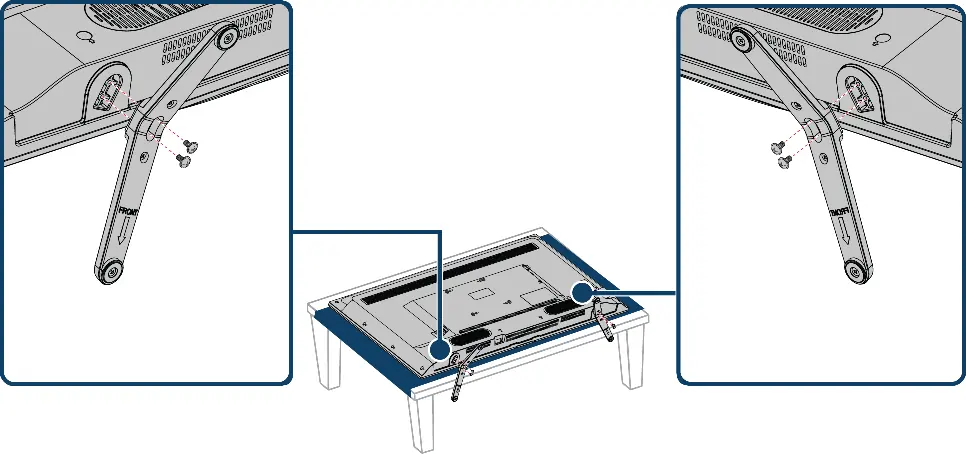
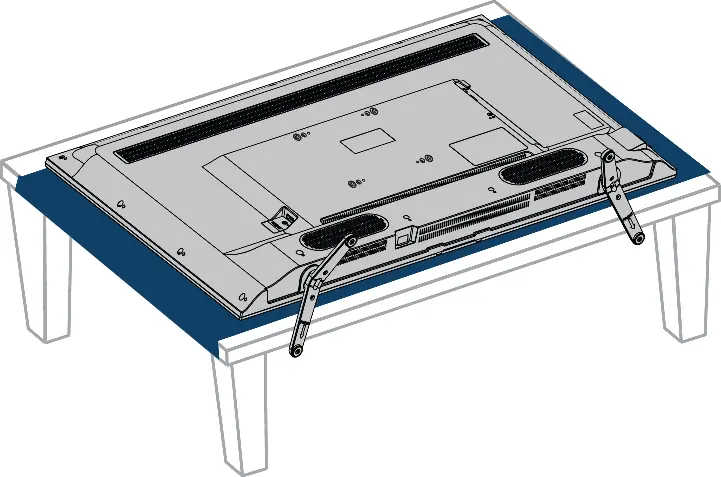
Installing the stands: Place the TV face-down on a cushioned, clean surface. Align the stands with the holes on the bottom of the TV, ensuring the arrows point toward the front. Secure each stand with two M4 x 20 mm screws.
Wall-mount bracket: If wall-mounting, do not install the stands. Use a UL-listed wall mount bracket. Insert the four provided spacers into the mount screw holes on the back of the TV. Attach the bracket using M6 screws (ensure they are between 9.5 mm and 11.5 mm in length, excluding spacers). Use all four mounting holes.
Connections
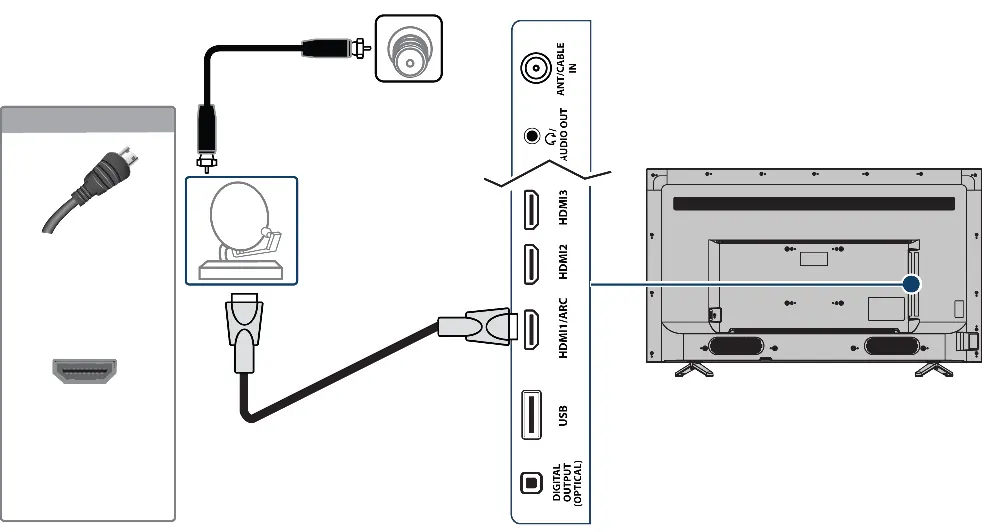
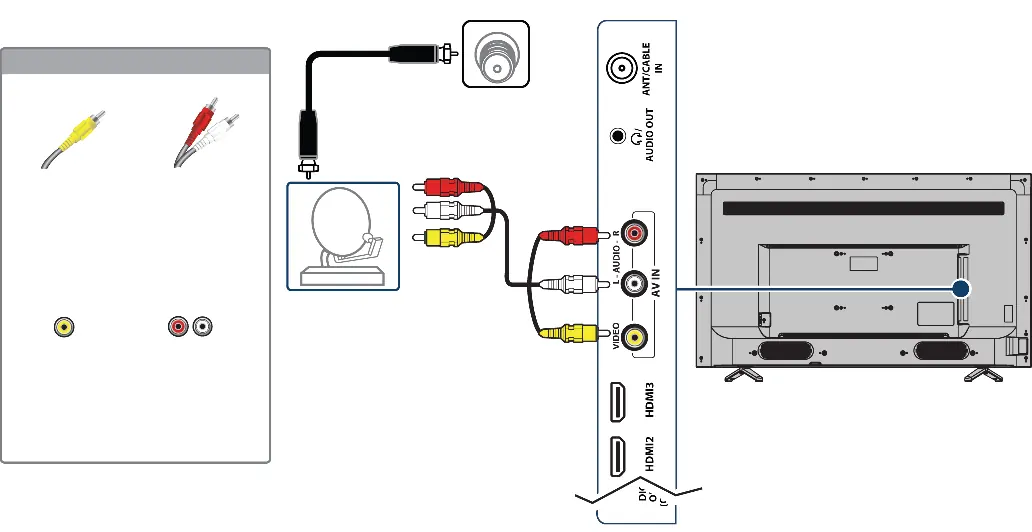
For the best video quality, use HDMI connections. The TV features multiple inputs on the side panel, including HDMI, AV, and Coaxial. Always unplug the power cord before making connections.
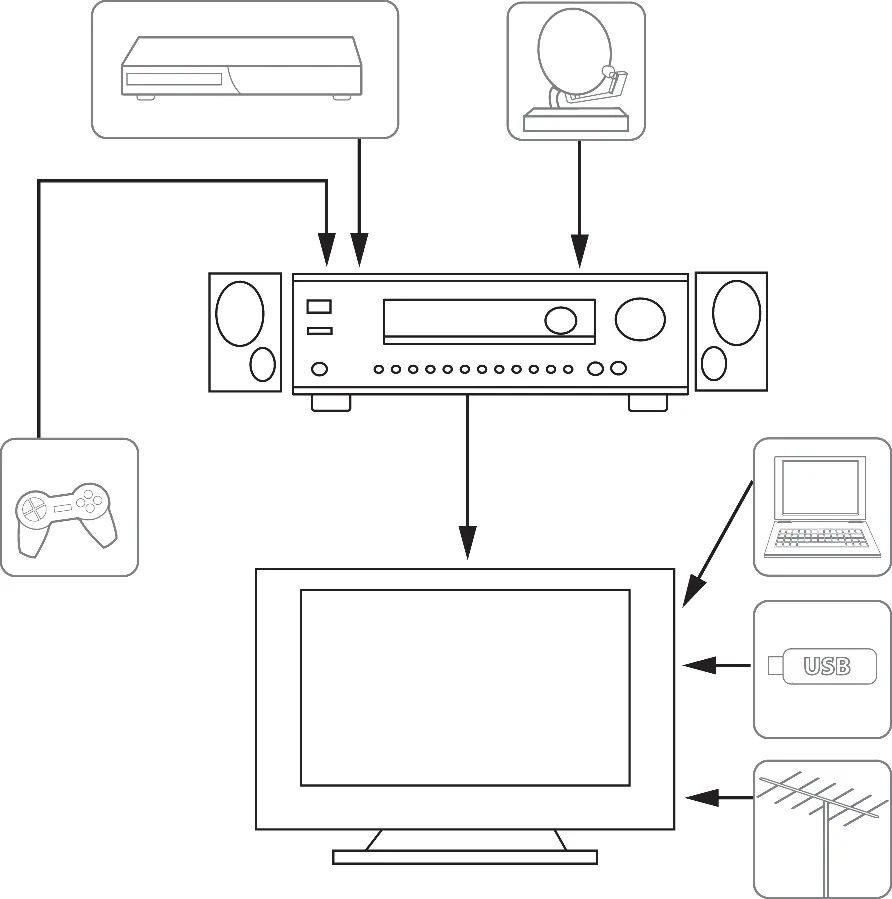
- Cable/Satellite Box: Connect via HDMI (best), AV (good), or Coaxial (good).
- Antenna/Cable TV (no box): Connect via Coaxial cable to the ANT/CABLE IN jack.
- USB Flash Drive: Connect to the USB port to view JPEG photos.
- External Audio: Use the DIGITAL OUTPUT (OPTICAL) jack for soundbars or the /AUDIO OUT jack for headphones/analog systems.
First-time Setup
When you turn on the TV for the first time, the Easy Setup wizard will guide you through selecting the language, viewing environment (Home or Store), time settings, and scanning for channels.
Remote Control
The remote control allows you to navigate menus, select inputs, adjust volume, and control playback for connected devices. Use the INPUT button to switch between connected devices.
Menu Settings
Press MENU to access the on-screen menu for adjustments:
- Picture: Adjust mode (Vivid, Standard, Energy Savings, Movie, Game, Custom), backlight, brightness, contrast, and aspect ratio.
- Sound: Adjust audio mode, balance, bass, treble, and TV speaker settings.
- Channels: Scan for channels, hide channels, or set up a favorite channel list.
- Parental Controls: Set passwords and block content based on ratings.
- Time: Set the clock and sleep timer.
Maintenance
Clean the TV cabinet and screen with a soft, lint-free cloth. Do not use the TV in extreme temperatures (working range: 41° to 104°F).
Troubleshooting
If you encounter issues, try the following:
- No picture/sound: Check power, input source, and cable connections.
- Remote not working: Check batteries and ensure there are no obstructions.
- No channels: Run an auto channel search.
- INlink (CEC) issues: Ensure HDMI CEC is enabled on both the TV and the connected device.
Practical help
Common problems
No picture or sound
Check that the power cord is plugged in, the correct input source is selected, and all cables are securely connected.
Remote control not working
Check batteries, ensure there are no obstructions between the remote and the sensor, and point the remote directly at the TV.
No channels found after scan
Ensure the antenna or cable is securely connected and try replacing the cable if necessary.
INlink (CEC) device not responding
Ensure INlink is enabled in the settings and that the device is HDMI CEC-compatible.
Before use
- Install batteries in the remote control
- Connect the power cord to a power outlet
- Connect your antenna, cable box, or other devices
- Place the TV on a stable surface or mount it securely
Specs in practice
- Refresh Rate
- 60Hz
Images and diagrams
- Side jacks layout for connecting external devices
- Remote control button mapping
- Stand installation steps
- Wall mount installation steps
Model compatibility
- Supports HDMI CEC (INlink) for device control
- USB port supports JPEG format images only

Manual page author
Michael Turner
Technical manual editor
Reviews PDF manuals for structure, safety notes, and practical product details so readers can find the right information quickly.