Electronics / Televisions
Insignia Roku TV User Guide (NS-40DR420NA16 / NS-48DR420NA16)
Quick guide for the Insignia Roku TV (NS-40DR420NA16 / NS-48DR420NA16). Learn how to set up your TV, connect devices, configure settings, and troubleshoot common issues.
Table of contents
Manual images
Click an image to enlargeQuick guide from the manual
This guide provides essential instructions for setting up and using your Insignia Roku TV. Key tasks include installing the TV stands or wall mount, connecting external devices, performing the initial guided setup, and configuring picture and sound settings. For optimal performance, ensure your TV is connected to a wireless network to access streaming content and automatic updates.
Installing the stands or wall-mount bracket
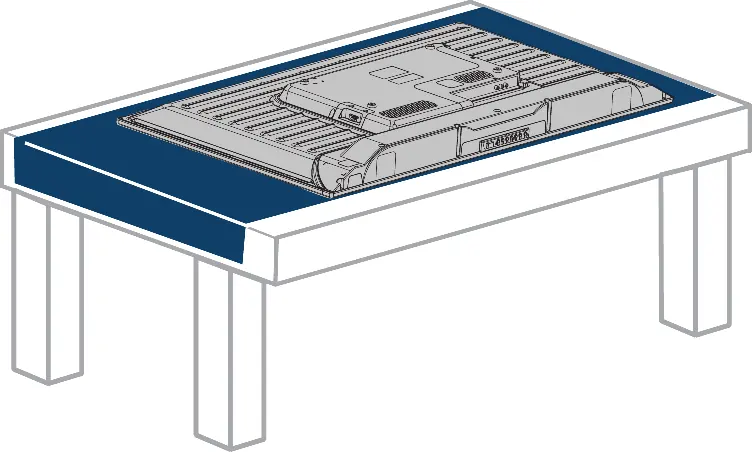
Before installing, place your TV face-down on a cushioned, clean surface to protect the screen.
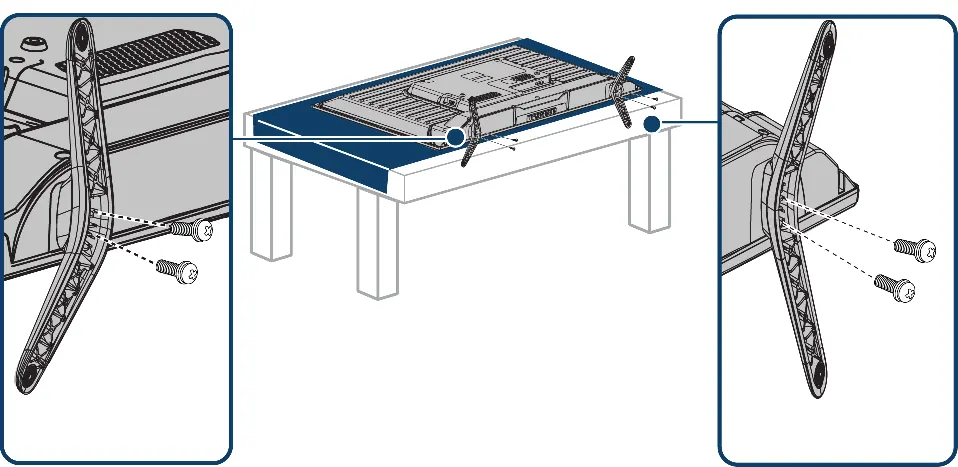
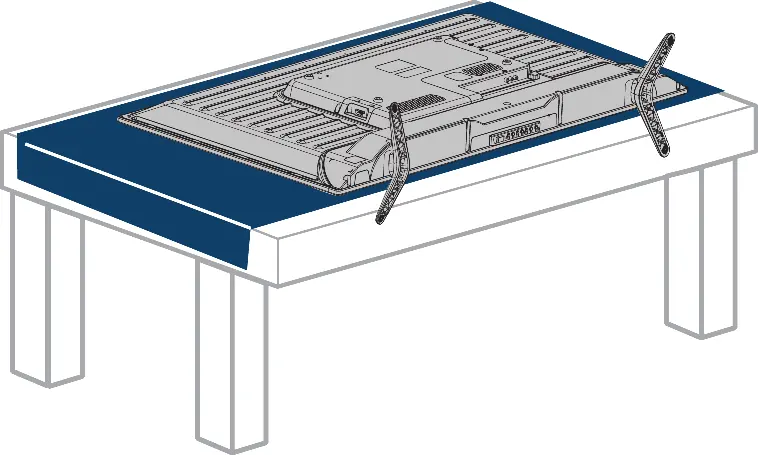
- Stands: Align the stands with the screw holes on the bottom of the TV and secure them with the provided screws.
- Wall-mount: If wall-mounting, remove the stands if installed. Use a UL Listed wall mount bracket. Ensure the bracket is securely attached using all four VESA mounting holes on the back of the TV.
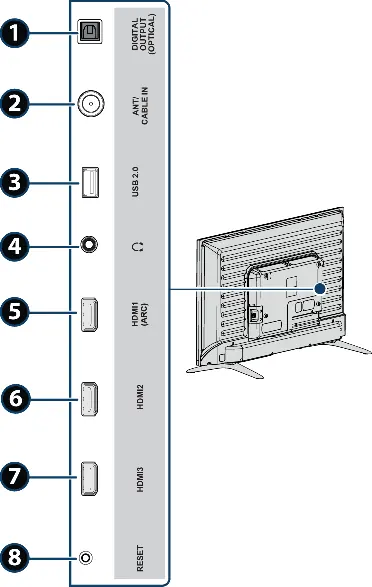
TV components
Your TV features built-in controls on the bottom edge, including Input, Mute, Volume, Channel, and Power buttons. The side and back panels contain various jacks for connecting devices, including HDMI, USB, AV, and Digital Optical Audio.
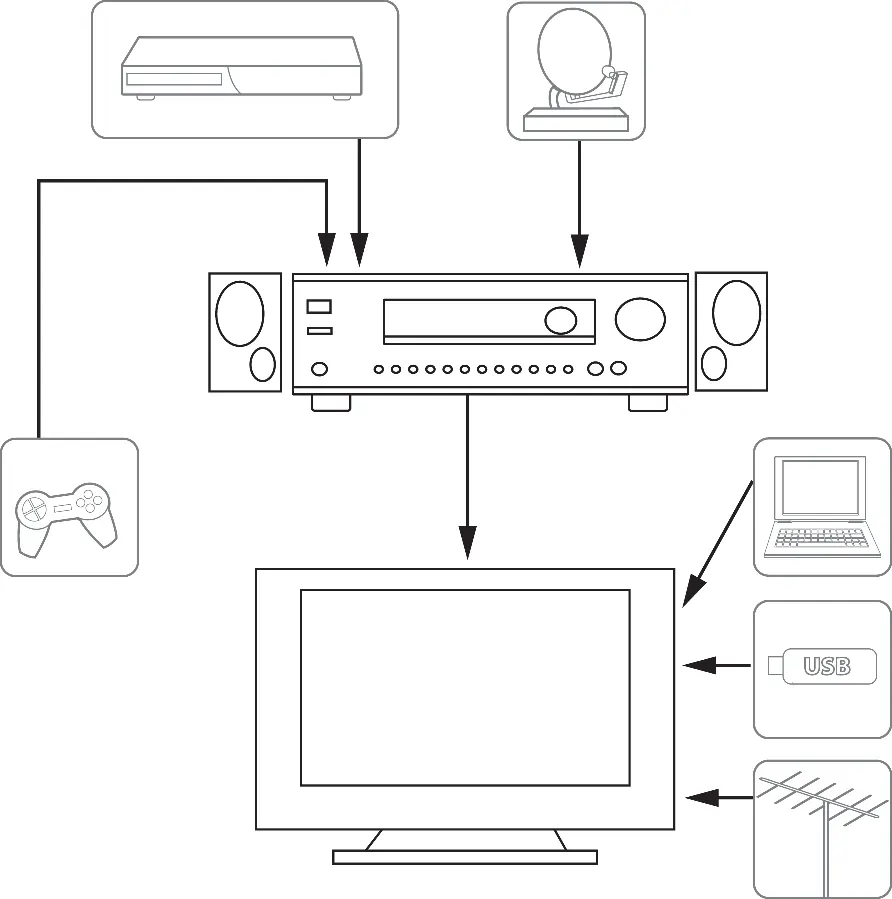
Connecting devices
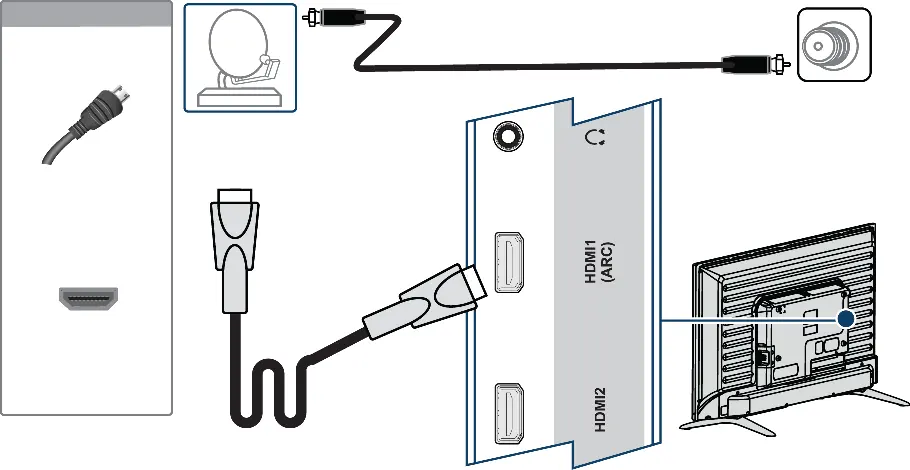
For the best video quality, use HDMI connections whenever possible. The TV supports connections for cable/satellite boxes, DVD/Blu-ray players, game consoles, computers, and external audio systems (sound bars or home theater systems) via Digital Optical or HDMI ARC.
Guided Setup
Upon first power-on, the TV leads you through a guided setup process. This includes selecting a language, connecting to a wireless network, downloading software updates, linking your Roku account, and configuring connected devices.
Using your TV
The Home screen is the central hub for your TV. You can personalize it by rearranging tiles, renaming inputs, and adding streaming channels. Use the remote control to navigate menus, adjust settings, and search for content.
Settings
You can adjust picture and sound settings globally or per input. The Options menu (accessible while watching a program) allows for quick adjustments to picture mode, brightness, and audio effects. Advanced settings are available in the Settings menu.
Parental controls
Parental controls allow you to block broadcast TV programs based on ratings. You must create a PIN to manage these settings. You can also hide specific entertainment options like the Movie Store, TV Store, or News on the Home screen.
Troubleshooting
If you encounter issues, try turning the TV off and on again. Common solutions include checking cable connections, ensuring the correct input is selected, and verifying that the TV is connected to a working power outlet. For network issues, ensure your wireless router is optimized and the TV is on the same network as your mobile devices.
Specifications
The TV supports 1080p resolution, 60Hz refresh rate, and includes built-in Wi-Fi. It features multiple HDMI inputs and a USB 2.0 port for media playback.
Practical help
Common problems
Picture does not fill the screen or has black bars
Adjust the picture size (aspect ratio) in the Advanced picture settings menu.
No picture when selecting an input
Check that the device is on, cables are connected securely, and the correct input is selected.
TV channel does not appear
Ensure Antenna TV is set up and scan for channels again.
No sound
Check volume, ensure the TV is not muted, check speaker settings, or verify external audio device connections.
Before use
- Place TV face-down on a cushioned surface for stand installation.
- Use all four VESA mounting holes for wall mounting.
- Connect all external devices before plugging in the power cord.
- Point the remote control towards the sensor on the front of the TV.
- Ensure the TV is connected to a wireless network for full functionality.
Images and diagrams
- Side jacks: Shows location of HDMI, USB, and antenna ports.
- Back jacks: Shows location of AV input ports.
- Remote control: Identifies buttons for power, navigation, and streaming shortcuts.
Model compatibility
- Requires wireless network for streaming features.
- Supports IEEE 802.11b/g/n wireless specification.
- HDMI ARC requires a certified HDMI cable.

Manual page author
David Miller
Documentation analyst
Organizes user manual content into clear summaries, with attention to model details, product context, and everyday usability.