Plumbing / Showers & Tubs
Installation Manual for Insignia 1100L/1200L Monochrome Series Shower Cabin
Comprehensive installation and user guide for the Insignia 1100L and 1200L Monochrome Series shower cabins. Includes step-by-step assembly instructions, plumbing and electrical connection guides, control panel operation, and essential...
Table of contents
Manual images
Click an image to enlargeQuick guide from the manual
This manual provides instructions for the assembly and operation of the Insignia Monochrome Series shower cabins. Before beginning, ensure you have checked all contents against the parts list. This product is suitable for DIY installation if you are confident in your abilities; otherwise, seek professional assistance. Key requirements include a water softener for hard water areas, the use of flexible braided water inlet pipes (not supplied), and the installation of isolation taps on both hot and cold water supplies. Electrical work must be performed by a qualified professional and protected by an RCD.
Installation Overview
The installation process involves several key stages:


- Tray and Waste: Level the tray and connect the waste using a 40mm compression joint. Ensure the spigot is drilled out for steam models.
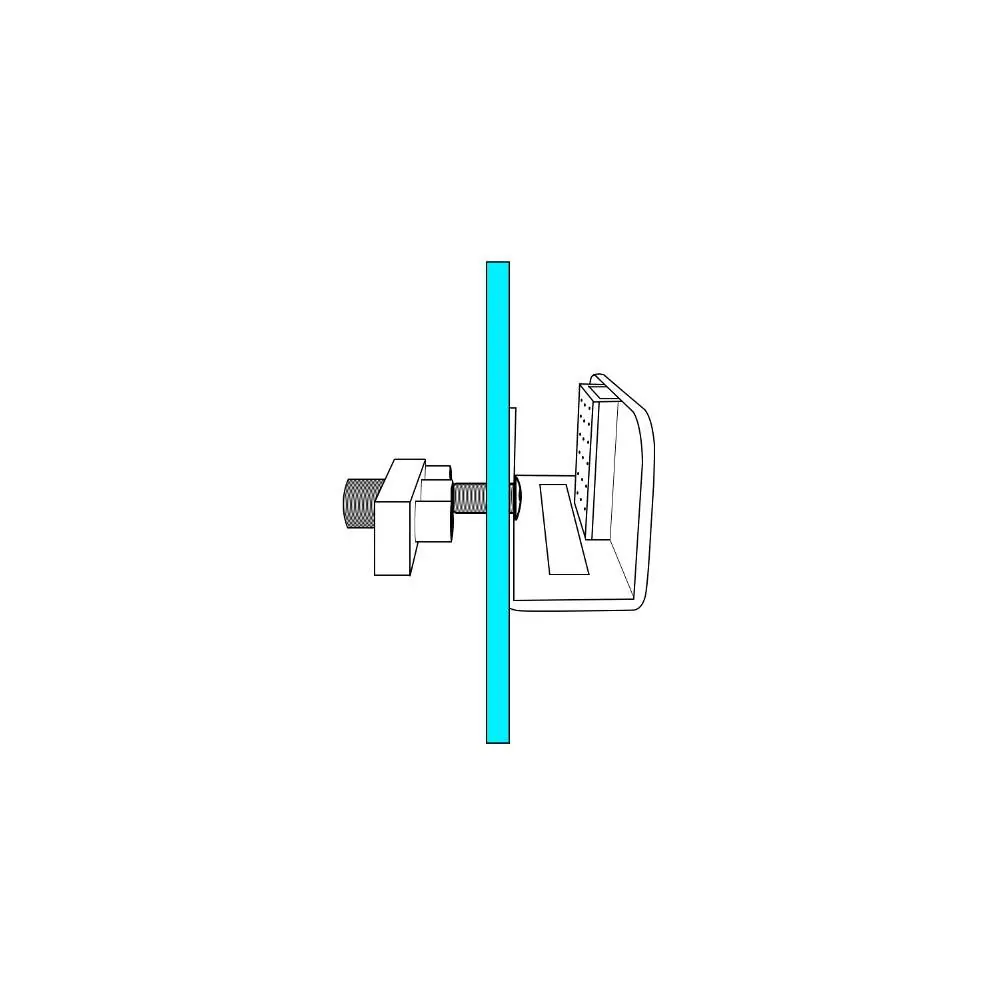
- Framework: Assemble the framework using the provided securing clips.
- Sealing: Apply RubberGum to the tray before fixing the framework. Ensure it does not contact silicone.
- Panels and Glass: Install back panels, fixed glass panels, and glass seals.
- Roof and Doors: Attach the roof and fit the door wheels and handles.
- Accessories: Install shelves, hand showers, and other accessories.
Water and Electrical Connections
Water Requirements: Recommended pressure is between 2.5 and 3.4 BAR. Do not exceed 3.4 BAR. Use flexible braided hoses for all water connections. Never use rigid pipes or glued joints for the waste.
Electrical Requirements: The steam version requires a 220-240AC power supply, while the non-steam version requires 100-240AC. All electrical connections must comply with local regulations and be protected by an RCD. The shower should be wired into an isolated fused feed.
Control Panel Operation
The control panel manages lights, steam, and audio functions:
- Lights: Press the light button to cycle through colors or turn off.
- Steam: Press the steam button to start. Use the mode button and arrows to set time and temperature.
- Music: Press the music button once for FM radio and twice for Bluetooth. Use arrows for volume and station/track selection.
- Lock: The panel locks after 20 seconds of inactivity. Press the padlock button to unlock.
Safety and Maintenance
Always turn off the power and water supply after use. Never leave children unattended in the shower. If you feel dizzy or faint while using the steam function, exit immediately. Ensure the bathroom is well-ventilated after a steam session. Regularly check all connections for leaks and maintain the shower by cleaning with appropriate products.
Practical help
Common problems
Leaking connections
Ensure all connections are watertight; do not overtighten braided hoses as this can cause them to pop.
Steam function not working
Check if the spigot is drilled out; ensure the control panel is unlocked and the steam generator is correctly connected.
Water pressure issues
Recommended pressure is 2.5-3.4 BAR. If using a gravity-fed system, a pump is likely required.
Before use
- Check all contents against the parts list before starting the build.
- Ensure you have a water softener if you live in a hard water area.
- Install isolation taps on both hot and cold water supplies.
- Verify electrical connection meets local regulations (RCD required).
- Ensure the spigot is drilled out for steam models.
- Do not book a tradesman until all parts have arrived and been checked.
Specs in practice
- Steam Version Power
- 3KW
- Steam Version Voltage
- 220-240AC
- Non-Steam Version Voltage
- 100-240AC
- Recommended Pressure
- 2.5-3.4 BAR
Images and diagrams
- Framework assembly: Shows the orientation of top and bottom rails and the use of securing clips.
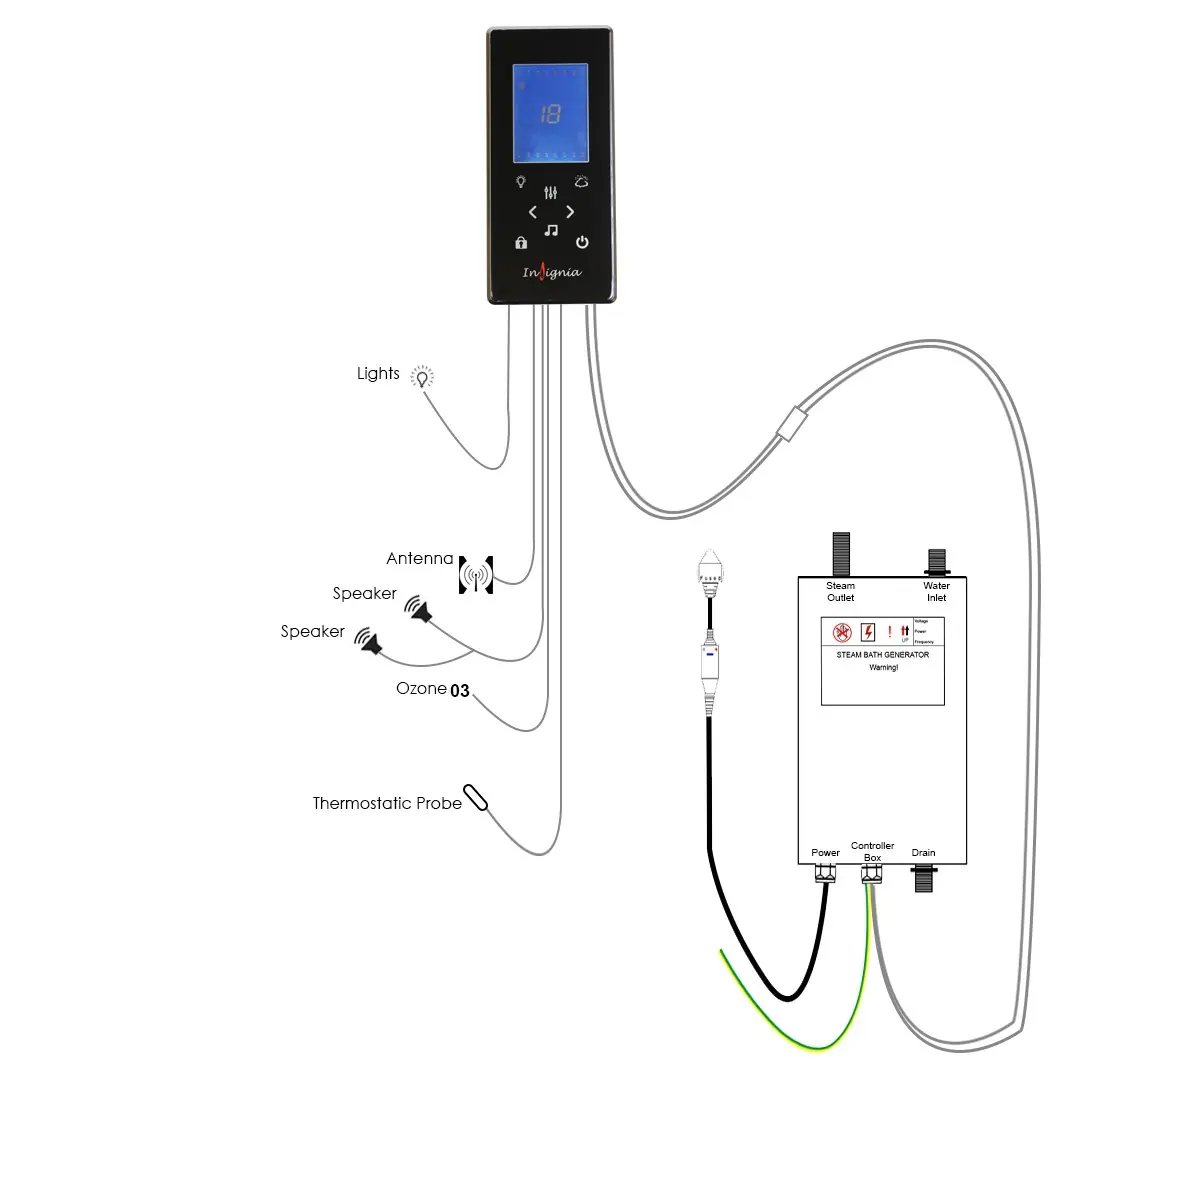
- Control panel: Identifies buttons for lights, steam, mode, lock, music, and power.
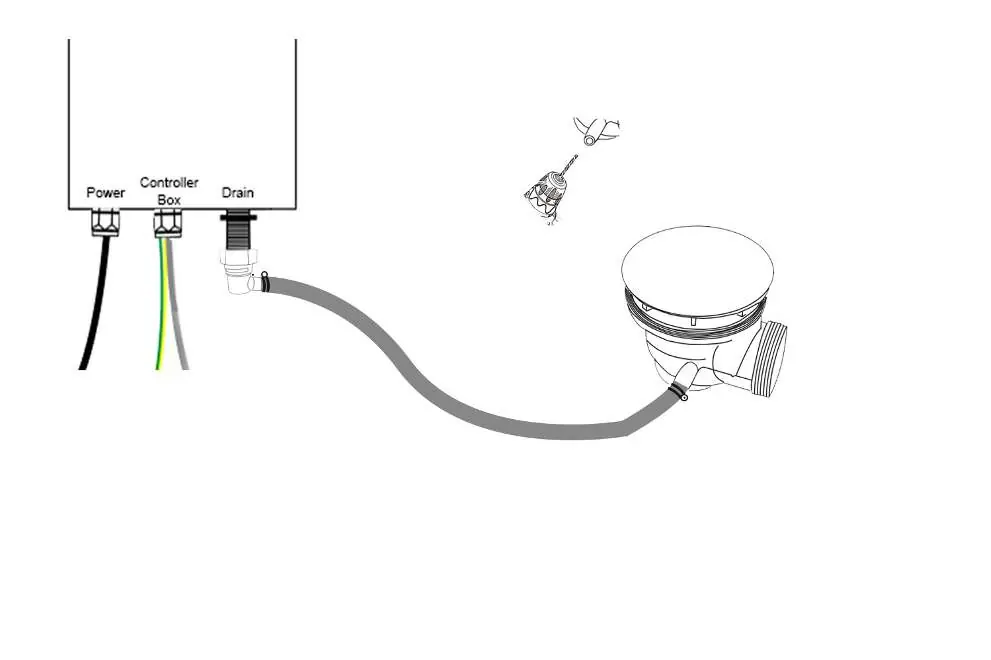
- Steam generator: Illustrates connections for the steam outlet, water inlet, and drain hose.
Model compatibility
- Requires flexible braided water inlet pipes (not supplied).
- Do not use central heating plastic pipes.
- Must be isolated when not in use.
- RubberGum must not come into contact with silicone.

Manual page author
David Miller
Documentation analyst
Organizes user manual content into clear summaries, with attention to model details, product context, and everyday usability.