Toys / Games
Owner's Manual for Kidzone 060-ROT-16 360 Rotation Bumper Car
Quick guide for the Kidzone 060-ROT-16 360 Rotation Bumper Car. Includes assembly instructions, charging procedures, remote control pairing, and troubleshooting tips.
Table of contents
Manual images
Jump to the sectionQuick guide from the manual
This document provides essential instructions for the Kidzone 060-ROT-16 360 Rotation Bumper Car. Key safety requirements include a maximum weight capacity of 66 lbs (30 kg) and a recommended age range of 18-72 months. Adult supervision is mandatory at all times. The product is designed for use on flat, smooth surfaces and must not be used near roadways, swimming pools, or steep inclines.
Assembly Instruction
The product must be assembled by an adult. Ensure all packaging materials are removed before assembly.
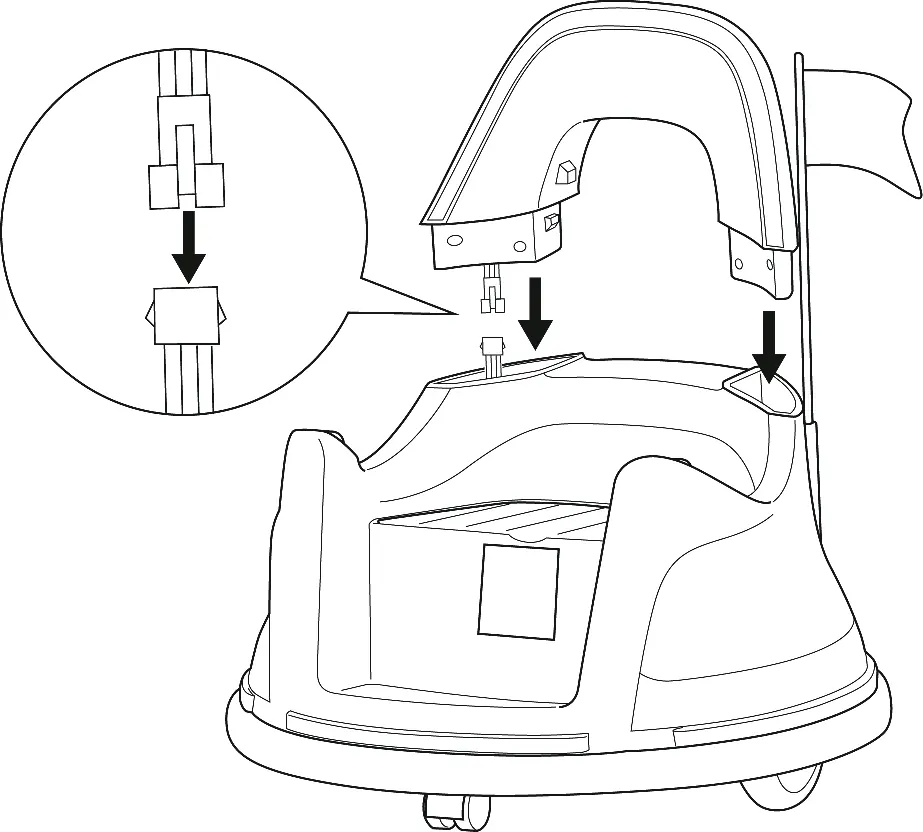

- Backrest: Connect the electrical wire from the backrest to the main car body, then insert the backrest into the body.
- Joysticks: Attach the joysticks to the car body using the provided screws and place the caps on top.
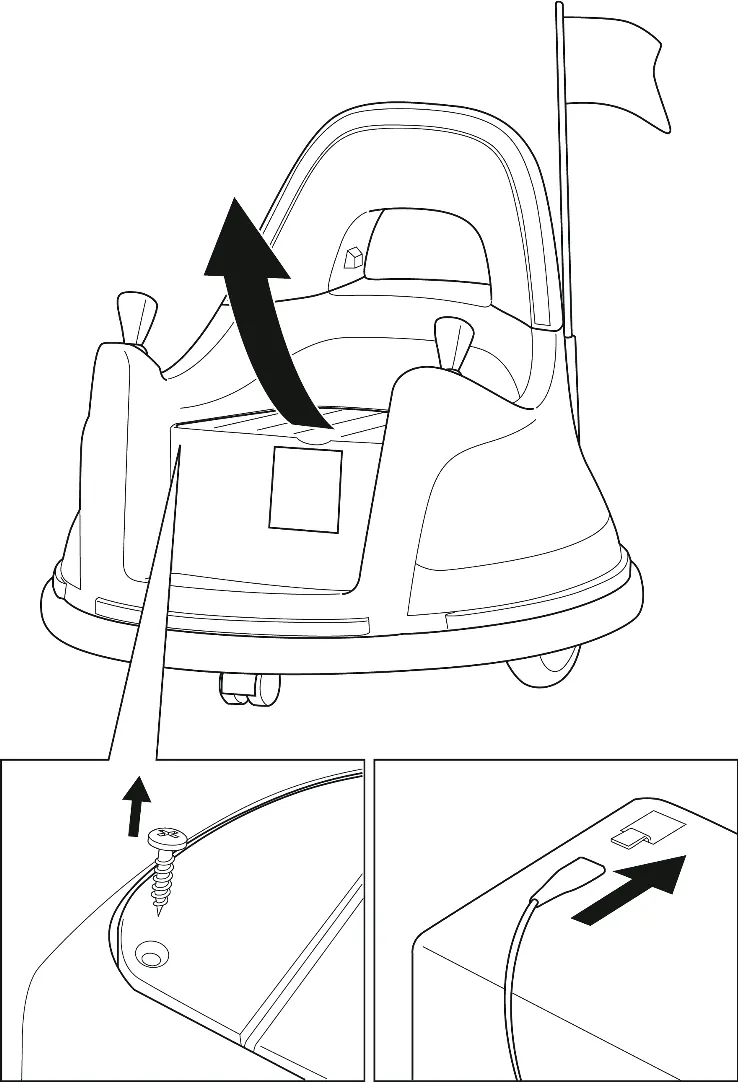
- Battery: The battery is packed disconnected. Remove the seat, connect the electrical wire from the car to the battery, and replace the seat.
User's Instruction
The vehicle can be operated via the onboard joysticks or the included remote control.
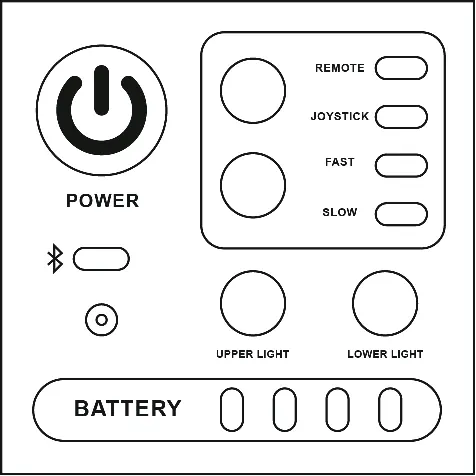
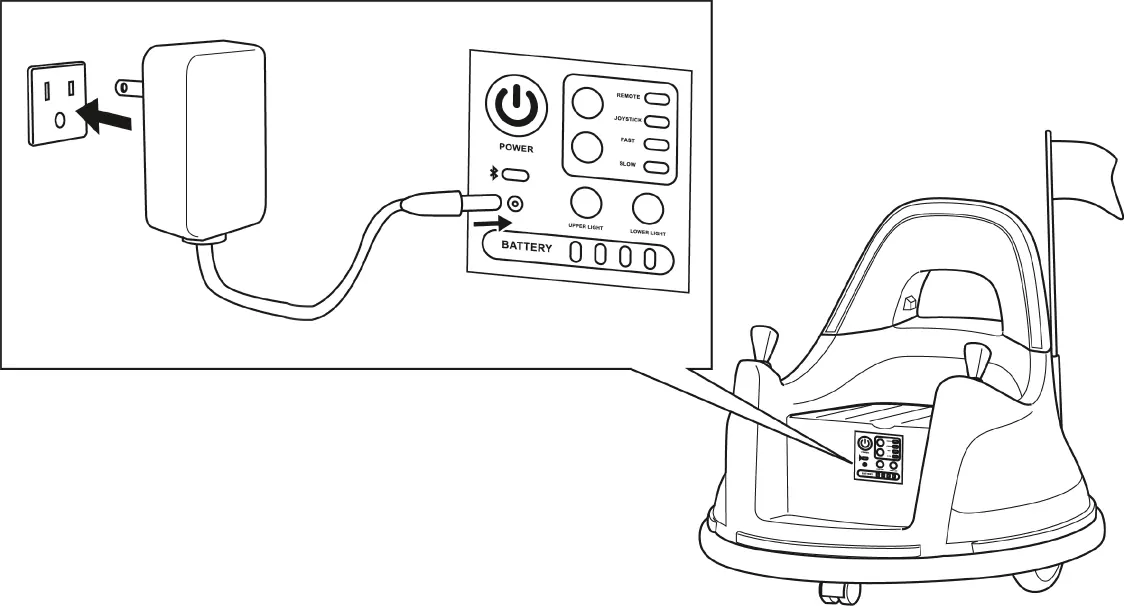
Control Panel
The control panel allows you to power the vehicle on/off, switch between high and low speeds, and toggle between remote control and joystick input. It also features indicators for battery level, Bluetooth connection, and light settings.
Remote Control
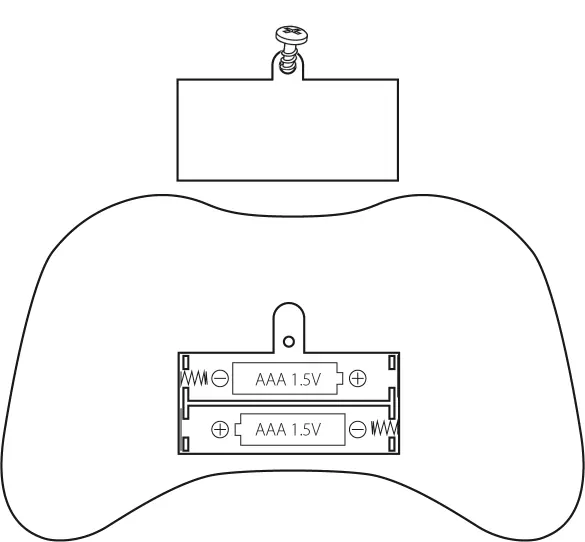
The remote control must be paired before first use. Insert 2 AAA 1.5V batteries (not included). Turn on the vehicle, then press and hold the 'M' (pairing) button on the remote for 2-4 seconds until the indicator light becomes solid. The 'P' button acts as an emergency brake, disabling all running functions.
Charging
The battery requires 8-12 hours to charge. Do not charge for more than 20 hours to avoid overheating. The vehicle must be turned off during charging. The charger indicator will turn red while charging and green when complete. Charge the battery at least once a month if the vehicle is not in use.
Care and Maintenance
- Regularly check for loose parts or cracked plastic.
- Clean the vehicle with a cloth; do not use a hose or immerse in water.
- Store away from heat sources and cover to protect from weather.
- Use lightweight oil occasionally to lubricate moving parts.
Troubleshooting
If the vehicle does not move, check the battery connection, ensure the battery is fully charged, or wait 10-15 seconds for the fuse to reset automatically. If the vehicle runs slowly, verify the user's weight is within the 66 lb limit and ensure the battery is charged. For persistent issues like grinding sounds or charging failures, contact customer service.
Manufacturer information
Kidzone Toys
Practical help
Common problems
Vehicle does not move
Check battery connections, fully charge the battery, or wait 10-15 seconds for the fuse to reset.
Vehicle runs very slow
Ensure the user's weight is under 66 lbs (30 kg) and the battery is fully charged.
Battery does not charge
Ensure the charger is firmly plugged into the wall and the charging port. If it still fails, contact customer service.
Remote control not working
Ensure fresh AAA batteries are installed and re-pair the remote by holding the 'M' button for 2-4 seconds.
Before use
- Verify the child is between 18-72 months old.
- Ensure the user's weight is under 66 lbs (30 kg).
- Connect the battery (packed disconnected).
- Charge the battery for 8-12 hours.
- Assemble the backrest and joysticks.
- Install 2 AAA batteries in the remote control.
- Pair the remote control if required.
Images and diagrams
- Assembly steps for backrest and joysticks.
- Battery connection procedure under the seat.
- Control panel layout and button functions.
- Remote control button layout.
- Charging port location and connection.
Model compatibility
- Remote control requires 2 AAA 1.5V batteries (not included).
- Only use the charger and battery provided by the manufacturer.
- Not for use on carpets, rugs, or slippery surfaces.

Manual page author
Emily Carter
User documentation editor
Prepares concise manual descriptions and highlights the most useful setup, operation, and maintenance information for readers.