Toys / Games
User Manual for Kidzone 060-ROT-13L Ride-On Car
Quick guide for the Kidzone 060-ROT-13L ride-on car. Includes assembly instructions, safety warnings, charging procedures, and troubleshooting tips.
Table of contents
Manual images
Jump to the sectionQuick guide from the manual
This ride-on car is designed for children aged 37-72 months with a maximum weight capacity of 66 lb (30 kg). Assembly must be performed by an adult. Always ensure the seatbelt is fastened and the child wears protective equipment like a helmet. Do not operate the vehicle in the dark, on slippery surfaces, or near bodies of water. The battery must be connected before the first use and charged for 8-12 hours.
Product Specifications
- Motor: 12V*5
- Battery: 12V*1
- Charge Time: 8-12 hours
- Speed: 0.6-1.9 mph (1-3.1 km/h)
- Dimensions: 46.7 x 24.8 x 18.9 inches
Assembly Instructions
Follow these steps to assemble the vehicle:
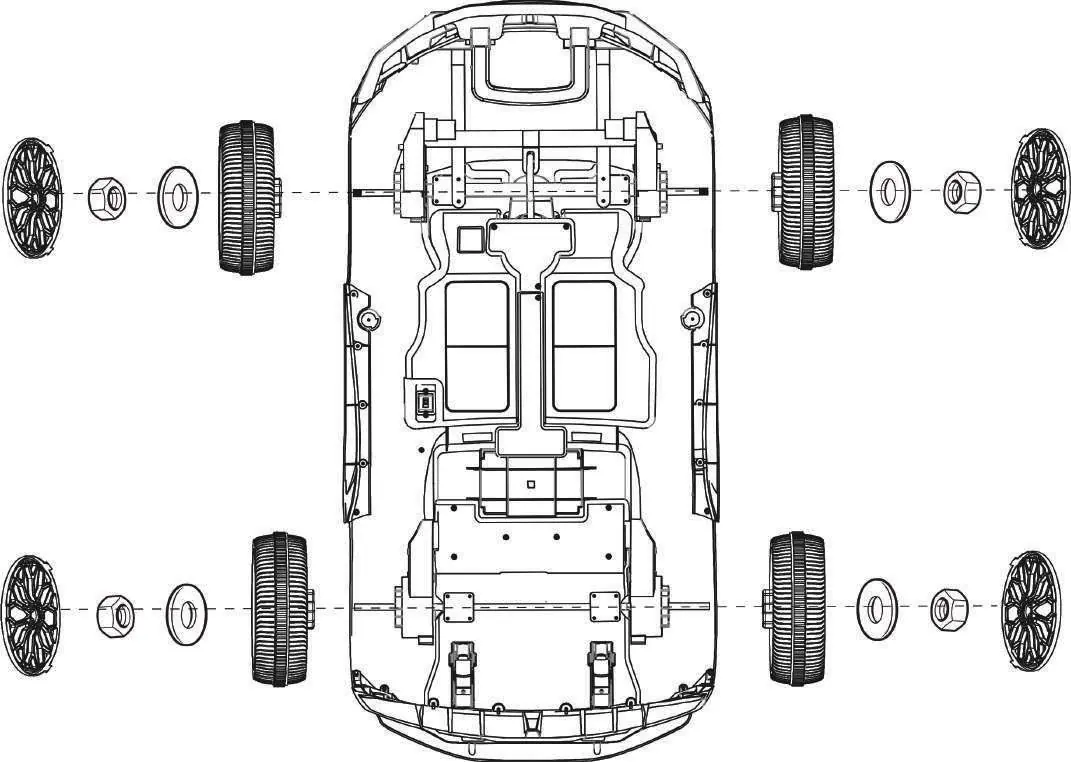

- Wheels: Slide the wheels onto the axles, secure with washers and nuts, and attach the wheel covers.
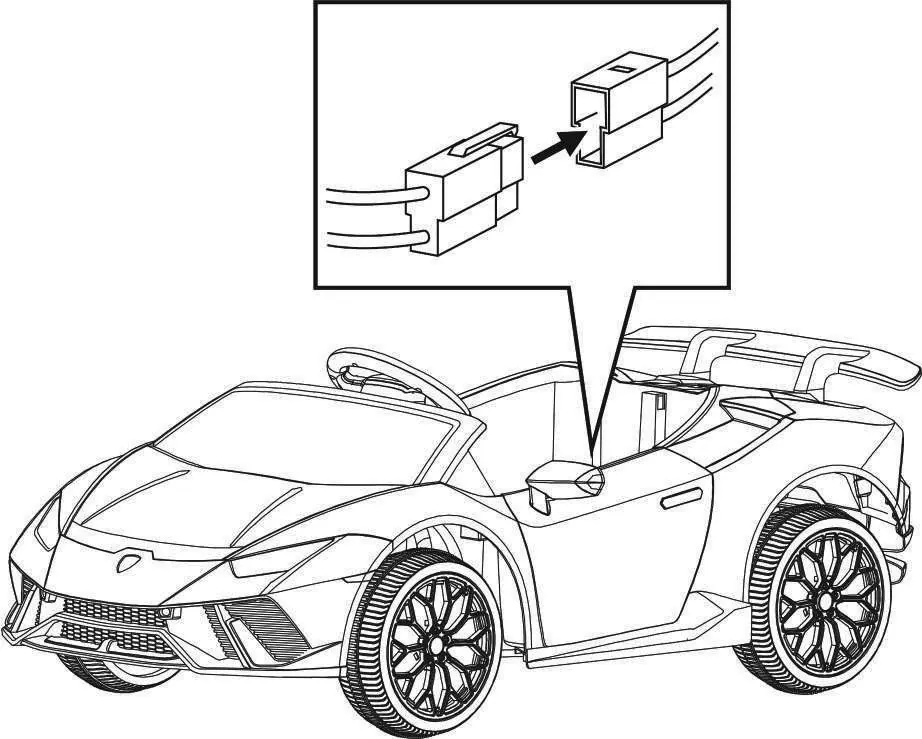
- Steering Wheel and Spoiler: Connect the electrical wires from the steering wheel to the car, insert the steering wheel onto the column, and secure it with the pre-installed screw and nut. Attach the rear spoiler to the slots on the back of the vehicle.
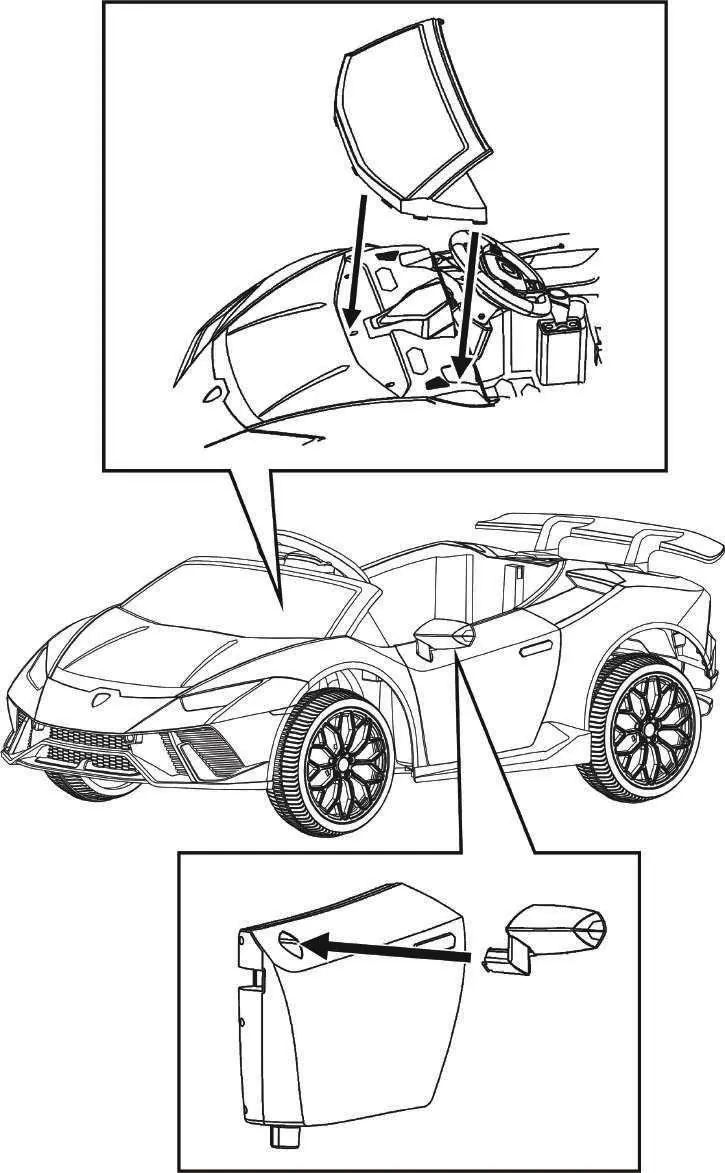
- Windshield and Mirrors: Attach the windshield by fitting the tabs into the grooves until it clicks. Insert the mirrors into the sides of the vehicle.
- Battery Connection: Connect the electrical wire from the car to the battery.
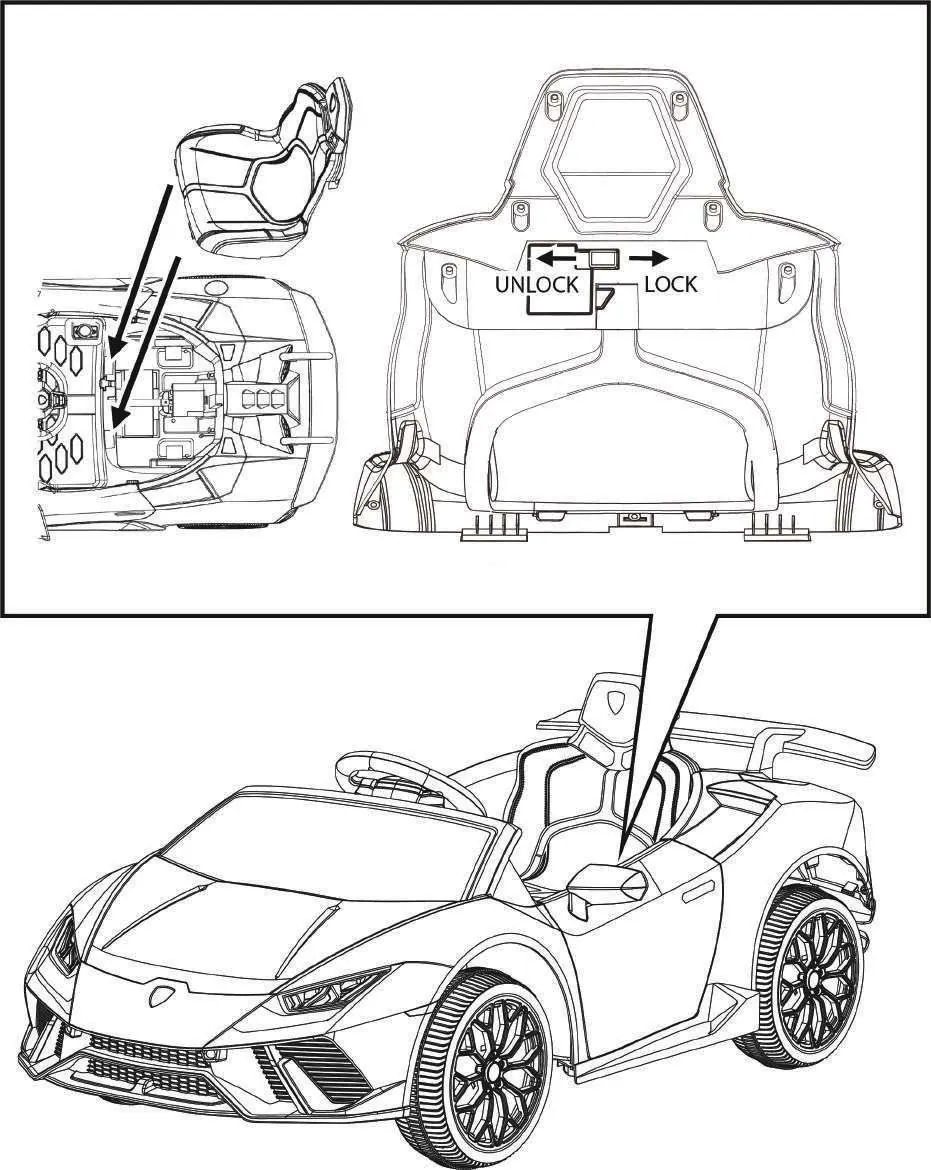
- Seat: Attach the seat by fitting the tabs into the grooves on the vehicle body and locking it in place.
Operation
Control Panel: Use the power button to turn the vehicle on or off. You can select high or low speed modes, connect via Bluetooth, play music, or listen to FM radio. The power indicator shows the estimated battery level.
Remote Control: The remote must be paired before use. Insert 2 AAA 1.5V batteries (not included). Press the 'M' button for 2-4 seconds to pair. Use the directional buttons to move the vehicle, the 'P' button for the emergency brake, and the 'S' button to switch speeds.
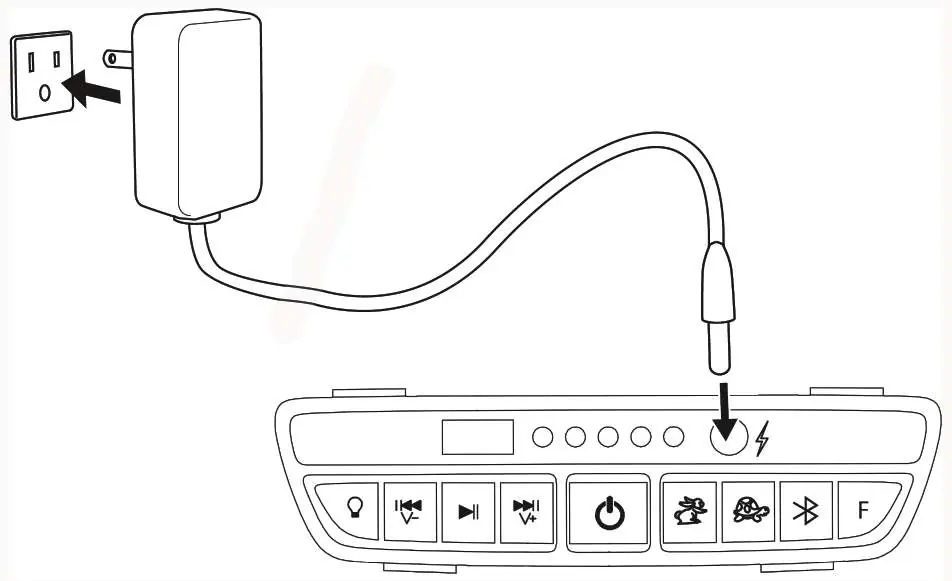
Charging
The vehicle must be turned off during charging. Connect the charger to the charging port on the control panel and plug it into a wall outlet. The indicator on the charger will turn red while charging and green when complete. Do not charge for more than 20 hours.
Care and Maintenance
- Regularly check for loose or missing parts and re-tighten if necessary.
- Clean the vehicle with a cloth; do not use a hose or immerse in water.
- Store the product away from heat sources and cover it when not in use.
- Charge the battery at least once a month to maintain battery life.
Troubleshooting
If the vehicle does not move, check the battery connection, ensure the fuse has reset (wait 10 seconds), or fully charge the battery. If the vehicle runs slowly, check if it is overloaded or if the battery is old. For loud grinding sounds or if the battery does not charge, contact customer service.
Manufacturer information
Kidzone Toys
Practical help
Common problems
Vehicle does not move
Check battery connections, ensure the fuse has reset (wait 10 seconds), or fully charge the battery.
Vehicle runs very slow
Ensure the user's weight is under 66 lb, fully charge the battery, or avoid using the vehicle in harsh environments.
Battery does not charge
Ensure the charger is firmly plugged into the power source and connected to the charging port.
Vehicle needs a push to go forward
Check if battery connectors are firmly connected or contact customer service for motor issues.
Before use
- Ensure the battery is fully charged (8-12 hours).
- Verify all parts are present and tightened.
- Connect the battery wire to the car.
- Ensure the child is within the age (37-72 months) and weight (max 66 lb) limits.
- Check that the area is safe, flat, and well-lit.
Specs in practice
- Battery Charge Time
- 8-12 hours for a full charge; do not exceed 20 hours.
- Maximum User Weight
- 66 lb / 30 kg.
Images and diagrams
- Assembly steps for wheels, steering wheel, windshield, and seat.
- Control panel layout showing power, speed, music, and charging port.
- Remote control layout with pairing, speed, and emergency brake buttons.
Model compatibility
- Only use the charger and battery provided or recommended by the manufacturer.
- Remote control requires 2 AAA 1.5V batteries (not included).

Manual page author
Emily Carter
User documentation editor
Prepares concise manual descriptions and highlights the most useful setup, operation, and maintenance information for readers.