Electronics / Gaming Peripherals
Logitech PRO Racing Pedals Setup Guide
Quick setup guide for Logitech PRO Racing Pedals. Learn how to install, adjust pedal spacing, customize pedal faces, change spring force, configure brake elastomers, and use G HUB settings.
Table of contents
Manual images
Click an image to enlargeQuick guide from the manual
This guide covers the setup, adjustment, and maintenance of the Logitech PRO Racing Pedals. Key procedures include mounting the pedals to a rig, adjusting pedal spacing and faces, and configuring the brake feel using elastomers. Always use the included Allen key for adjustments and ensure all bolts are hand-tightened.
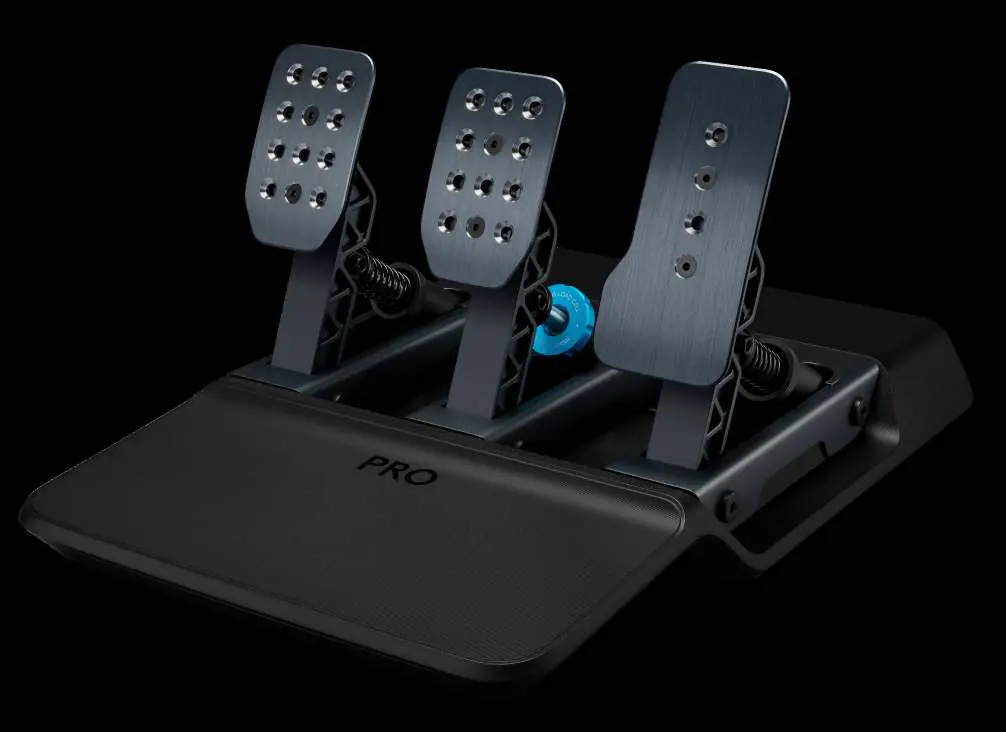
Features
- Clutch, Brake, and Gas pedals
- Optional springs and brake elastomers
- Lubricating grease
- Allen key
- USB cable
Connection and Installation
If attaching to a simulation racing rig or seat, ensure the M6 bolts do not exceed a depth of 10mm into the pedal unit. Calculate the required bolt length by adding 10mm to the thickness of your mounting plate. Use washers if necessary to prevent bolts from encroaching too far. Do not use power tools to tighten the bolts; hand-tighten only.
Adjusting Pedal Spacing
Use the included Allen key to loosen the two bolts on the underside of the pedal set. Slide the modules to your desired spacing and tighten all bolts securely to prevent movement during use.
Adjusting Pedal Faces
Pedal faces can be adjusted for spacing and height. Clutch and Brake pedals can be adjusted horizontally and vertically using the provided holes. The Gas pedal can be adjusted vertically. Loosen the two bolts in the pedal face, reposition, and reinsert the bolts.
Adjusting Pedal Spring Force
To change spring force, lift the piston out of its location in the pedal module. Wrap your hand around the pedal face from the front, grip the knurled edge of the piston body, and squeeze to dislocate it from its locking position using the pedal arm as leverage.
Gas and Clutch
Once the piston is removed, pull it away from the steel rod to remove the spring. Choose one of the included springs, push it back over the steel rod, and reinsert the piston. Ensure the spring is captured by the two locators. If you hear noises when pressing the pedal, rotate the spring slightly.
Brake
The brake uses elastomer dampeners. After removing the piston, unscrew the knurled cap to access the elastomer pieces. There are three pieces: two of equal size and one smaller piece. The smaller piece must always be at the bottom. Use the included grease on the sides of the elastomers for smooth operation. Do not use the soft beige piece if the pedals are hard-mounted to a rig, as this may cause damage.
Custom Pedal Setup
Pedal modules can be removed from the main base and mounted into a custom simulation rig. Unplug the modules from the hub, remove the bolts holding them to the base, and feed the cables through the holes. Remove the Pedal Hub from the base and reconnect the modules to it in your custom setup.
G HUB Settings
Configure your pedals using G HUB software on your PC. You can adjust sensitivity and the pressure required for 100% axis output on the brake pedal. The sensitivity slider changes the linearity of the pedal response; 50 is the recommended 1:1 linear setting.
Combined Pedals
This mode is only required for very old racing titles that do not support separate axes for brake and gas. It is recommended to leave this option unticked for the vast majority of games.
Recommended Maintenance
Clean the base and pedals weekly with a damp, lint-free cloth. Every 200 hours, remove excess grease from the brake pedal and reapply sparingly. Use only silicone-based grease. Do not use petroleum-based lubricants or hydrocarbon solvents.
Manufacturer information
Logitech
Practical help
Common problems
Pedals sliding or tipping during use
If using on a desk, ensure they are secured. If using a rig, ensure they are hard-mounted.
Noises when pressing the pedal
Rotate the spring slightly in place and press the pedal again until the noise stops.
Elastomer damage
Do not use the soft beige piece if the pedals are hard-mounted to a rig.
Cannot achieve 100% axis output
Adjust the Brake Force setting in G HUB to match your preference and physical strength.
Before use
- Check the thickness of your rig plate to determine the correct M6 bolt length.
- Hand-tighten all bolts; do not use power tools.
- Install G HUB software on your PC.
- Verify the elastomer combination for your preferred brake feel.
- Ensure the small elastomer piece is at the bottom of the piston.
Specs in practice
- M6 Bolt Depth
- Maximum 10mm depth plus the thickness of your mounting plate.
- Brake Force Default
- 30kg of force required for 100% axis output.
- Sensitivity 50
- 1:1 linear response between pedal movement and axis output.
Images and diagrams
- Pedal spacing adjustment using the included Allen key.
- Piston removal process for spring or elastomer changes.
- Elastomer combination table for brake feel configuration.
Model compatibility
- Compatible with PC and Logitech Racing Wheels.
- Combined Pedal mode available for older racing titles.

Manual page author
Emily Carter
User documentation editor
Prepares concise manual descriptions and highlights the most useful setup, operation, and maintenance information for readers.