Home Appliances / Space Heaters
User Manual for Namron 5401358 Patio Heater
Quick guide for the Namron 5401358 wall-mounted patio heater. Includes installation steps, safety clearances, operation instructions, and technical specifications.
Quick answers from the manual
Quick answer
- The Namron 5401358 is a 2000W wall-mounted patio heater. It requires a minimum installation height of 1.8m from the ground and 0.5m clearance from sides and ceilings. It is operated via a digital display with adjustable power levels (P0-P9). p. 1, 2
Key actions
- Mounting the heater p. 1, 2
- Operating the heater p. 2
First start
- Plug in the power; the heater enters standby mode with a flashing white light. Press the power button to start. p. 2
Show 2 more answers Show less
Technical specifications
| Parameter | Value | Meaning | Pages |
|---|---|---|---|
| Voltage | 220-240V~ 50/60Hz | Power supply requirements | p. 1 |
| Power | 2000W | Heating output | p. 1 |
Where to find it in the PDF
- Installation and Safety p. 1
- Mounting and Operation p. 2
Table of contents
Manual images
Click an image to enlargeQuick guide from the manual
The Namron 5401358 is a 2000W wall-mounted patio heater designed for outdoor use. It features adjustable power levels and requires specific installation clearances to ensure safe operation. Always ensure the unit is grounded and installed in an environment free from acid or alkali substances.
Installation
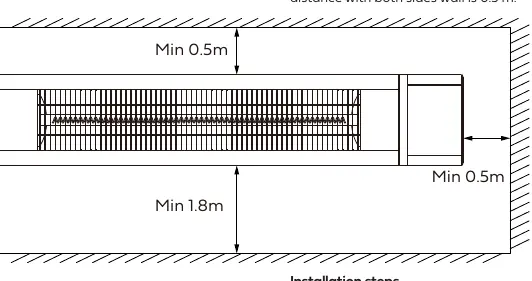
Safety clearances
To ensure safe use, the heater must be installed with the following minimum distances:
- Ground: 1.8 meters from the bottom of the heater.
- Ceiling/Roof: 0.5 meters.
- Side walls: 0.5 meters.
Mounting steps
- Ensure the product is handled gently during installation.
- The heater comes with 4 brackets: two attached to the back of the heater and two for the wall.
- Loosen the M5*10 screws on the square fasteners on the back of the heater to attach the heater-side brackets.
- Secure the wall-side brackets at an appropriate distance (45-55 cm).
- Use a percussion drill to create holes for the wall brackets (8mm diameter).
- Insert plastic wall anchors and secure the brackets using ST4*35 screws.
- Connect the wall brackets to the heater brackets using the provided nut and adjust the heater angle as required.
Operation
The heater is operated via a digital display interface:
- Standby: Plug in the power; the heater enters standby mode and the white light flashes.
- Power On: Press the power button to display P0.
- Adjusting Power: Press the button again to cycle through power levels (P0-P5-P9).
- Turning Off: Press the button until the display shows 00 to turn off.
- Auto-return: If left in P0 state without operation for 10 seconds, it returns to standby.
Technical specifications
- Voltage: 220-240V~ 50/60Hz
- Power: 2000W
- IP Rating: IP34
- Included: 1.8m cable, IP44 plug, and remote control.
Manufacturer information
Namron AS
Practical help
Common problems
Heater does not turn on
Ensure the power is connected and the unit is in standby mode (indicated by a flashing white light).
Heater angle needs adjustment
Loosen the nut connecting the wall bracket to the heater bracket, adjust the heater to the desired angle, and retighten the nut.
Before use
- Verify the installation surface can support the heater weight.
- Ensure the power supply matches the 220-240V rating.
- Check that the installation site meets the 1.8m height and 0.5m clearance requirements.
- Ensure the product is grounded.
Show more Show less
Images and diagrams
- The heater requires 4 brackets total: two on the heater back and two on the wall.
- Use a percussion drill for 8mm holes when mounting to the wall.
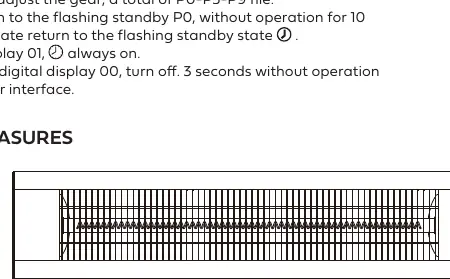
- The heater dimensions are 922.8mm in width and 180mm in height.
Model compatibility
- Not recommended for installation in acid or alkali environments.

Manual page author
Emily Carter
User documentation editor