Tools / Welding Equipment
Operator's Manual for NOVA FT07-R1 Wireless TIG Foot Pedal
Quick guide for the NOVA FT07-R1 Wireless TIG Foot Pedal, covering setup, battery charging, pairing, and troubleshooting for seamless welding operation.
Table of contents
Manual images
Click an image to enlargeQuick guide from the manual
The NOVA FT07-R1 is a 2.4 GHz wireless TIG foot pedal designed to control arc start and amperage ramping. It operates up to 100 feet from the receiver. Before first use, you must connect the internal battery wires and fully charge the unit. The pedal arrives factory-paired, but re-pairing instructions are provided if the connection is lost.
Unpacking and Setup
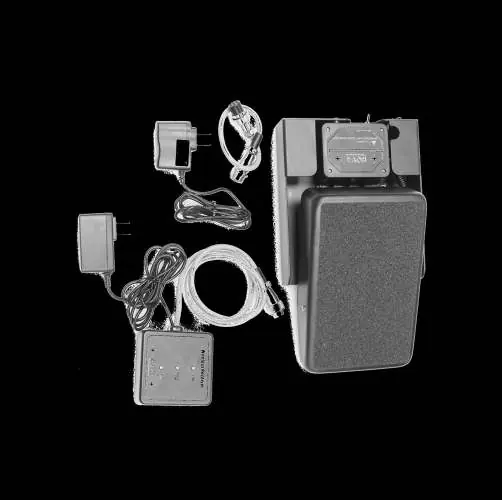
Ensure you have the following components: wireless foot pedal with transmitter, charger, receiver dongle with magnetic backing, and a brand-specific adapter plug. Inspect for shipping damage immediately upon receipt.
Connecting the Battery
The pedal is shipped with the battery disconnected for safety. To connect:
- Open the transmitter box on the front of the pedal.
- Match the connector tabs and slide them together.
- Tuck the wires neatly beside the transmitter.
Charging the Battery
Charge the pedal before initial use and whenever the receiver indicates low battery:
- Set the pedal switch to OFF.
- Connect the charger to the port on the front of the pedal.
- Plug into a 100-240V outlet.
- Charge for at least 4 hours until the LED turns from red to green.
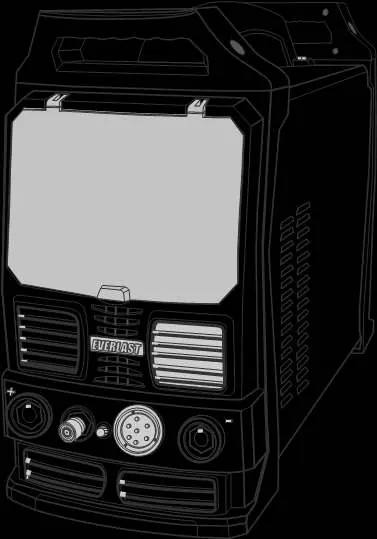
Connecting the Receiver
- Attach the magnetic dongle to the welder or a nearby surface.
- Connect the appropriate adapter to the dongle connector.
- Plug the dongle into the welder's remote terminal.
- Connect the dongle to a 100-240V power source.
Operation
Confirm the welder is set to the correct pedal mode. Press the pedal lightly to start the arc; increase pressure to raise amperage. Release the pedal fully to stop the arc. Always switch the pedal to OFF when not in use to preserve battery life.
Troubleshooting
If the welder does not respond, check that the dongle is powered, the pedal is switched ON, and the battery is charged. If the arc is unstable, ensure there are no large metal obstructions between the pedal and receiver (line-of-sight operation is recommended).
Practical help
Common problems
Welder does not respond when pedal is activated
Check battery charge, ensure dongle is plugged in, verify pedal is switched ON, and check that battery wires are connected.
Arc is sluggish or delayed
Check battery charge, remove obstructions, or move the pedal closer to the receiver.
Arc does not shut off cleanly
Ensure the pedal is fully released to the stop position and check that the microswitch is not being activated.
Before use
- Connect internal battery wires to the transmitter.
- Charge the pedal for at least 4 hours until the LED turns green.
- Verify the welder is set to the correct 'Pedal' mode.
- Ensure the dongle is connected to a 100-240V power source.
- Switch the pedal to ON.
Specs in practice
- Operation Frequency
- 2.4 GHz wireless signal; requires line-of-sight for best performance.
- Rated Operation Distance
- Up to 100 feet; performance may be reduced by walls or large metal structures.
- Charge Duration
- Up to 40 days based on an average 8-hour shift.
Images and diagrams
- The transmitter box on the pedal contains the battery connector and the ON/OFF switch.
- The dongle features three LEDs: Power (top), Signal/Diagnostic (middle), and Low Battery (bottom).
- The pedal top can be removed by pressing in the pivot pins on both sides.
Model compatibility
- Not all welders are compatible; older non-digital welders often do not work with this unit.
- Adapter plugs vary by brand; verify your welder's pin configuration before purchase.
- NOVA is an independent brand and is not endorsed by Miller, Lincoln, or ESAB.

Manual page author
David Miller
Documentation analyst
Organizes user manual content into clear summaries, with attention to model details, product context, and everyday usability.