Electronics / Monitors
User Manual for Philips 220V3 Series LCD Monitor
A comprehensive user guide for the Philips 220V3 Series LCD Monitor. Includes installation instructions, OSD menu navigation, SmartControl Lite software setup, technical specifications, and troubleshooting solutions.
Quick answers from the manual
Quick answer
- The Philips 220V3 series monitor is a 22-inch LCD display. Setup involves connecting the power and signal cables, and optionally installing the SmartControl Lite software for advanced adjustments via your PC. p. 1, 6, 7
Key actions
- Install base stand p. 6
- Connect to PC p. 7
- Adjust OSD settings p. 7, 8
First start
- Connect power cord and signal cable, turn on computer, then turn on monitor. p. 7
Show 4 more answers Show less
Problems and fixes
No picture
Check power connections and ensure the monitor is turned on.
p. 35
Image not centered
Use the Auto function in OSD.
p. 35Maintenance and reset
- Use the Reset option in the OSD Setup menu to recall factory settings. p. 38
Technical specifications
| Parameter | Value | Meaning | Pages |
|---|---|---|---|
| Native Resolution | 1680x1050@60Hz | Optimal resolution for display performance. | p. 18, 22 |
| Tilt | -5/+20 | Monitor tilt range. | p. 18 |
| Power Supply | 100-240VAC, 50-60Hz | Input voltage requirements. | p. 19, 20 |
Where to find it in the PDF
- Installation p. 6, 7
- Operating the monitor p. 7, 8
- Technical Specifications p. 18, 21
- Troubleshooting p. 35, 39
Table of contents
Manual images
Click an image to enlargeQuick guide from the manual
This guide covers the Philips 220V3 series LCD monitors, including models 220V3, 220V3L, 220V3A, and 220V3LA. The monitor is designed for optimal performance at a native resolution of 1680x1050 at 60Hz. Users can adjust settings via the OSD (On-Screen Display) menu or the SmartControl Lite software.
Installation
To install the base stand, place the monitor face down on a soft, smooth surface. Attach the base column until it clicks into position, then firmly insert the base stand into the column. To connect to your PC, connect the power cord to the monitor, turn off your computer, connect the signal cable (VGA or DVI), and then plug both devices into a power outlet.
Operating the monitor
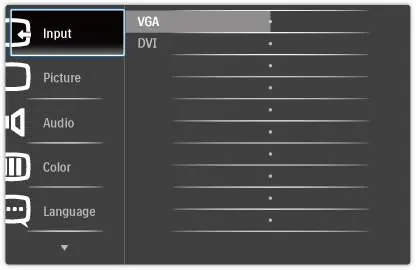
The monitor features an OSD menu accessible via buttons on the front bezel. Use the OSD to adjust brightness, contrast, input source, and color settings. The 'Auto' button automatically adjusts the monitor when using VGA input.
SmartControl Lite
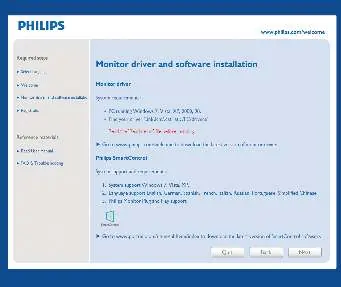
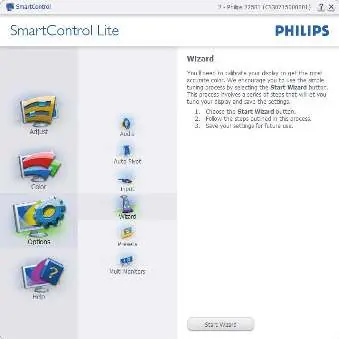
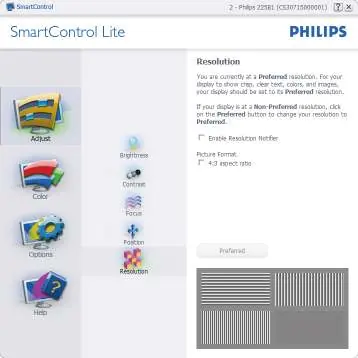
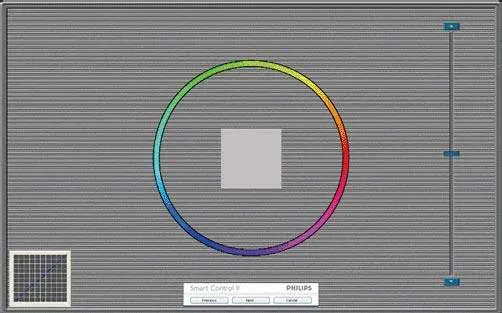
SmartControl Lite is a software interface that allows you to control monitor settings directly from your Windows PC. It includes a Wizard for initial setup and a Standard pane for fine-tuning resolution, color calibration, and audio settings. The software can be accessed via the task tray or desktop shortcut.
Technical specifications
The monitor features a 22-inch TFT-LCD panel with a 16:10 aspect ratio. It supports DVI-D and VGA inputs. Power consumption varies by model, with typical usage ranging from approximately 18W to 22W. The monitor is compatible with Windows 7, Mac OSX, and Linux.
Troubleshooting
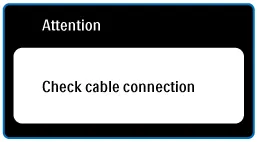
If you encounter issues, check that all cables are securely connected and that the computer is turned on. If the screen displays 'Cannot display this video mode', ensure your PC is set to the native resolution of 1680x1050@60Hz. For 'burn-in' or 'ghost image' concerns, use a screen saver or periodic screen refresh application.
Safety and maintenance
Keep the monitor away from direct sunlight and heat sources. Do not block ventilation holes. Clean the screen with a slightly damp cloth; never use organic solvents like alcohol or ammonia. If the monitor gets wet, disconnect the power immediately.
Manufacturer information
Philips
Practical help
Common problems
No picture (Power LED not lit)
Ensure the power cord is plugged into the outlet and the back of the monitor. Check that the power button is in the ON position.
No picture (Power LED is white blinking)
Ensure the computer is turned on and the signal cable is properly connected. Check for bent pins on the cable.
Image is not centered
Use the 'Auto' function in the OSD menu or adjust the Phase/Clock settings in the OSD.
Image vibrates on the screen
Check that the signal cable is securely connected to the graphics board or PC.
Before use
- Ensure the monitor is placed on a flat, stable surface.
- Connect the power cord firmly to the back of the monitor.
- Connect the signal cable (VGA or DVI) to the computer.
- Ensure the computer is turned off before connecting cables.
- Verify that the power outlet is easily accessible.
Show more Show less
Specs in practice
- Native Resolution
- 1680x1050@60Hz for optimal performance.
- Power Supply
- Built-in, 100-240VAC, 50-60Hz.
- Response Time
- 5 ms typical.
Images and diagrams
- OSD button layout: Power, OSD Menu, Back, Brightness, OSD Adjustment, Display Format, Volume, Auto.
- Rear ports: AC power input, VGA input, DVI-D input, Kensington lock, Audio input.
Model compatibility
- Compatible with Windows 7, Vista, XP, NT, Mac OSX, and Linux.
- SmartControl Lite is Windows 7 compliant.

Manual page author
David Miller
Documentation analyst