Electronics / Monitors
Philips Brilliance 231B4 Monitor User Manual
Quick guide for the Philips Brilliance 231B4 monitor. Includes setup instructions, OSD menu navigation, SmartImage optimization, PowerSensor configuration, and troubleshooting tips.
Quick answers from the manual
Quick answer
- The Philips 231B4 is a 23-inch LCD monitor. Setup involves attaching the base, connecting the power and signal cables (VGA, DVI, or DisplayPort), and installing the provided software for advanced features like SmartControl and PowerSensor. p. 4, 6, 8, 11
Key actions
- Install the base p. 4, 5
- Connect to PC p. 6
First start
- Connect power and signal cables, then turn on the computer and monitor. p. 6
Show 4 more answers Show less
Problems and fixes
No picture
Check power connection, signal cable, and computer status.
p. 40Maintenance and reset
- Reset OSD settings p. 43
Technical specifications
| Parameter | Value | Meaning | Pages |
|---|---|---|---|
| Panel Size | 23 inch | Display size | p. 24 |
| Resolution | 1920 x 1080 @ 60Hz | Native resolution | p. 24 |
Where to find it in the PDF
- Installation p. 4, 5
- Technical Specifications p. 24, 25
Table of contents
Manual images
Click an image to enlargeQuick guide from the manual
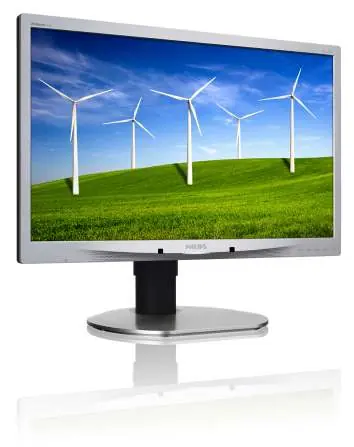
The Philips Brilliance 231B4 is a 23-inch LCD monitor designed for optimal performance at 1920 x 1080 resolution. This guide provides essential information for setting up, optimizing, and troubleshooting your device.
Assembly and Installation
To assemble the monitor:

- Place the monitor face down on a smooth surface to avoid scratching the screen.
- Snap the base into the VESA mount area.
- Attach the base to the column and tighten the screw at the bottom.
- Connect the power cord and the appropriate signal cable (VGA, DVI, or DisplayPort) to the back of the monitor.
- Plug the power cord into a nearby outlet and turn on your computer and monitor.
This monitor supports a 100mm x 100mm VESA-compliant mounting interface if you choose to use a wall mount or monitor arm.
Operating the Monitor
The monitor features control buttons on the front bezel for OSD (On-Screen Display) navigation:
- Power Button: Switches the monitor ON and OFF.
- OSD Menu: Access the OSD menu and confirm adjustments.
- SmartImage: Hot key to select between Office, Photo, Movie, Game, Economy, and Off modes.
- PowerSensor: Dedicated button for PowerSensor settings.
Image Optimization
The monitor includes several features to enhance display quality:
- SmartImage: Provides presets that dynamically adjust brightness, contrast, color, and sharpness based on the content type.
- SmartContrast: Automatically optimizes contrast ratio for maximum visual clarity.
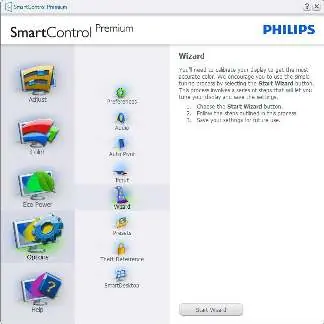
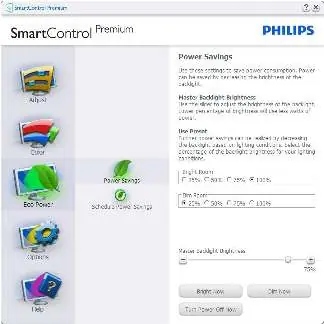
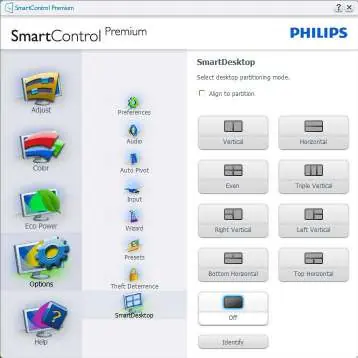
- SmartControl Premium: Software that allows you to control monitor settings via an on-screen graphic interface.
- SmartDesktop: A feature within SmartControl Premium that allows for easy window partitioning and management.
PowerSensor
PowerSensor is an infrared sensor that detects user presence. When you are away from the monitor, it automatically reduces power consumption by up to 80%. You can adjust the detection range (up to 120cm) and signal strength via the OSD menu.
Troubleshooting
If you encounter issues:
- No Picture: Check power cable connections and ensure the power button is in the ON position. Verify signal cable connections.
- Image vibrates/flickers: Use the 'Auto' function in the OSD or adjust Phase/Clock settings (VGA mode only).
- Blurred/Indistinct text: Ensure the resolution is set to the native 1920 x 1080 @ 60Hz.
- SmartControl issues: Re-install the software or update your graphics driver.
Technical Specifications
- Panel Size: 23 inch (58.4cm)
- Native Resolution: 1920 x 1080 @ 60Hz
- Connectivity: DVI, VGA, DisplayPort (optional), USB 2.0 x 2, Audio In/Out
- Stand Adjustments: Tilt (-5°/+20°), Swivel (-65°/+65°), Pivot (90°), Height (110mm)
- Power Consumption: 26.7W (typ.), <0.3W (standby)
Manufacturer information
Philips
Practical help
Common problems
No Picture (Power LED not lit)
Check power cord connection and ensure power button is ON.
No Picture (Power LED is White)
Check computer power, signal cable connection, and ensure no pins are bent.
Image vibrates or flickers
Use 'Auto' function in OSD or adjust Phase/Clock in VGA mode.
Blurred or indistinct text
Set resolution to native 1920 x 1080 @ 60Hz.
Before use
- Ensure monitor is on a smooth surface for assembly.
- Check all cables (Power, VGA/DVI/DP).
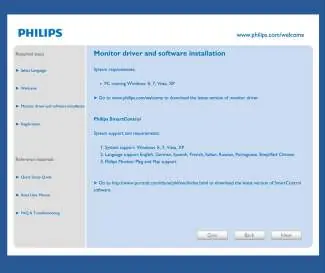
- Install monitor drivers and SmartControl software.
- Set resolution to 1920x1080 @ 60Hz.
Show more Show less
Specs in practice
- Native Resolution
- 1920 x 1080 @ 60 Hz for optimal performance.
Images and diagrams
- Base installation steps.
- Control button layout.
- OSD menu structure.
- PowerSensor detection range.
Model compatibility
- Compatible with Windows 8.1/8/7 and Mac OSX.
- Requires DDC/CI support for full SmartControl functionality.

Manual page author
Michael Turner
Technical manual editor