Electronics / Monitors
User Manual for Philips 231E1SB LCD Monitor
Comprehensive user guide for the Philips 231E1SB LCD monitor. Includes setup instructions, OSD settings, SmartControl II software guide, troubleshooting, and technical specifications.
Quick answers from the manual
Quick answer
- The Philips 231E1SB is a 23-inch LCD monitor. Setup involves attaching the base, connecting the power and signal cables (VGA/DVI), and installing the monitor driver if necessary. p. 72, 75, 77
Key actions
- Attach the base stand by inserting it into the base column until it clicks. p. 78, 79
- Connect the power cord and signal cable (VGA or DVI) to the monitor and PC. p. 76, 77
First start
- Turn on the computer and monitor. If an image appears, installation is complete. p. 77
Show 4 more answers Show less
Problems and fixes
No picture
Check power connection, ensure monitor is ON, and verify signal cable connection.
p. 14
After-image
This is normal for LCDs and will disappear after a period of time.
p. 15, 16Maintenance and reset
- To reset to factory settings, press the Menu button, then the Setup button, and select 'Reset'. p. 6
Technical specifications
| Parameter | Value | Meaning | Pages |
|---|---|---|---|
| Screen Size | 23 inches | Visual display area. | p. 35 |
| Native Resolution | 1920 x 1080 @ 60Hz | Optimal display resolution. | p. 37 |
| Power Consumption | < 50W | Typical power usage. | p. 38 |
Where to find it in the PDF
- Safety and Troubleshooting p. 2, 3, 14, 15
- Product Information p. 32, 35, 36, 37
- Installation p. 72, 75, 76, 77
Table of contents
Manual images
Click an image to enlargeQuick guide from the manual
The Philips 231E1SB is a 23-inch LCD monitor designed for optimal performance at a native resolution of 1920x1080 at 60Hz. This guide covers the installation, operation, and maintenance of your monitor. For the best experience, ensure your display settings are set to the native resolution.
Installation
To set up your monitor:

- Attach the Base Stand: Place the monitor face down on a smooth surface, then firmly insert the base stand into the base column until it clicks.
- Connecting to your PC: Connect the power cord to the back of the monitor. Connect the VGA or DVI signal cable to the video connector on your computer.
- Getting Started: Turn on your computer and monitor. If the monitor displays an image, the installation is complete.
Operation and OSD
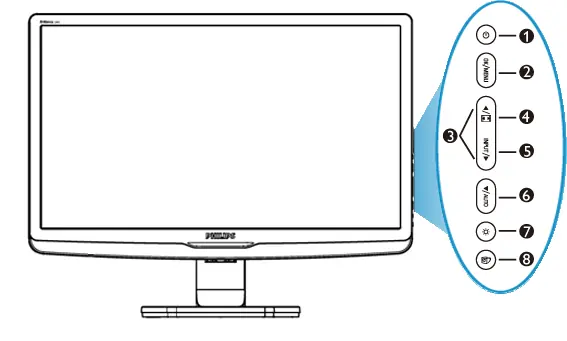
The On-Screen Display (OSD) allows you to adjust screen performance directly through an on-screen menu. Use the buttons on the front bezel to navigate the menu and confirm selections.
- SmartImage: Provides presets that optimize display for different content types (Office Work, Image Viewing, Entertainment, Economy, Off).
- SmartContrast: Dynamically analyzes content to optimize contrast ratio.
SmartControl II
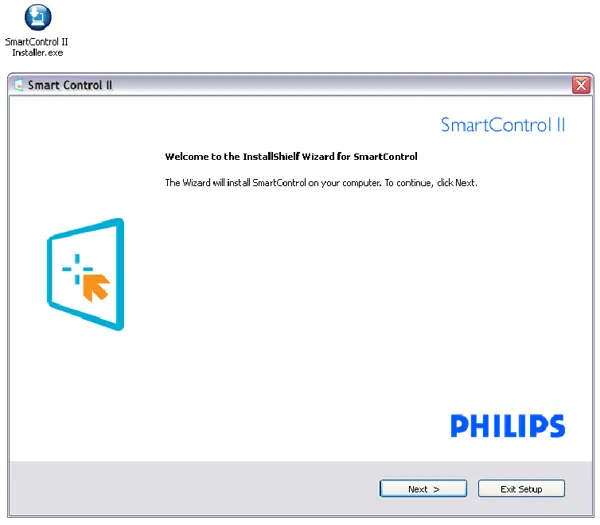
SmartControl II is monitor-based software that allows you to adjust display settings (brightness, contrast, color, etc.) through an on-screen graphic interface. It is recommended for business environments and can be installed from the provided CD-ROM.
Troubleshooting
If you encounter issues:
- No Picture: Ensure the power cord is plugged in and the power button is ON. Check if the signal cable is properly connected.
- Flickering: Press the Auto button or adjust the Phase/Clock settings in the OSD.
- After-image: This is a characteristic of LCD technology and usually disappears after a few hours.
Technical Specifications
- Screen Size: 23 inches
- Native Resolution: 1920 x 1080 @ 60Hz
- Power Consumption:< 50W (typical)
- Operating Temperature: 0°C to 40°C
Manufacturer information
Philips
Practical help
Common problems
No picture (Power LED not lit)
Ensure the power cord is plugged into the power outlet and the back of the monitor. Check that the power button is in the ON position.
No picture (Power LED blinking)
Ensure the computer is turned on and the signal cable is properly connected. Check for bent pins on the cable.
After-image appears
This is a characteristic of liquid crystal and is not a malfunction. It usually disappears after a period of time.
Auto button not working properly
The Auto function is designed for standard PCs. It may not work with non-standard video cards.
Before use
- Unpack all parts from the accessory pack.
- Place the monitor face down on a smooth surface.
- Attach the base stand to the monitor column.
- Connect the power cord.
- Connect the VGA or DVI signal cable to your PC.
- Turn on the monitor and your computer.
Show more Show less
Specs in practice
- Native Resolution
- 1920 x 1080 @ 60Hz for optimal performance.
- Power Consumption
- Less than 50W (typical) during normal operation.
- Operating Temperature
- 0°C to 40°C for optimal performance and longevity.
Images and diagrams
- Front view buttons: Power, Menu/OK, OSD adjustment, Input, Auto, Brightness, SmartImage.
- Rear view ports: VGA input, DVI-D input (option), AC power input, Kensington lock.
- Base attachment: Shows the monitor face down and the base stand insertion point.
Model compatibility
- Compatible with standard PCs, Macs, and workstations.
- Requires a cable adapter for some Mac systems.
- SmartControl II supports Windows 2000, XP, and Vista.

Manual page author
Michael Turner
Technical manual editor