Electronics / Monitors
Quick Start Guide for Philips 22BDL72xxL/74xxL Series LED Display
Quick start guide for the Philips 22BDL72xxL/74xxL Series LED Display. Includes installation steps, cabinet connection, cabling, and LED module mounting instructions.
Quick answers from the manual
Quick answer
- This guide covers the installation of the Philips 22BDL72xxL/74xxL LED display, including unpacking, cabinet assembly, daisy-chaining power/data cables, and mounting LED modules. p. 1, 2
Key actions
- Wear anti-static gloves before handling the cabinet. p. 1
- Connect power and data cables in a daisy chain. p. 2
First start
- Plug the power plug into the electric outlet only when the cables are properly wired. p. 2
Show 1 more answers Show less
Where to find it in the PDF
- Unpacking and Cabinet Connection p. 1
- Cabling and Module Installation p. 2
Table of contents
Manual images
Click an image to enlargeQuick guide from the manual
This document provides essential installation instructions for the Philips 22BDL72xxL/74xxL Series LED Display. It covers the physical assembly of the video wall, including cabinet connection, cabling, and module installation. Please ensure you have the necessary tools and follow safety precautions, such as wearing anti-static gloves.
Unpacking and Preparation
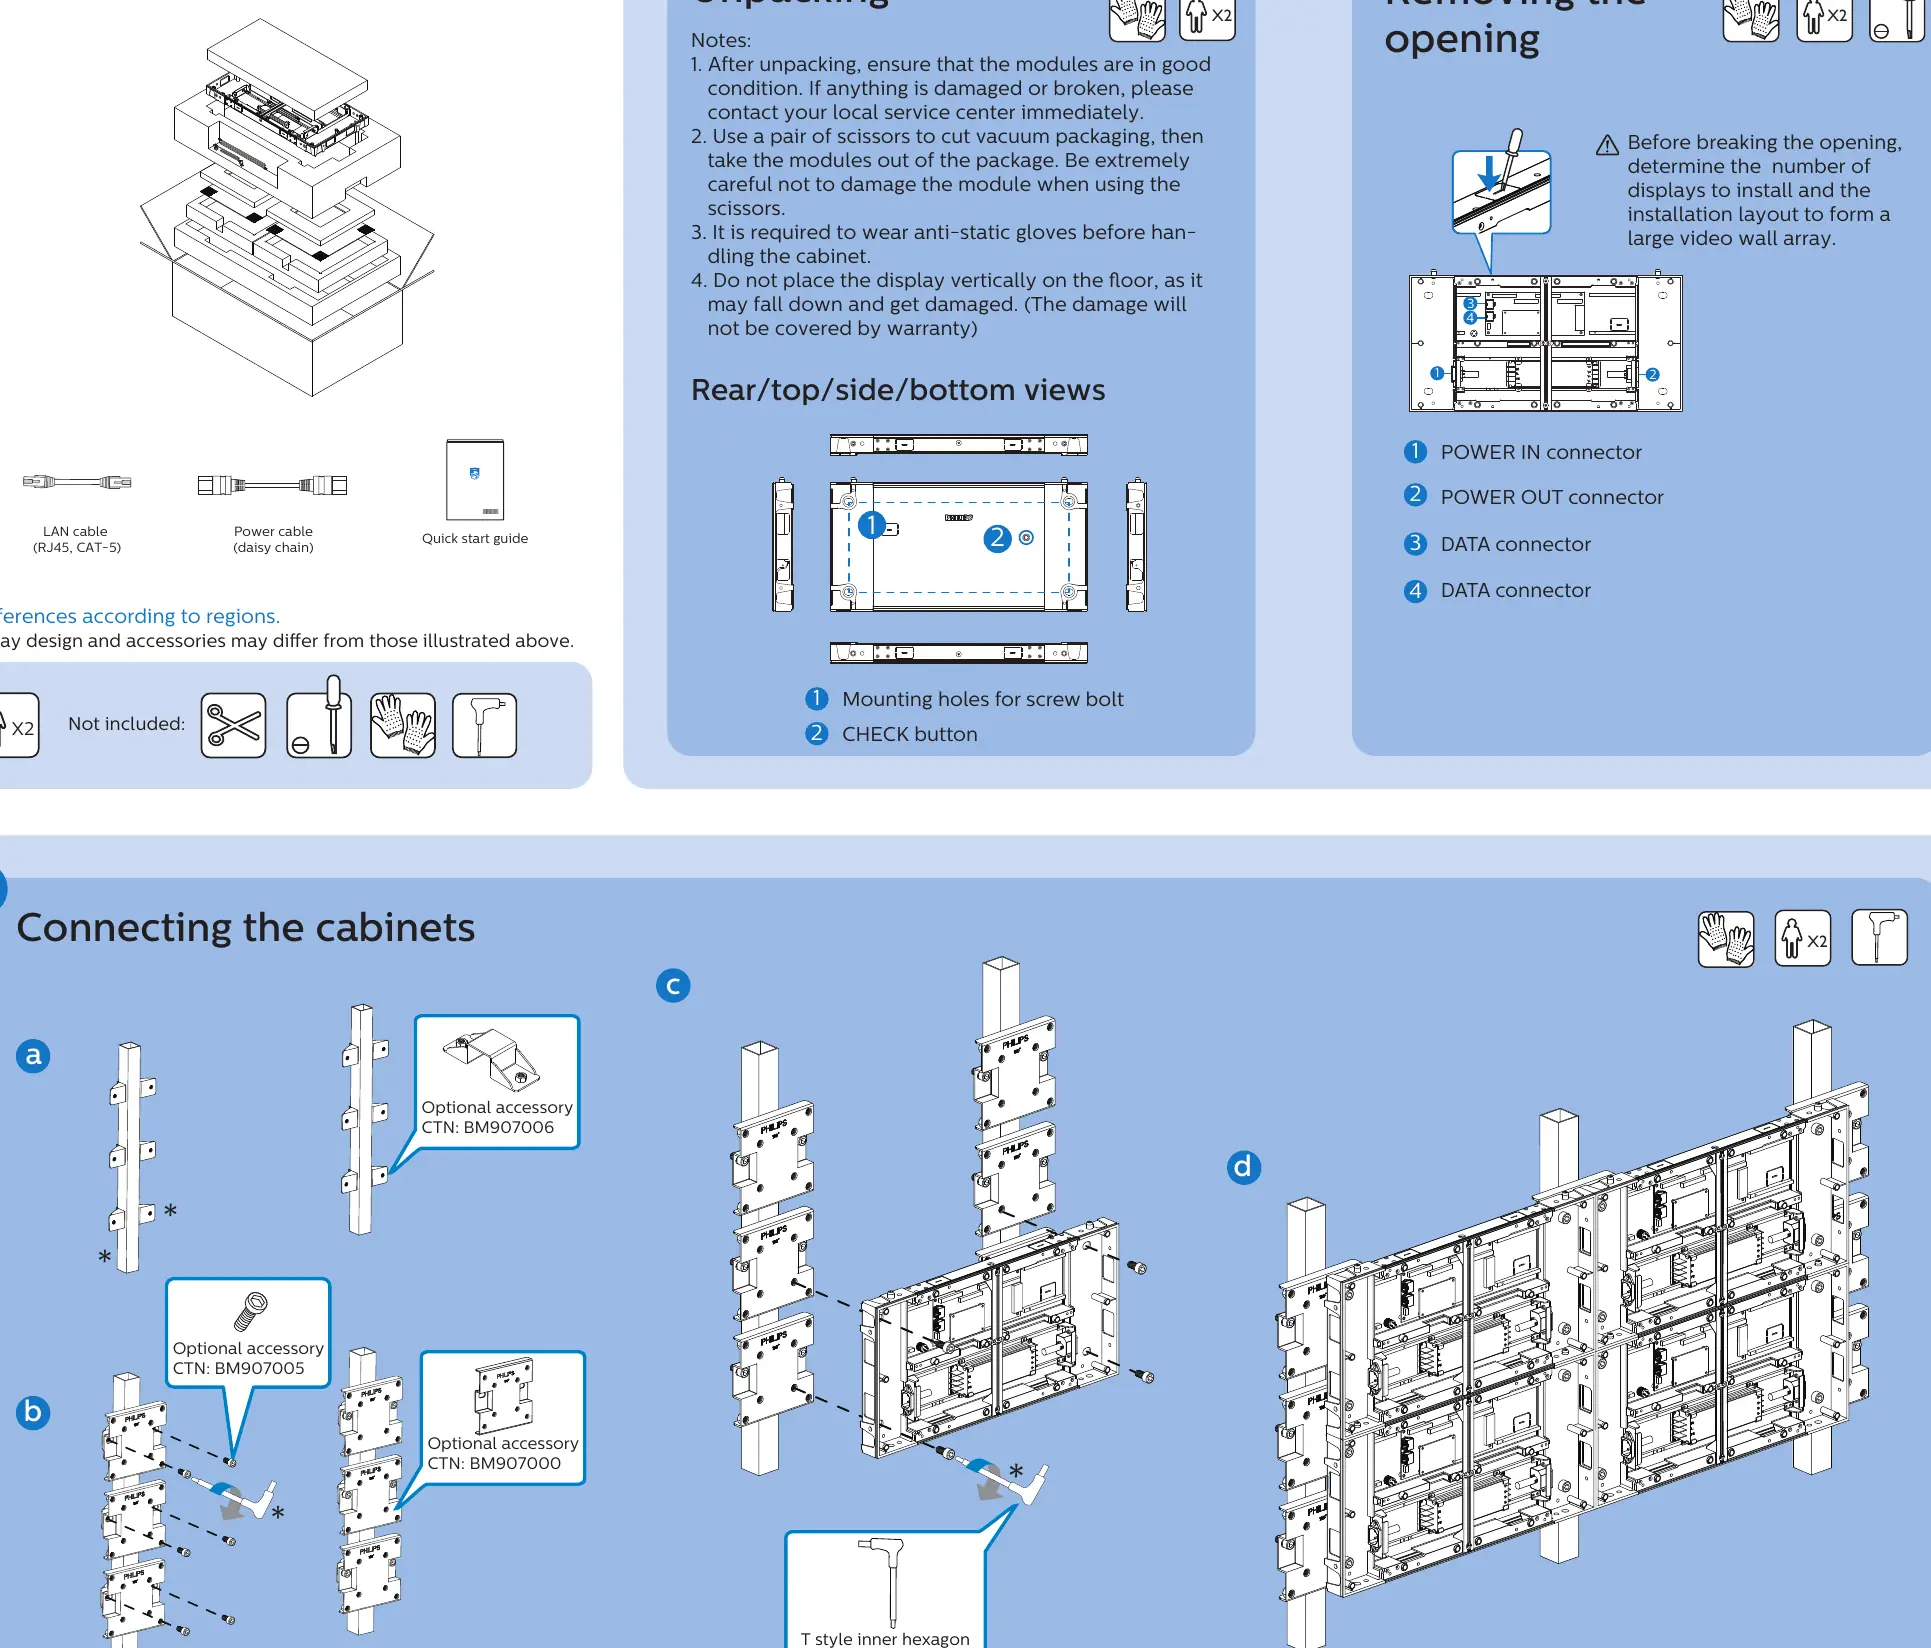
- After unpacking, inspect the modules for any damage. Contact your local service center if issues are found.
- Use scissors carefully to cut the vacuum packaging to avoid damaging the modules.
- Important: Always wear anti-static gloves before handling the cabinet.
- Do not place the display vertically on the floor, as it may fall and sustain damage not covered by warranty.
- Before breaking the opening, determine the number of displays and the installation layout for your video wall.
Connecting the Cabinets
To assemble the video wall, connect the cabinets using the appropriate mounting holes. You may require optional accessories (such as BM907000, BM907005, or BM907006) depending on your configuration. Use a size 7 T-style inner hexagon wrench to secure the connections.
Connecting Data and Power Cables
Once the cabinets are mounted, proceed to wire the system:
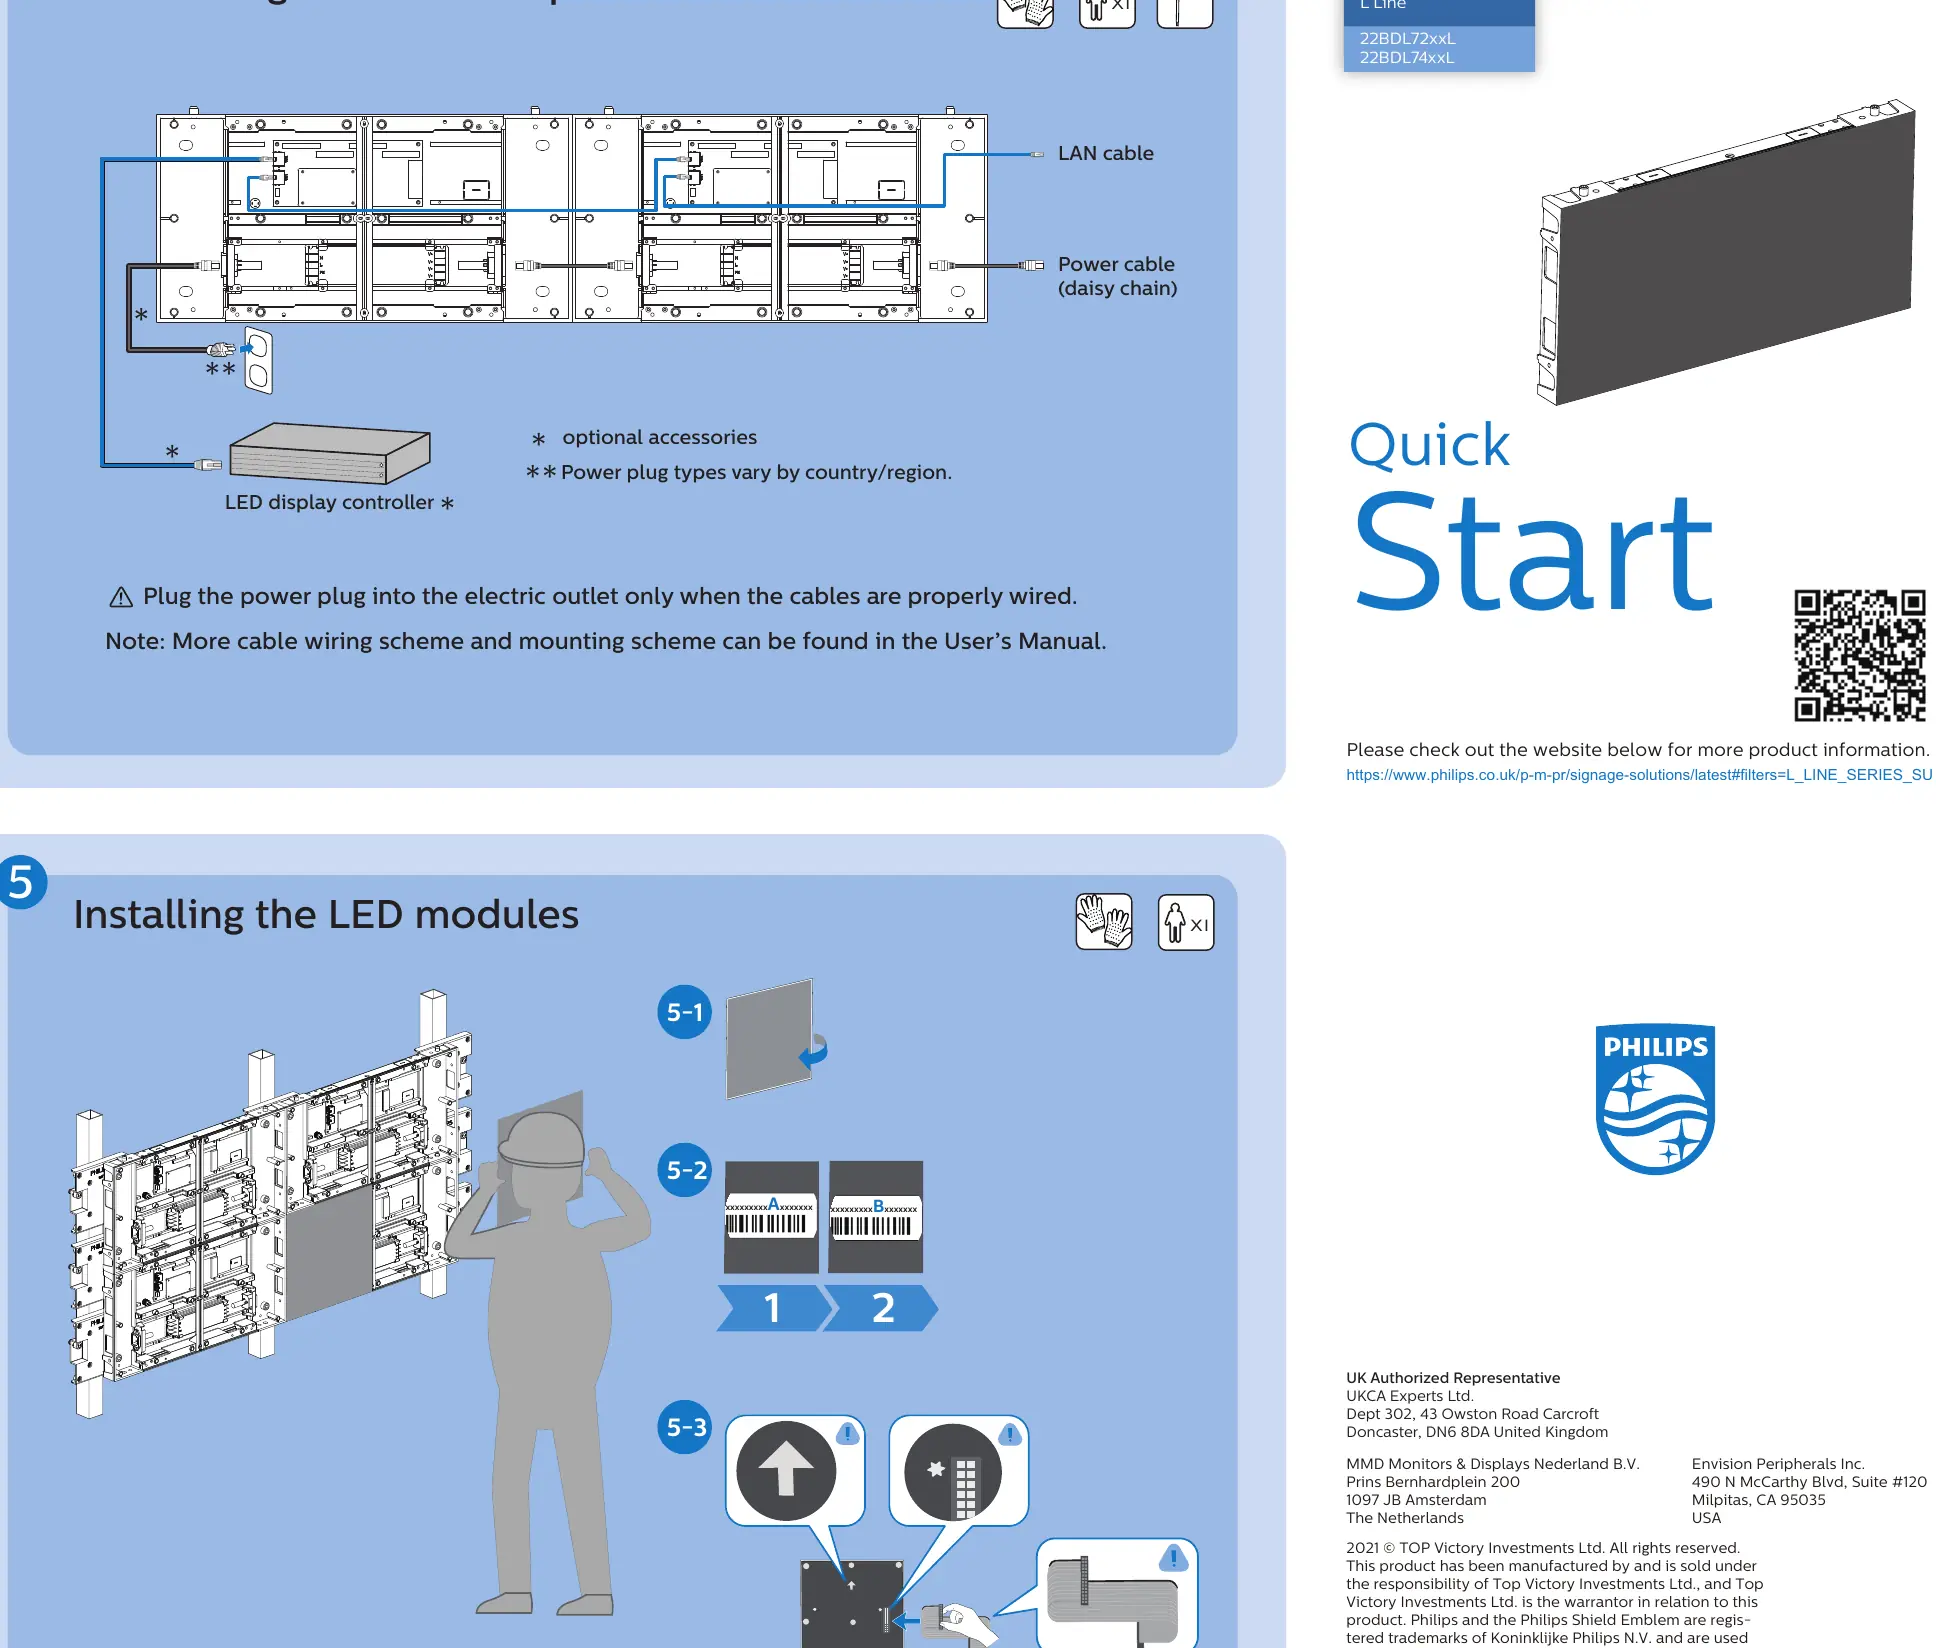
- Connect the power cables in a daisy chain configuration.
- Connect the LAN cables (RJ45, CAT-5) for data transmission.
- Warning: Only plug the power plug into the electric outlet after all cables are properly wired.
Installing the LED Modules
After the cabinet structure and wiring are complete, install the LED modules:
- Align the module with the cabinet frame.
- Ensure the module is securely attached to the cabinet.
- Verify that the modules are flush and properly seated.
Manufacturer information
Philips
Practical help
Common problems
Display damage during unpacking
Use scissors carefully when cutting vacuum packaging to avoid scratching or damaging the module surface.
Display falls over
Never place the display vertically on the floor. Ensure it is properly supported or mounted.
Before use
- Wear anti-static gloves before handling the cabinet.
- Inspect modules for damage immediately after unpacking.
- Determine the total number of displays and the layout before starting installation.
- Ensure you have a size 7 T-style inner hexagon wrench.
- Verify all data and power cables are connected before plugging into the power outlet.
Show more Show less
Images and diagrams
- Step 1: Unpacking and identifying rear/top/side/bottom views and mounting holes.
- Step 3: Connecting cabinets using optional accessories and T-style wrench.
- Step 4: Daisy-chaining power and data cables between displays.
- Step 5: Attaching LED modules to the cabinet frame.
Model compatibility
- Requires optional accessories (CTN: BM907000, BM907005, BM907006) depending on the installation layout.
- Power plug types vary by country/region.

Manual page author
Emily Carter
User documentation editor