Electronics / Monitors
User Guide for Philips 24B2N4200 Business Monitor
Quick start guide for the Philips 24B2N4200 Business Monitor, covering assembly, ergonomic adjustments, connection ports, and USB hub setup.
Quick answers from the manual
Quick answer
- This guide provides instructions for assembling the Philips 24B2N4200 monitor, connecting video and USB devices, and adjusting the ergonomic stand. p. 1
Key actions
- Assemble the monitor stand. p. 1
- Connect video and USB cables. p. 1
First start
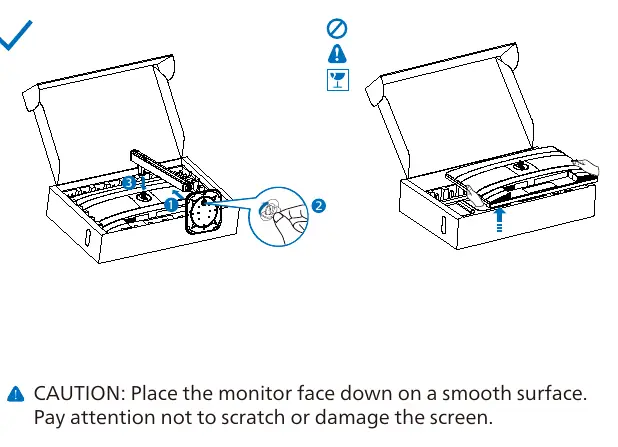
- Place the monitor face down on a smooth surface to avoid scratches. p. 1
Show 2 more answers Show less
Technical specifications
| Parameter | Value | Meaning | Pages |
|---|---|---|---|
| USB-C Power | 15W | Power delivery capacity for connected devices. | p. 1 |
| Height Adjustment | 150mm | Maximum vertical adjustment range. | p. 1 |
Where to find it in the PDF
- Quick Start Guide p. 1
Table of contents
Manual images
Click an image to enlargeQuick guide from the manual
This document provides essential setup instructions for the Philips 24B2N4200 Business Monitor. It covers physical assembly, ergonomic adjustments, and connectivity options to ensure proper installation and usage.
Assembly and Setup
To prevent damage to the screen, always place the monitor face down on a smooth, flat surface during assembly. Ensure the stand is securely attached to the monitor base before attempting to stand the unit upright.
Ergonomic Adjustments
The monitor stand supports several ergonomic adjustments to improve viewing comfort:
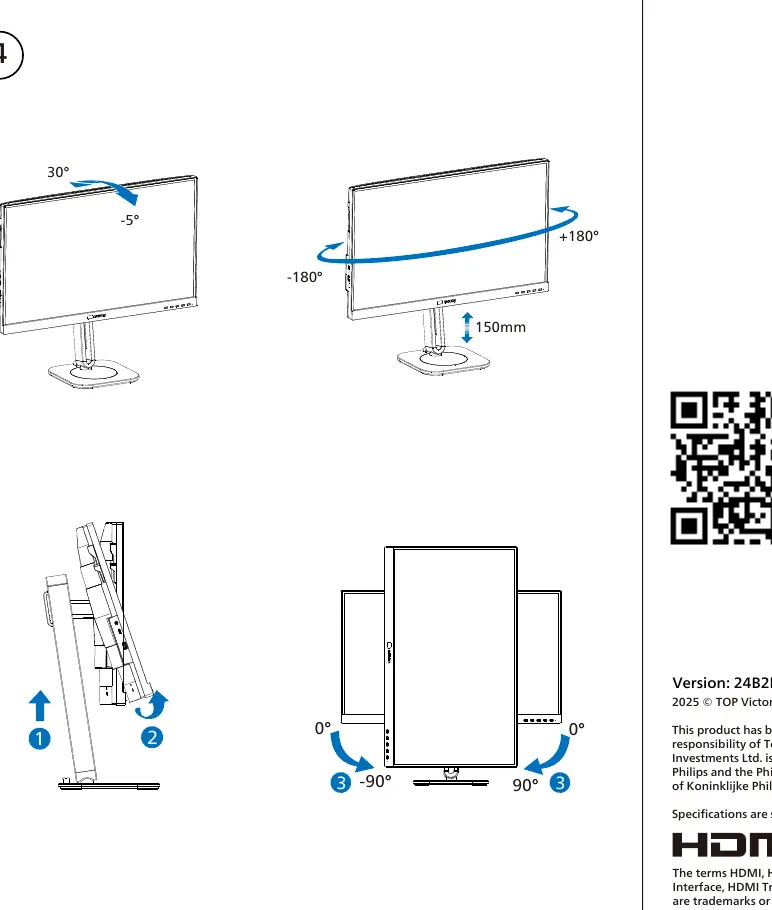
- Tilt: Adjustable from -5° to 30°.
- Swivel: Adjustable from -180° to +180°.
- Height: Adjustable up to 150mm.
- Pivot: Supports rotation from -90° to 90°.
Connections and Ports
The monitor features a variety of input and output ports to support different devices:
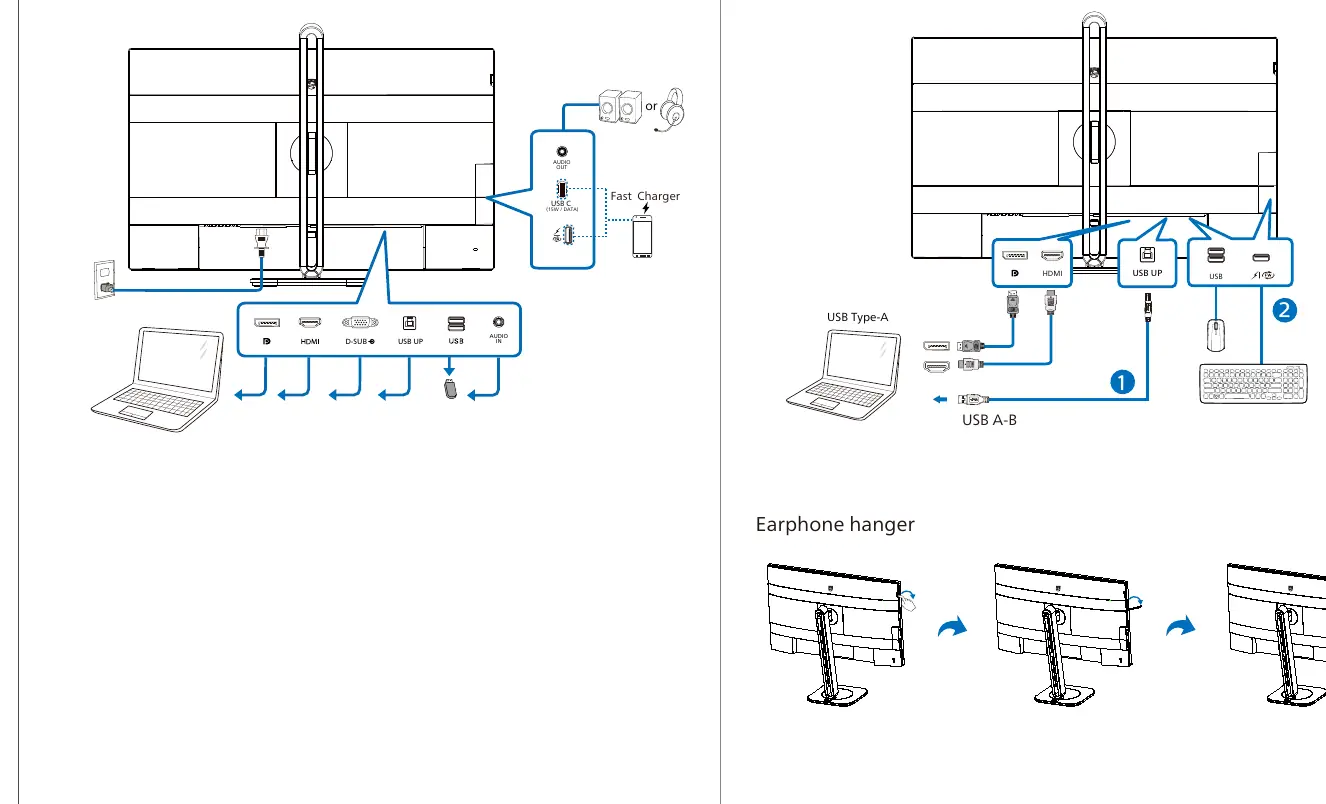
- Video Inputs: HDMI, DisplayPort (DP), and D-SUB.
- USB Connectivity: Includes USB-C (supporting 15W power delivery and data), USB-A, and USB-B (upstream) ports.
- Audio: Audio input and output jacks are available.
USB Hub and Accessories
The monitor includes a built-in USB hub. Connect the USB A-B cable to your computer to enable the USB Type-A ports on the monitor. An earphone hanger is also provided for convenient storage of your headset.
Manufacturer information
Philips
Practical help
Common problems
Screen damage during setup
Always place the monitor face down on a smooth, clean surface before attaching the stand.
USB hub not working
Ensure the USB A-B cable is connected between the monitor and your computer.
Before use
- Place the monitor face down on a smooth surface.
- Verify all necessary cables (HDMI, DP, USB-C) are available.
- Attach the stand securely to the monitor base.
- Check that the workspace is stable and flat.
Show more Show less
Specs in practice
- Height Adjustment
- Allows for 150mm of vertical movement for ergonomic positioning.
Images and diagrams
- The manual provides visual guides for stand assembly, showing the correct orientation for attaching the base.
- Connection diagrams illustrate the location of HDMI, DP, USB-C, and audio ports.
- Ergonomic diagrams demonstrate the range of motion for tilt, swivel, and height adjustments.
Model compatibility
- Actual product and accessories may vary by country or region.

Manual page author
David Miller
Documentation analyst