Electronics / Monitors
Installation Guide for Philips 22BDL7219L-00 LED Display
A comprehensive installation guide for the Philips 22BDL7219L-00 LED display. This guide covers unpacking, cabinet assembly, data and power cabling, and LED module installation.
Quick answers from the manual
Quick answer
- This guide provides the physical installation procedure for the Philips 22BDL7219L-00 LED display, including cabinet mounting, daisy-chain cabling, and module installation. p. 1, 2
Key actions
- Wear anti-static gloves before handling the cabinet. p. 1
- Connect power and data cables in a daisy chain configuration. p. 2
First start
- Ensure all cables are properly wired before plugging the power plug into the electric outlet. p. 2
Show 1 more answers Show less
Where to find it in the PDF
- Installation Steps p. 1, 2
Table of contents
Quick guide from the manual
This document provides essential instructions for the physical installation of the Philips 22BDL7219L-00 LED display. It covers the process from unpacking to final module installation.
Safety precautions
- Anti-static protection: It is required to wear anti-static gloves before handling the cabinet.
- Handling: Do not place the display vertically on the floor, as it may fall and sustain damage not covered by warranty.
- Power safety: Only plug the power cable into an electric outlet after all cables are properly wired.
Unpacking
Upon unpacking, ensure all modules are in good condition. If any damage is found, contact your local service center immediately. Use scissors to cut the vacuum packaging, taking extreme care not to damage the module.
Cabinet assembly
Before assembly, determine the number of displays and the installation layout for the video wall. Use the mounting holes on the cabinet to secure the units. Optional accessories (CTN: BM907006, BM907005, BM907000) may be required depending on the configuration. A T-style inner hexagon wrench (size 7) is required for assembly.
Connecting data and power cables
The system uses a daisy-chain configuration for both power and data:
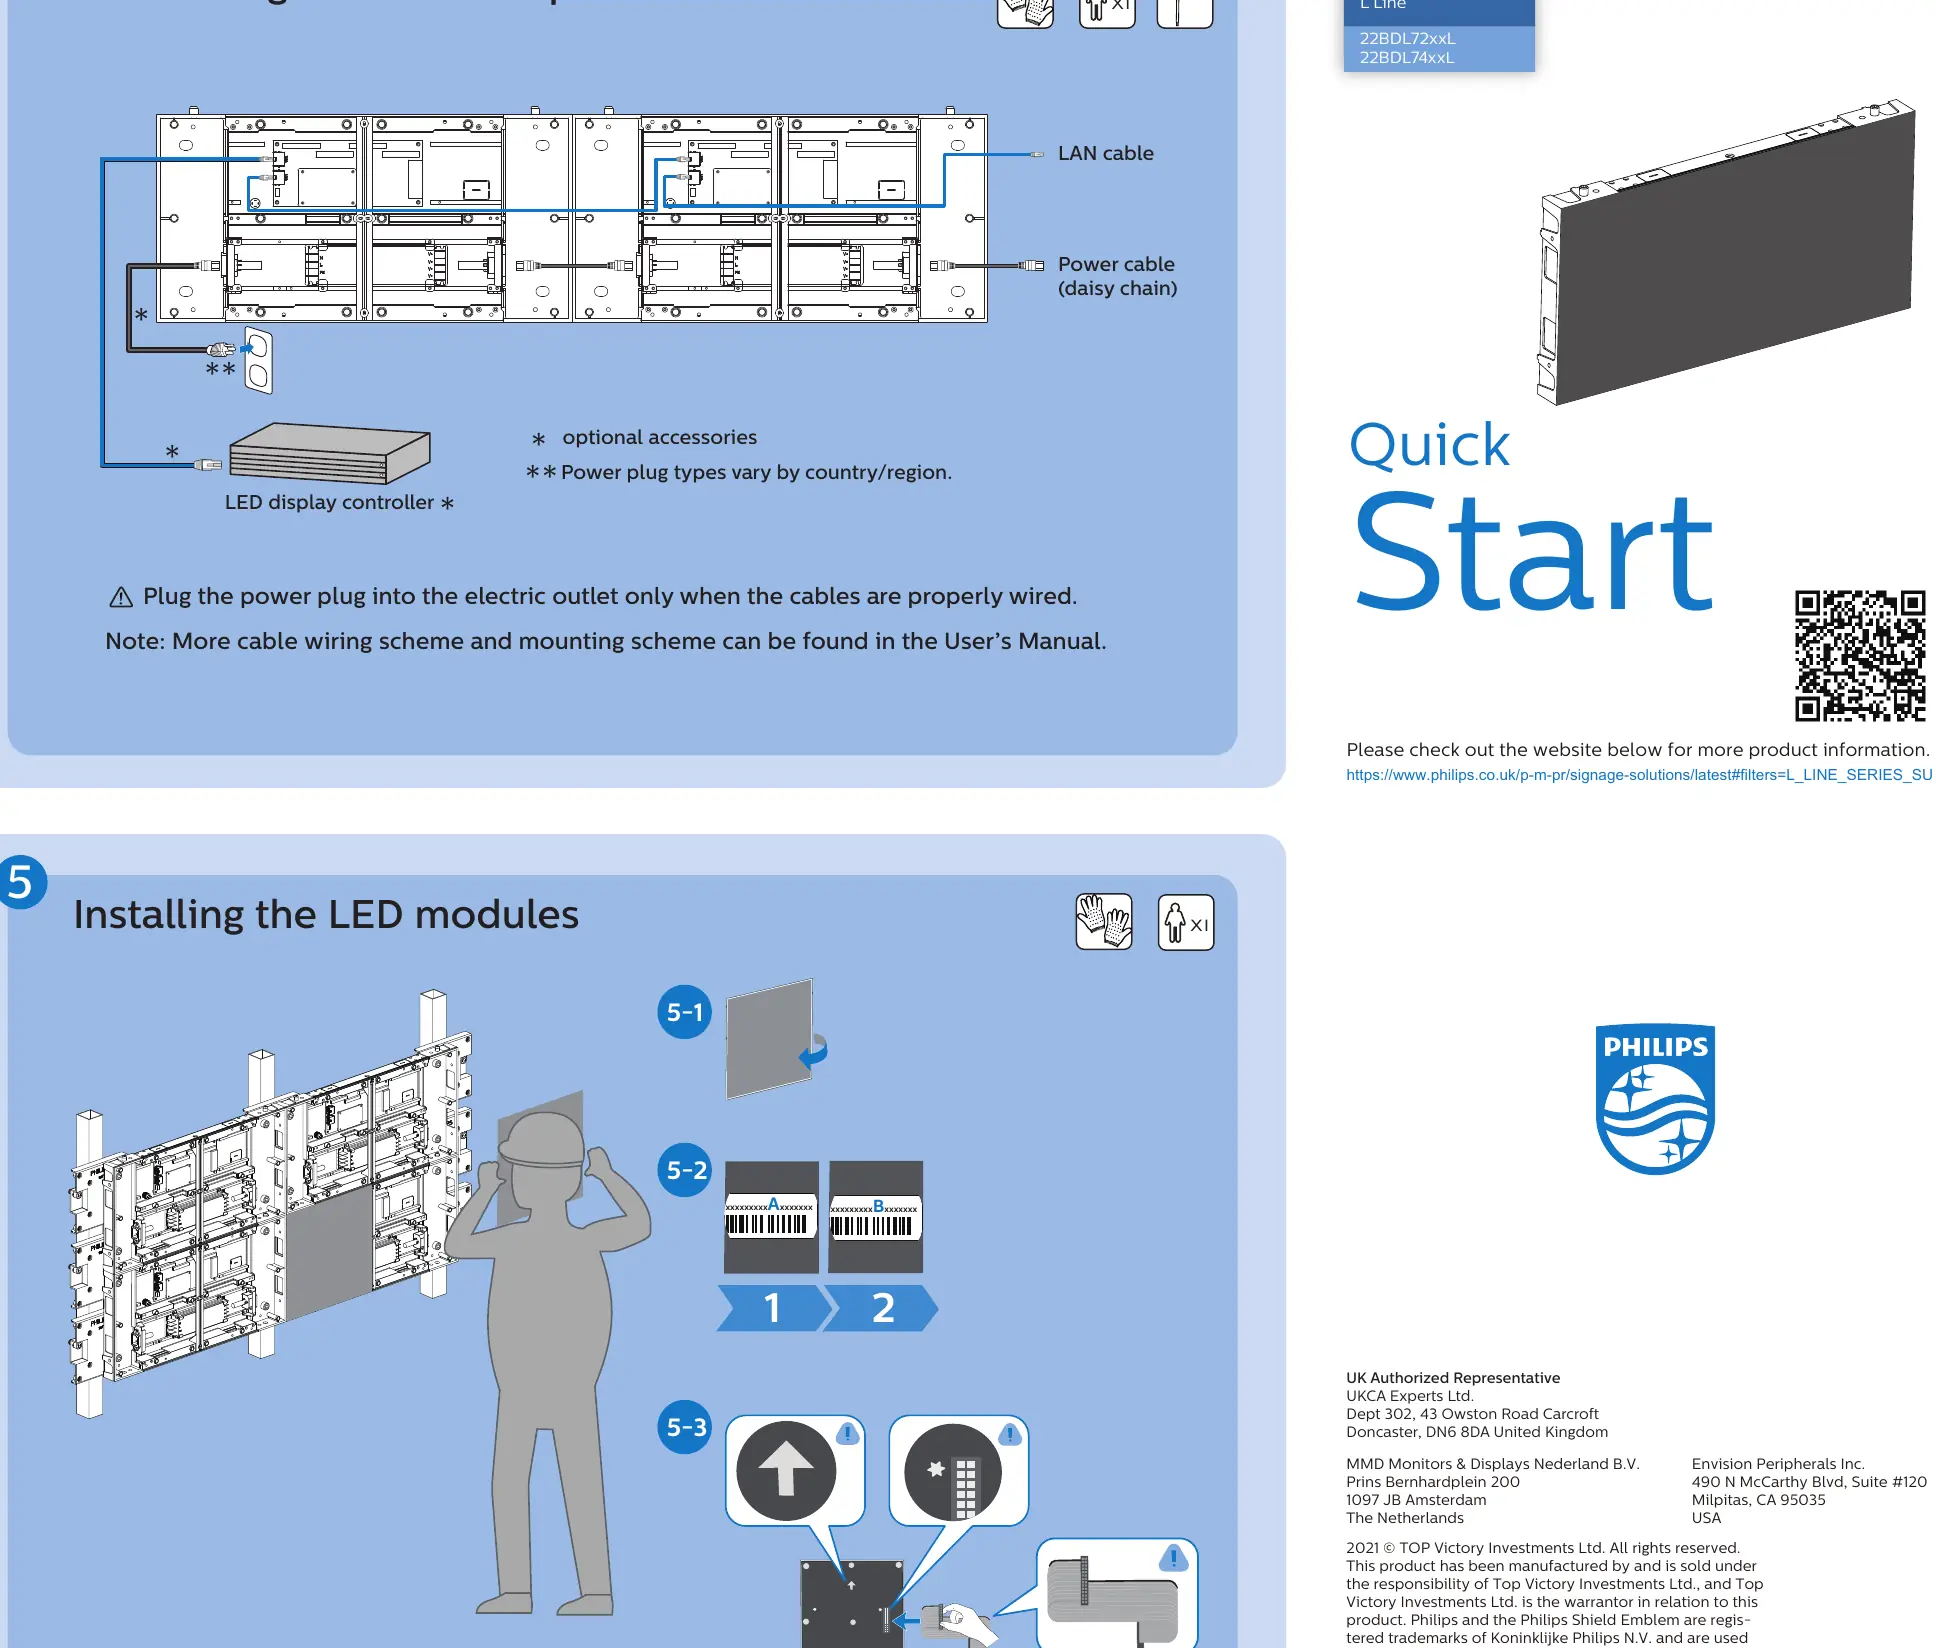
- Power: Connect power cables between cabinets.
- Data: Connect LAN cables (RJ45, CAT-5) between cabinets.
- Controller: Connect the chain to the LED display controller.
Ensure all connections are secure before connecting to the main power supply.
Installing the LED modules
Once the cabinets are mounted and wired, install the LED modules. Ensure proper alignment of the modules (labeled A/B) to the cabinet structure. Follow the sequence indicated in the manual to ensure correct placement.
Manufacturer information
Philips
Practical help
Common problems
Display damage during unpacking
Do not place the display vertically on the floor. Use anti-static gloves when handling.
Power or connection issues
Ensure all cables are properly wired in a daisy-chain configuration before plugging the power plug into the electric outlet.
Before use
- Wear anti-static gloves
- Inspect modules for damage immediately after unpacking
- Determine the installation layout for the video wall
- Ensure T-style inner hexagon wrench (size 7) is available
- Verify availability of optional mounting accessories (BM907006, BM907005, BM907000)
Show more Show less
Images and diagrams
- Step 1: Unpacking and identifying rear/top/side/bottom views
- Step 3: Connecting cabinets using optional accessories and T-wrench
- Step 4: Daisy-chaining data and power cables
- Step 5: Aligning and installing LED modules
Model compatibility
- Compatible with L Line series (22BDL72xxL, 22BDL74xxL)
- Requires optional accessories for specific mounting configurations

Manual page author
David Miller
Documentation analyst