Electronics / Monitors
Philips 190V4L Monitor User Manual
Quick guide for the Philips 190V4L monitor. Includes setup instructions, OSD menu navigation, SmartControl Lite features, technical specifications, and troubleshooting steps.
Table of contents
Manual images
Click an image to enlargeQuick Guide
This guide provides essential information for setting up and operating your Philips 190V4L monitor. For optimal performance, ensure your computer is set to the native resolution of 1440 x 900 at 60Hz.
Safety and Maintenance
- Avoid placing the monitor in direct sunlight or near heat sources.
- Keep the monitor away from oil, water, or excessive moisture.
- Do not block ventilation openings.
- Clean the screen with a soft, dry cloth. Do not use alcohol-based or ammonia-based cleaners.
- If the monitor will not be used for a long time, disconnect the power cable.
Installation
Base Stand Installation:
- Place the monitor face down on a soft, flat surface to prevent scratches.
- Attach the base column to the monitor.
- Hold the monitor base with both hands and firmly insert it into the base column.
Connecting to PC:
- Connect the power cable to the back of the monitor.
- Turn off your computer and unplug the power cable.
- Connect the signal cable (VGA or DVI) to the video connector on the back of your computer.
- Connect the monitor power cable to a nearby outlet.
- Turn on your computer and monitor. If an image appears, installation is complete.
OSD Menu
The On-Screen Display (OSD) allows you to adjust monitor settings. Use the buttons on the front bezel to navigate:
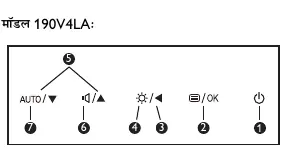
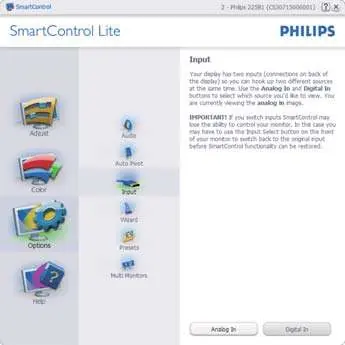
- Input: Select between VGA and DVI inputs.
- Picture: Adjust Brightness, Contrast, and SmartContrast.
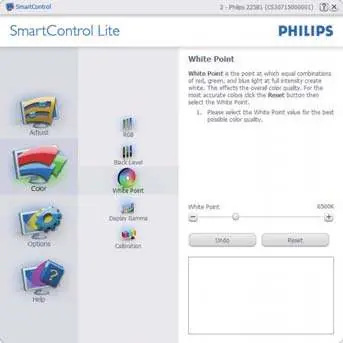
- Color: Adjust Color Temperature (6500K, 9300K) or sRGB settings.
- OSD Settings: Adjust horizontal/vertical position, transparency, and OSD timeout.
- Setup: Auto-adjust, phase, clock, and reset options.
SmartControl Lite
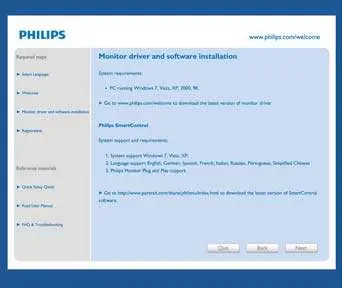
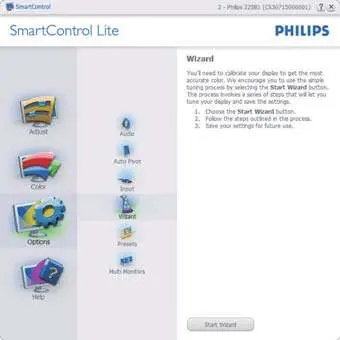
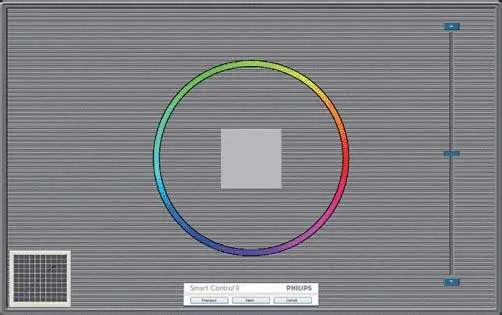
SmartControl Lite is software that allows you to control your monitor via an on-screen graphical interface. It includes features for calibration, color adjustment, and input selection. It is compatible with Windows 7, Vista, and XP.
Troubleshooting
- No Picture (LED off): Check if the power cable is connected to the outlet and the monitor.
- No Picture (LED white): Ensure the computer is on and the signal cable is properly connected.
- Image not centered: Use the Auto function in the OSD menu.
- Vertical/Horizontal flicker: Use the Auto function or adjust Phase and Clock settings in the OSD menu.
Technical Specifications
- Panel Type: TFT-LCD
- Backlight: LED
- Native Resolution: 1440 x 900 @ 60Hz
- Response Time: 5ms
- Connectivity: DVI (Digital), VGA (Analog)
- VESA Mount: 100mm x 100mm
Manufacturer information
Philips
Practical help
Common problems
No picture (LED off)
Check if the power cable is securely connected to the wall outlet and the monitor.
No picture (LED white)
Ensure the computer is turned on and the signal cable is properly connected to the PC.
Image not centered
Use the Auto function in the OSD menu to automatically adjust the image position.
Vertical or horizontal flicker
Use the Auto function or manually adjust the Phase and Clock settings in the OSD menu.
Before use
- Ensure the monitor is placed on a stable, flat surface.
- Verify the power cable is connected securely.
- Connect the VGA or DVI signal cable to the PC.
- Ensure the PC is turned off before making connections.
- Check for VESA mount compatibility (100mm x 100mm) if wall mounting.
Show more Show less
Specs in practice
- Native Resolution
- 1440 x 900 at 60Hz is the optimal resolution for the best display quality.
- Response Time
- 5ms indicates the speed at which pixels change color, important for reducing ghosting in motion.
- Aspect Ratio
- 16:10 is the widescreen format of this display.
Images and diagrams
- Base stand installation: Shows placing the monitor face down and attaching the base column and base.
- OSD button layout: Identifies the function of each button on the front bezel (Power, OSD Menu/OK, Brightness, Input, etc.).
Model compatibility
- Compatible with Windows 7, Vista, XP, Mac OSX, and Linux.
- Supports DDC/CI and sRGB standards.

Manual page author
David Miller
Documentation analyst