Tools / Saws
User Manual for PowerSmart DB7659H-22 22-inch Two Stage Gas Snow Thrower
Quick guide for the PowerSmart DB7659H-22 22-inch Two Stage Gas Snow Thrower. Includes assembly instructions, operating procedures, maintenance tips, and troubleshooting.
Quick answers from the manual
Quick answer
- To operate the snow thrower, start the engine, adjust the chute direction, engage the auger control handle, and then engage the drive control handle to move forward. p. 19
Key actions
- Clear a clogged chute p. 19, 20
- Replace shear pins p. 21
First start
- Pre-operation inspection p. 16
Show 4 more answers Show less
Problems and fixes
Engine fails to start
Check spark plug wire, safety key, choke position, and fuel quality.
p. 25Maintenance and reset
- Tire pressure maintenance p. 20
Technical specifications
| Parameter | Value | Meaning | Pages |
|---|---|---|---|
| Engine | 212cc | Engine displacement | p. 3 |
| Clearing Width | 22 in | Width of snow path | p. 3 |
Where to find it in the PDF
- Technical Data p. 3
- Assembly p. 13, 14, 15
- Maintenance p. 20, 21, 22, 23
Table of contents
Manual images
Click an image to enlargeQuick guide from the manual
This manual provides essential instructions for the safe operation and maintenance of the PowerSmart DB7659H-22 22-inch Two Stage Gas Snow Thrower. For technical support, contact customer service at 1-800-791-9458 (Mon-Fri 9am-5pm EST) or email [email protected].
Safety information
Warning: This machine is capable of amputating fingers, hands, toes, and feet. Always follow these safety rules:
- Never use your hands to clear a clogged chute; use the provided clean-out tool.
- Keep bystanders, pets, and children at least 75 feet away during operation.
- Stop the engine and disconnect the spark plug wire before performing any maintenance or adjustments.
- Never operate indoors or in poorly ventilated areas due to carbon monoxide risk.
- Handle gasoline with extreme care; never refuel while the engine is hot or running.
Assembly and adjustments
The snow thrower requires partial assembly before use:
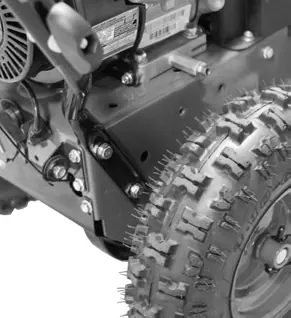
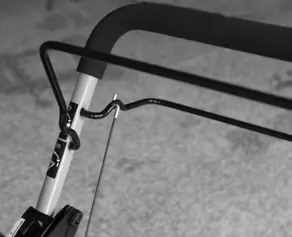

- Handle assembly: Attach the lower handle using four bolts, then attach the upper handle using four knobs, washers, and bolts.
- Cables: Attach the drive and auger cables to the control handles. Ensure cables are routed under the handle assembly and move freely without binding.
- Chute assembly: Align the discharge chute with the base mount holes and secure with screws, locknuts, and washers.
- Skid shoes: Install skid shoes on the auger housing. Adjust the height based on the surface: lower for smooth surfaces (concrete/asphalt) and higher for rough surfaces (gravel/dirt).
Operating your snow thrower
Before starting, ensure the engine is filled with oil and gasoline to the proper level. Refer to the separate engine manual for specific engine operation instructions.
- Starting: Start the engine and let it run for several minutes. Adjust the chute direction using the rotation handle.
- Clearing snow: Engage the auger control handle to start the auger, then engage the drive control handle to move forward.
- Stopping: Engage the auger for 30 seconds to clear remaining snow, release the control handles, and set the engine switch to OFF.
Maintenance
Regular maintenance is required to ensure safe operation:
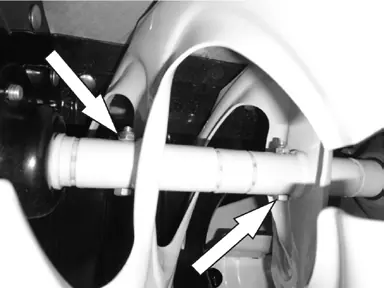

- Tire inflation: Check tire pressure before each use; it should be between 20-24 psi.
- Shear pins: If the auger stops rotating, check the shear pins. Replace broken pins with the provided spares. Never use standard bolts as replacements.
- Belt maintenance: If the auger fails to rotate or performs poorly, inspect the auger belt for wear, damage, or improper tension.
- Storage: Clean the unit of snow and ice after each use. Store in a dry, locked place. Do not store with fuel in the tank for extended periods.
Troubleshooting
If you encounter issues, consult the troubleshooting section. Common problems include engine starting failures, drive system issues, or auger performance problems. Always stop the engine and disconnect the spark plug wire before attempting any repairs.
Practical help
Common problems
Engine fails to start
Check if spark plug wire is connected, ensure safety key is inserted, move choke to START, or prime the engine.
No forward or reverse drive
Check if drive belt is loose or damaged, or if friction drive wheel is worn.
Auger not rotating
Check for clogged chute, broken shear pins, or loose/damaged auger belt.
Engine runs erratic or stalls
Check for stale fuel, clogged fuel system, or loose spark plug wire.
Before use
- Read the engine manual.
- Check oil and gasoline levels.
- Ensure all components are properly attached.
- Inspect for broken or damaged parts.
- Verify all fasteners are tight.
- Check tire pressure (20-24 psi).
Show more Show less
Specs in practice
- Clearing Width
- 22 inches
- Clearing Height
- 15 inches
Images and diagrams
- Panel Assembly: Shows handle and control cable configuration.
- Frame Assembly: Details drive system and wheel components.
- Auger Housing Assembly: Illustrates auger, impeller, and chute components.
Model compatibility
- Use only manufacturer-approved attachments (e.g., wheel weights, tire chains).
- Use only original equipment manufacturer (OEM) parts for repairs.

Manual page author
Michael Turner
Technical manual editor