Plumbing / Sinks Faucets
Installation and User Guide for RAVAK Freedom FM 080.XX Floor-Mounted Bathtub Tap
Quick guide for the RAVAK Freedom FM 080.XX floor-mounted bathtub tap. Includes installation steps, technical requirements, and maintenance instructions for models FM 080.00CR and FM 080.20BL.
Table of contents
Manual images
Click an image to enlargeImportant Information
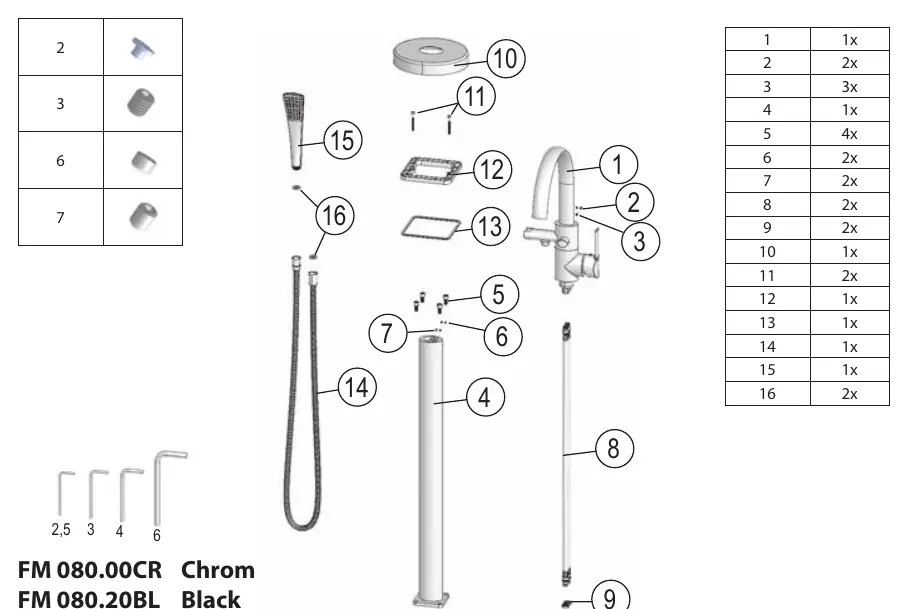
This document provides installation and maintenance instructions for the RAVAK Freedom floor-mounted bathtub tap, available in Chrome (FM 080.00CR) and Black (FM 080.20BL) finishes. Ensure all components are present before beginning installation.
Technical Specifications
The faucet is designed for the following operating conditions:
- Operating Pressure: 0.1 - 0.5 MPa
- Water Temperature: 5°C - 65°C
Installation
Installation should be performed by a qualified professional. Follow these steps to assemble and mount the unit:
- Preparation: Prepare the floor surface and remove any old components. Ensure the water supply lines are ready.
- Body Assembly: Assemble the faucet body, ensuring all seals and connections are secure.
- Connection: Connect the water supply hoses to the faucet body.
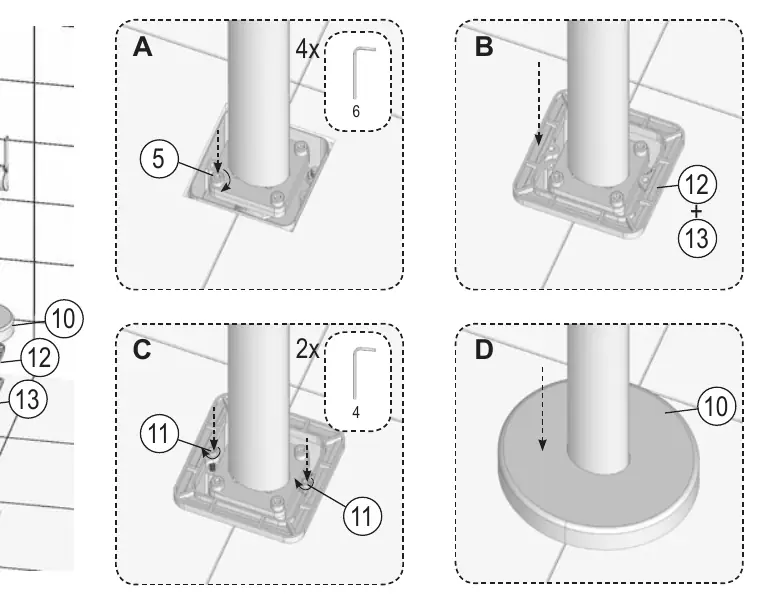
- Floor Mounting: Position the base assembly on the floor. Use the provided hardware to secure the base to the floor surface.
- Final Assembly: Attach the faucet body to the base assembly.
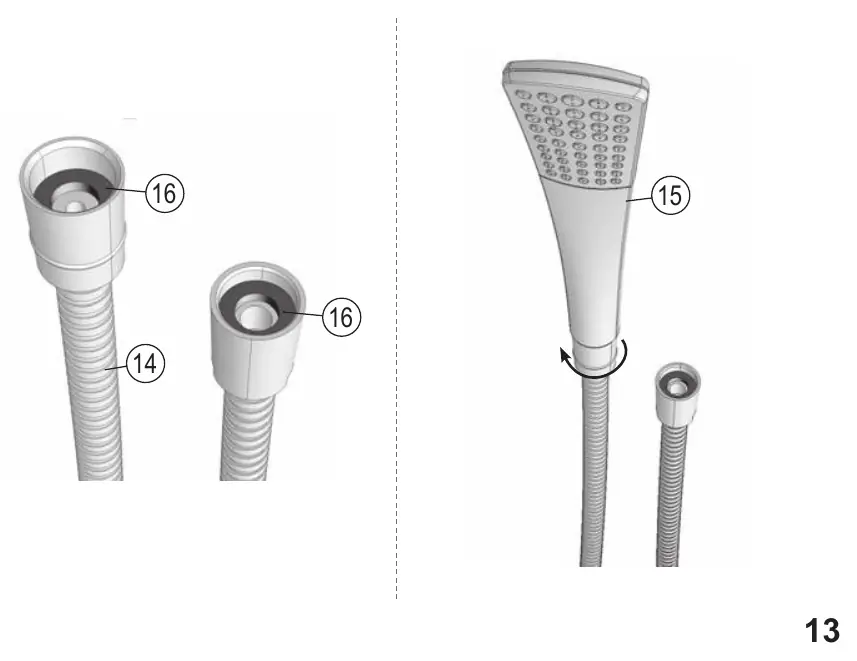
- Shower Hose: Connect the shower hose and hand shower to the faucet outlet.
Maintenance
To maintain the appearance and functionality of your RAVAK faucet:
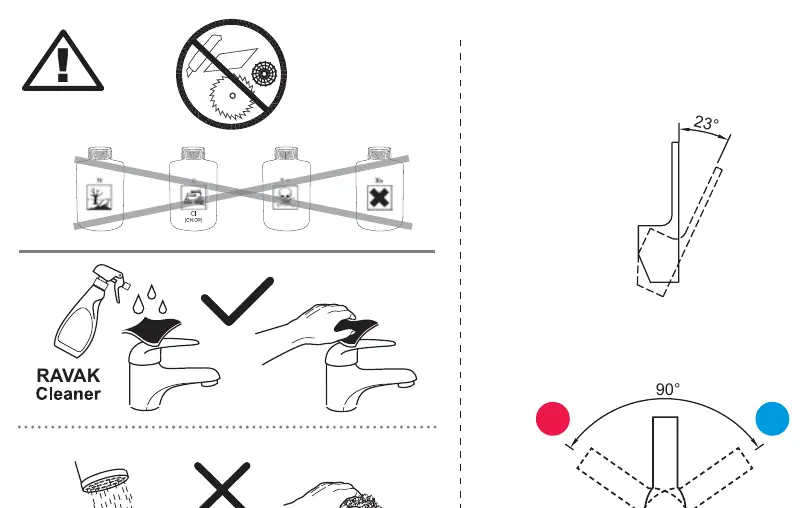
- Clean the surface using RAVAK Cleaner or a mild, non-abrasive detergent.
- Do not use abrasive sponges, steel wool, or aggressive chemical cleaners (e.g., chlorine-based products), as these can damage the finish.
- Regularly check connections for leaks.
Practical help
Common problems
Leaking at the base connection
Ensure the seals (part 9) are correctly positioned and the base is tightened securely to the floor.
Low water flow
Check the aerator and hose connections for debris or blockages.
Before use
- Verify water pressure is within 0.1 - 0.5 MPa.
- Verify water temperature is within 5°C - 65°C.
- Ensure all parts listed in the exploded view are present.
- Prepare the floor surface for mounting.
- Ensure you have the necessary tools (hex keys provided).
Images and diagrams
- Page 2 provides an exploded view of all components with a parts list.
- Page 12 illustrates the four-step floor mounting sequence (A, B, C, D).
- Page 13 shows the correct assembly of the shower hose and hand shower.
Model compatibility
- Designed specifically for floor-mounted installation.
- Compatible with standard water supply systems within the specified pressure and temperature ranges.

Manual page author
Emily Carter
User documentation editor
Prepares concise manual descriptions and highlights the most useful setup, operation, and maintenance information for readers.