Lighting / Fixtures
Installation Instructions for Resistex Doled LED Downlight
Quick guide for installing and maintaining the Resistex Doled LED Downlight. Includes safety precautions, wiring steps, and mounting instructions.
Table of contents
Manual images
Click an image to enlargeQuick guide from the manual
This document provides essential installation and maintenance instructions for the Resistex Doled LED Downlight. Professional installation is required to ensure compliance with electrical standards. Always ensure the power is disconnected before performing any work on the luminaire.
Safety notes
- Electrical Safety: Never work on the luminaire while it is under voltage.
- Professional Installation: The installation must be performed by a professional installer in compliance with local electrical standards and regulations.
- ESD Precautions: The device is sensitive to electrostatic discharges. Handle with necessary precautions.
Installation steps
- Preparation: Ensure the power supply is switched off. Cut the ceiling opening according to the required diameter (155mm, 160mm, or 195mm depending on the model).
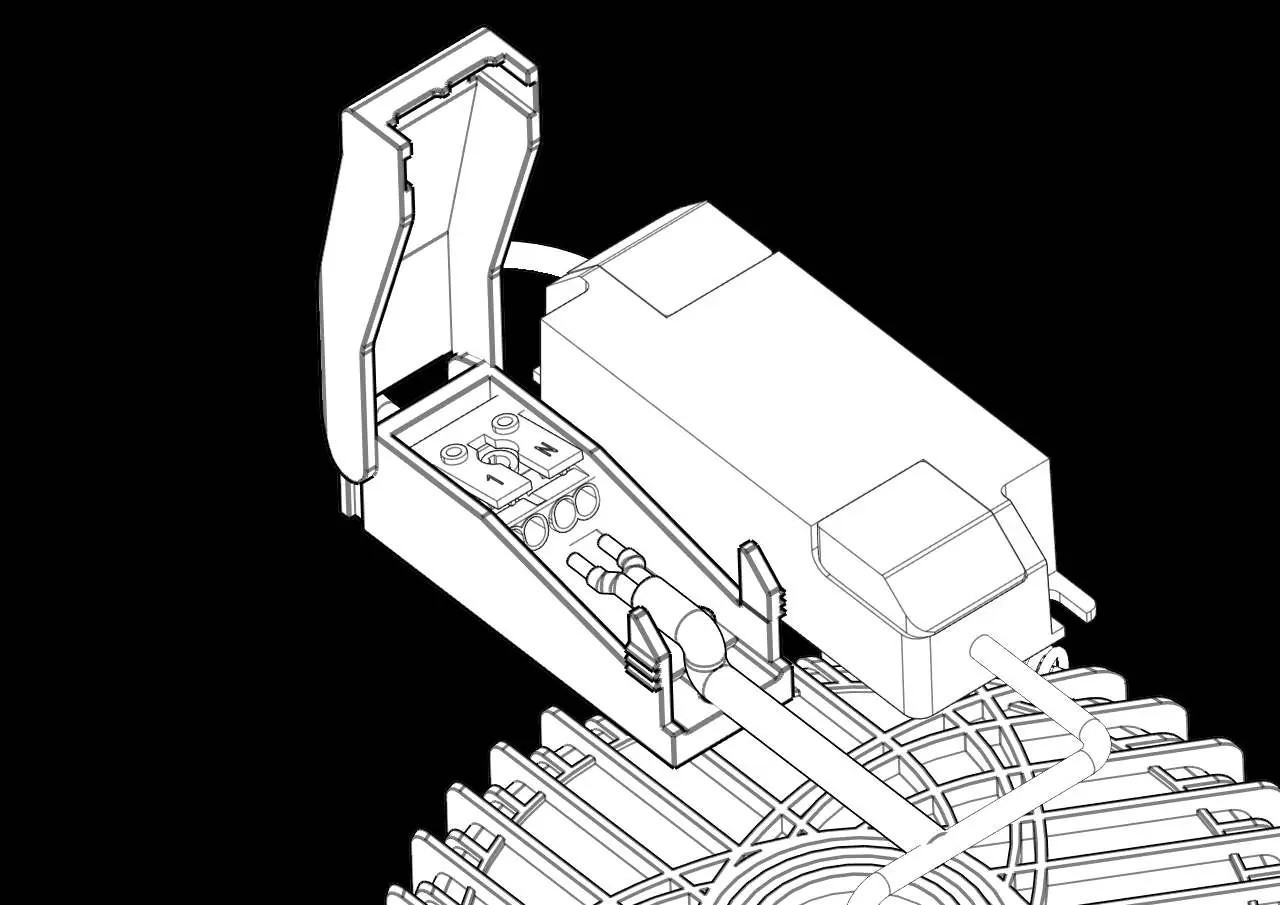
- Access Terminals: Open the terminal box cover on the back of the luminaire.
- Wiring: Connect the electrical supply wires to the L (Live) and N (Neutral) terminals inside the box.
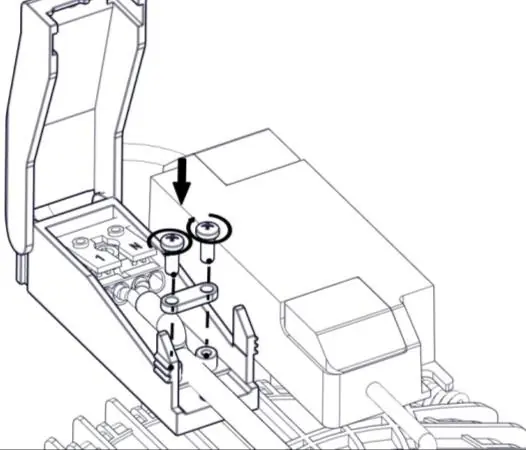
- Secure Connections: Ensure the cable is properly secured and the terminal box cover is closed and screwed shut.
- Mounting: Fold the spring clips upwards and insert the luminaire into the ceiling cutout.
- Finalization: Ensure the luminaire is flush with the ceiling and the springs hold it securely in place. Switch the power back on.
Maintenance
Do not use chemicals or abrasive products to clean the fixture. Keep these instructions for future dismantling or maintenance. Additional information regarding Resistex luminaires can be found at www.resistex-sa.com.
Technical dimensions
The Doled series is available in different sizes. Ensure you verify the specific cutout diameter required for your model (155mm, 160mm, or 195mm) before cutting the ceiling material.
Official resources from the manual
Practical help
Common problems
Luminaire does not turn on
Verify that the power supply is connected correctly to the L and N terminals and that the main power is switched on.
Risk of electrostatic discharge
Handle the luminaire with care and follow ESD (Electrostatic Discharge) precautions during installation.
Before use
- Ensure the main power supply is disconnected.
- Verify the ceiling cutout diameter matches your specific model (155mm, 160mm, or 195mm).
- Confirm a professional installer is available for the electrical connection.
- Check that no abrasive cleaners are used for future maintenance.
Specs in practice
- 155mm / 160mm / 195mm
- Required ceiling cutout diameter for the specific luminaire variant.
Images and diagrams
- Step 3: Shows the correct wiring connection to the L and N terminals.
- Step 7: Illustrates the spring clip mechanism for inserting the light into the ceiling.
- Dimension diagrams: Provide the exact measurements for the different model sizes.
Model compatibility
- Requires professional installation.
- Not suitable for use with abrasive or chemical cleaning agents.

Manual page author
Michael Turner
Technical manual editor
Reviews PDF manuals for structure, safety notes, and practical product details so readers can find the right information quickly.