Lighting / Fixtures
Installation Instructions for Resistex Doled LED Luminaire
A complete installation guide for the Resistex Doled LED luminaire. Includes safety warnings, wiring instructions, mounting steps, and dimension specifications for various models.
Quick answers from the manual
Quick answer
- The Resistex Doled is an LED luminaire that requires professional installation. Ensure power is off, cut the appropriate ceiling hole (155/160/195mm), connect L/N wires, and secure the unit using the spring clips. p. 1, 2
Key actions
- Cut ceiling hole p. 2
- Connect wires p. 2
- Insert into ceiling p. 2
Maintenance and reset
- Do not use chemicals or abrasive products to clean the fixture. p. 1
Technical specifications
| Parameter | Value | Meaning | Pages |
|---|---|---|---|
| Cutout Diameters | 155mm, 160mm, 195mm | Required ceiling hole size | p. 1 |
Where to find it in the PDF
- Safety and Dimensions p. 1
- Installation Steps p. 2
Table of contents
Manual images
Click an image to enlargeQuick guide from the manual
The Resistex Doled is an LED luminaire designed for professional installation. Before beginning, ensure the power supply is disconnected. The installation requires cutting a hole in the ceiling based on the specific model diameter (155mm, 160mm, or 195mm). Ensure all electrical connections are made by a qualified professional in compliance with local standards.
Safety notes
- Never work on the luminaire while voltage is present.
- Installation must be performed by a professional installer.
- Be aware of the risk of electrostatic discharges (ESD); handle with appropriate precautions.
- Follow all mounting steps carefully.
Installation
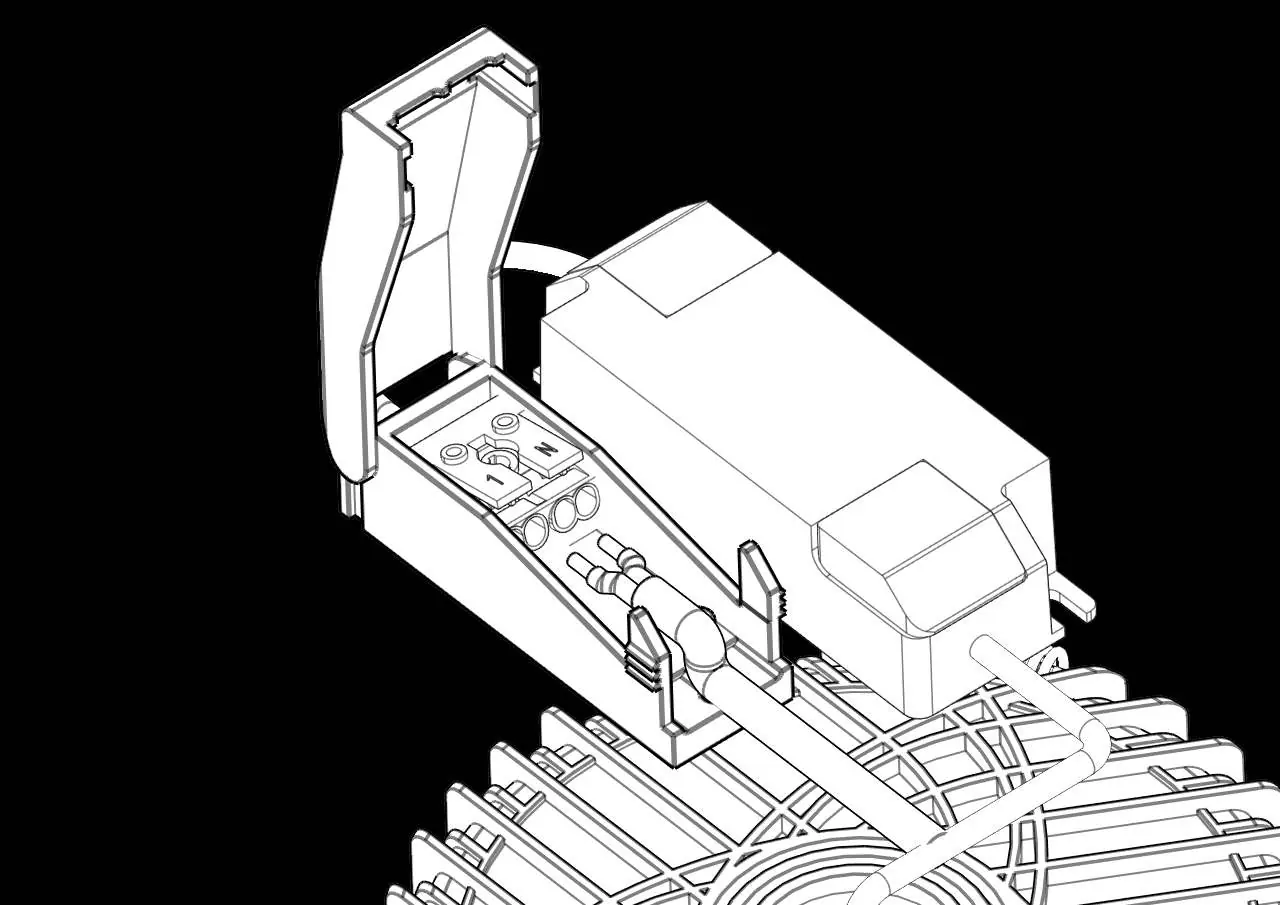
- Cut a hole in the ceiling according to the required diameter (155mm, 160mm, or 195mm).
- Open the terminal cover on the luminaire.
- Connect the electrical wires to the L (Live) and N (Neutral) terminals.
- Secure the cable using the provided clamp.
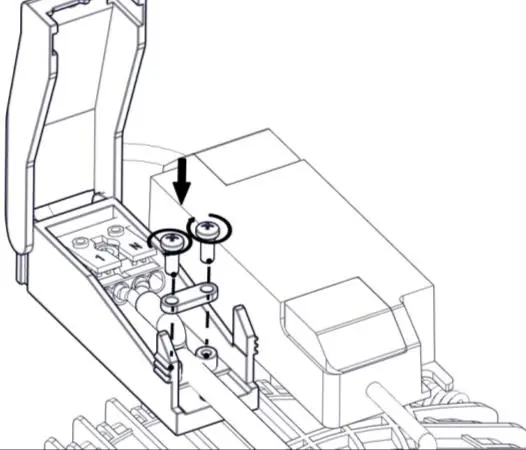
- Close the terminal cover.
- Secure the cover with the provided screw.
- Insert the luminaire into the ceiling cutout using the spring clips.
- Ensure the luminaire is properly seated and flush with the ceiling.
Maintenance
Do not use chemicals or abrasive products to clean the fixture. Keep these instructions for future maintenance or dismantling. Additional information is available on the Resistex website at www.resistex-sa.com.
Official resources from the manual
Practical help
Common problems
Luminaire does not turn on
Verify that the power supply is active and that the L and N wires are correctly connected to the terminals.
ESD risk during handling
Handle the luminaire with precautions as per ESD norms to prevent damage to electronic components.
Before use
- Ensure the main power supply is switched off.
- Verify the ceiling cutout diameter (155mm, 160mm, or 195mm).
- Ensure a professional installer is available for the electrical connection.
- Check that the terminal cover is accessible.
Specs in practice
- Cutout Diameters
- The required hole size in the ceiling for installation: 155mm, 160mm, or 195mm.
Images and diagrams
- Step 1: Cut the ceiling hole.
- Step 3: Connect L and N wires to the terminal block.
- Step 7: Use spring clips to secure the luminaire into the ceiling.
Model compatibility
- Ensure the ceiling thickness is compatible with the spring clip mechanism.

Manual page author
David Miller
Documentation analyst
Organizes user manual content into clear summaries, with attention to model details, product context, and everyday usability.