Electronics / Security Systems
Installation and User Guide for RISCO RWS332 Wireless 2-Way Indoor Sounder
Quick guide for the RISCO RWS332 Wireless 2-Way Indoor Sounder. Learn how to install, mount, replace batteries, and configure sounder parameters.
Quick answers from the manual
Quick answer
- The RWS332 is a wireless 2-way indoor sounder. It is installed by mounting the bracket, connecting the batteries, and registering the device with the system receiver. p. 3, 4, 5
Key actions
- Registering the sounder p. 5
- Replacing batteries p. 7, 8
First start
- Mounting and Registration p. 4, 5
Show 3 more answers Show less
Maintenance and reset
- Resetting the sounder p. 7
Technical specifications
| Parameter | Value | Meaning | Pages |
|---|---|---|---|
| Battery Type | 4 x CR123 3V Lithium | Required power source | p. 9 |
| Sound Level | 85 dB | Speaker output at 1 meter | p. 9 |
Where to find it in the PDF
- Installation p. 4, 5, 6
- Technical Specifications p. 9
Table of contents
Manual images
Click an image to enlargeQuick guide from the manual
The RISCO RWS332 is a wireless 2-way indoor sounder designed for residential and small office security systems. Key installation steps involve mounting the bracket, connecting the batteries, and registering the device with your system receiver. Always ensure the system is in Service Mode before performing maintenance to avoid triggering tamper alarms.
Installation and Configuration
The sounder can be mounted on a wall or ceiling.
- Select Location: Choose a suitable location for the sounder.
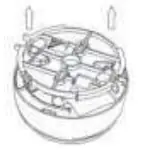
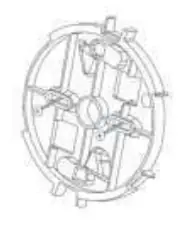
- Remove Bracket: Twist and remove the plastic mounting bracket from the sounder.
- Mounting: Use the mounting holes as a template to secure the bracket to the surface.
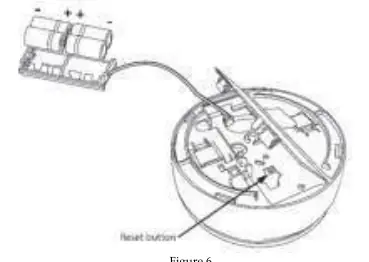
- Power: Open the battery compartment and connect the battery cable to the connector.
- Registration: After hearing a squawk, press the tamper contact for at least 3 seconds until the receiver detects the device. Alternatively, register by entering the 11-digit serial number.
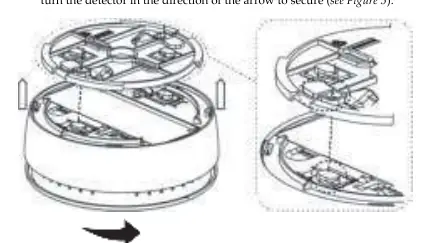
- Final Assembly: Align the base with the bracket, insert the hooks into the cavities, and turn to secure.
Battery Replacement
To replace batteries, first enter the system receiver into Service Mode to avoid a tamper alarm. Remove the sounder from the bracket, open the battery compartment, and replace the old batteries with new ones, ensuring correct polarity. The device uses 4 x CR123 3V Lithium batteries.
Sounder Parameters
Parameters are defined via the system receiver:
- Alarm Volume: 0-9
- Squawk Volume: 0-9
- Exit/Entry Volume: 0-9
- Supervision Time: 0-255 minutes
- Pre-alarm: On/Off
Technical Specifications
- Sound Level: 85 dB at 1 meter
- Battery Type: 4 x CR123 3V Lithium
- Battery Life: 3 years (typical)
- Wireless Range: Up to 150 m (unobstructed)
- Operating Temperature: -10 °C to 55 °C
Practical help
Common problems
Tamper alarm triggered during maintenance
Enter the system receiver into Service Mode before removing the sounder from the bracket.
Sounder not registering with system
Ensure you press the tamper contact for at least 3 seconds after hearing the squawk, or register using the 11-digit serial number.
Before use
- Select a suitable installation location.
- Ensure the system receiver is in Service Mode.
- Have 4 x CR123 3V Lithium batteries ready.
- Verify the mounting surface is suitable for the bracket.
Show more Show less
Specs in practice
- Alarm Volume
- 85 dB at 1 meter distance.
- Wireless Range
- Up to 150 meters in unobstructed conditions.
- Battery Life
- Approximately 3 years under typical usage.
Images and diagrams
- Figure 1: Removing the plastic mounting bracket.
- Figure 3: Using mounting holes as a template.
- Figure 5: Aligning and securing the sounder to the bracket.
Model compatibility
- Compatible with all RISCO wireless systems.

Manual page author
Emily Carter
User documentation editor