Electronics / Headphones Earbuds
User Manual for Zebronics 16CHVS6TA8M NVR
Quick guide for the Zebronics 16CHVS6TA8M NVR. Learn how to install the hard drive, connect IP cameras, configure recording schedules, set up motion detection, and access the system via mobile app.
Quick answers from the manual
Quick answer
- The Zebronics 16CHVS6TA8M is a 16-channel NVR. Default login is admin/123456. It supports HDD installation, ONVIF/SLINK camera connection, and P2P mobile monitoring. p. 1, 10, 21
Key actions
- Login to the system p. 10
- Install HDD p. 9, 10
First start
- Power on the device and log in using the default credentials (admin/123456). p. 10
Problems and fixes
HDD requires formatting
Click the hard disk in the Disk Format menu and select Format.
p. 19Maintenance and reset
- Factory Restore: Supports restoring the device to factory configuration. p. 25
Technical specifications
| Parameter | Value | Meaning | Pages |
|---|---|---|---|
| Video Input | 16 Channel IP | Supports 16 IP cameras | p. 7 |
| Power Input | DC 12V, 2A | External power adapter requirements | p. 8 |
Where to find it in the PDF
- Specifications p. 7, 8
- HDD Installation p. 9, 10
Table of contents
Manual images
Click an image to enlargeQuick guide from the manual
The Zebronics 16CHVS6TA8M is a 16-channel Network Video Recorder (NVR). This manual covers the installation of the hard drive, system login, camera connection, recording configuration, and network setup. The default login credentials are: User name: admin, Password: 123456.
Installation
To install a hard disk drive (HDD):
- Open the chassis by unscrewing the side screws of the NVR case.
- Connect the HDD SATA cable and power cable to the hard disk.
- Secure the hard disk to the screw holes on the baseplate.
- Replace the NVR cover and fasten it with screws.
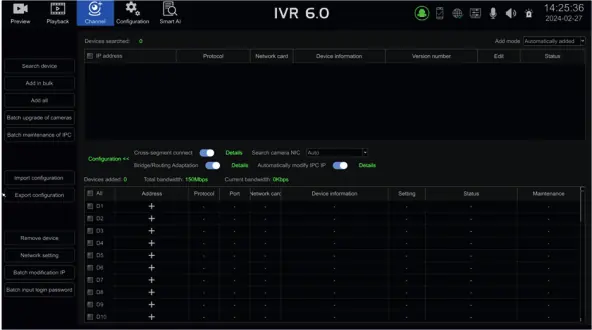
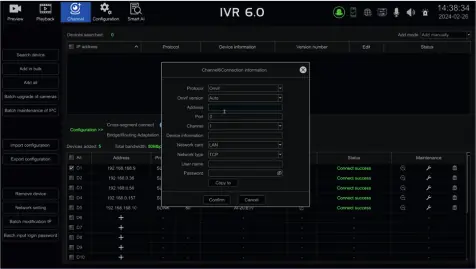
Connecting IP Cameras
The NVR supports automatic and manual addition of IP cameras (IPC). It is compatible with ONVIF, SLINK, and i9 protocols. Ensure the NVR and IPCs are on the same LAN. You can search for devices, select them, and add them to the channel list. For manual addition, you can enter the IP address, port, and protocol details directly.
Recording and Playback
The system supports scheduled recording, alarm recording, and manual recording. You can configure recording plans for specific time periods. Video playback allows you to query recordings by date, channel, and event type. You can use the progress bar to select specific time points for playback.
Network and Mobile Monitoring
The NVR supports P2P mobile monitoring. Enable the P2P service in the network settings to connect the device to the mobile app. Use the QR code displayed on the interface to download the app and bind the device. You can also perform network diagnostics, such as ping tests, to ensure the NVR is correctly connected to the network.
Maintenance and AI
The system supports online and USB upgrades. You can also export/import configurations and restore factory settings. The AI configuration section allows for humanoid detection, where you can set detection areas and sensitivity to reduce false alarms.
Practical help
Common problems
Cannot find IP cameras
Ensure the NVR and IPC are on the same LAN and that the IP addresses are correctly configured.
HDD not recording
Check if the HDD is properly installed and formatted via the Disk Format menu.
Forgot password
Use the QR code on the mobile app or email retrieval (requires prior binding of the device to the app).
Before use
- Ensure power supply is 12V, 2A.
- Install and format the SATA HDD.
- Connect the NVR to a stable network switch.
- Ensure IP cameras are compatible (ONVIF/SLINK/i9).
- Verify that the NVR is placed in a well-ventilated, dust-free environment.
Specs in practice
- 16 Channel IP
- Supports connection of up to 16 IP cameras.
Images and diagrams
- HDD Installation: Open the case, connect SATA/power cables, and secure the drive to the baseplate.
Model compatibility
- Supports ONVIF, SLINK, and i9 protocols.
- Compatible with Windows 10 and higher for web access.

Manual page author
Emily Carter
User documentation editor
Prepares concise manual descriptions and highlights the most useful setup, operation, and maintenance information for readers.