Lighting / Fixtures
User Manual for River of Goods 20874 Pendant Lamp
Quick guide for the River of Goods 20874 pendant lamp. Includes assembly steps, wiring instructions, bulb requirements, and maintenance tips.
Table of contents
Quick guide from the manual
This document provides assembly and installation instructions for the River of Goods 20874 pendant lamp. Before beginning, ensure the power is disconnected at the circuit breaker or fuse box. Do not rely on the light switch alone to prevent electrical shock.
Assembly and Installation
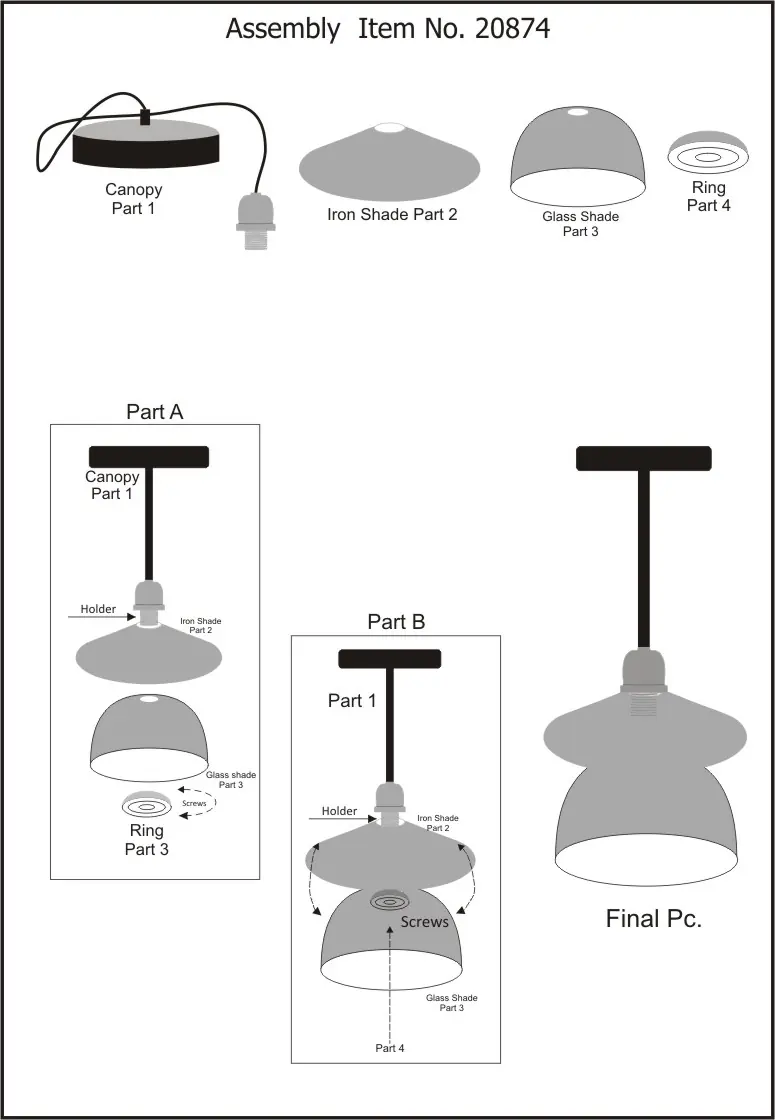
- Place all parts on a flat, smooth surface.
- Install the Crossbar A to the ceiling outlet box using the provided screws.
- Connect the wires: Lamp BLACK wire to the installation POSITIVE wire; Lamp WHITE wire to the NEUTRAL wire; house Ground wire and Lamp BARE GROUND wire to the GROUND SCREW on the Crossbar A.
- Push the wiring inside the electrical box.
- Lift the lamp from the Canopy B and attach it to the Crossbar A using the two Canopy screws.
- Install the Big Shade on the Socket using the Socket ring.
- Install the bulb (not included). Refer to the wattage label near the lamp holder for the maximum allowed wattage.
- Install the Small Shade to the Big Shade using the provided D-Screws.
Bulb Requirements
The fixture supports the following bulb types:
- E26 Type A: Maximum 40W
- E26 CFL: Maximum 13W
Care and Maintenance
Use only a soft cloth for cleaning. Do not use any chemicals or abrasive cleaners.
Practical help
Common problems
Electrical shock risk during installation
Disconnect power at the circuit breaker or remove the fuse at the fuse box. Do not rely on the wall switch.
Bulb overheating
Check the wattage caution label near the lamp holder and do not exceed the maximum specified wattage (40W for Type A, 13W for CFL).
Before use
- Ensure power is disconnected at the circuit breaker
- Verify all parts are present on a flat surface
- Check the wattage label for bulb compatibility
- Have necessary tools for crossbar installation
Show more Show less
Images and diagrams
- The assembly diagram illustrates the connection of the crossbar to the electrical box and the wiring sequence.
- The parts breakdown shows the assembly order of the canopy, iron shade, glass shade, and ring.
Model compatibility
- Bulbs are not included with the fixture.

Manual page author
David Miller
Documentation analyst