Industrial / Communication Modules
User Manual for Sealevel SeaLINK+16/USB 2163 Series
Quick guide for the Sealevel SeaLINK+16/USB 2163 series. Includes installation steps, configuration of dipswitches for RS-232/422/485 modes, pinout diagrams, and troubleshooting.
Table of contents
Manual images
Click an image to enlargeQuick guide from the manual
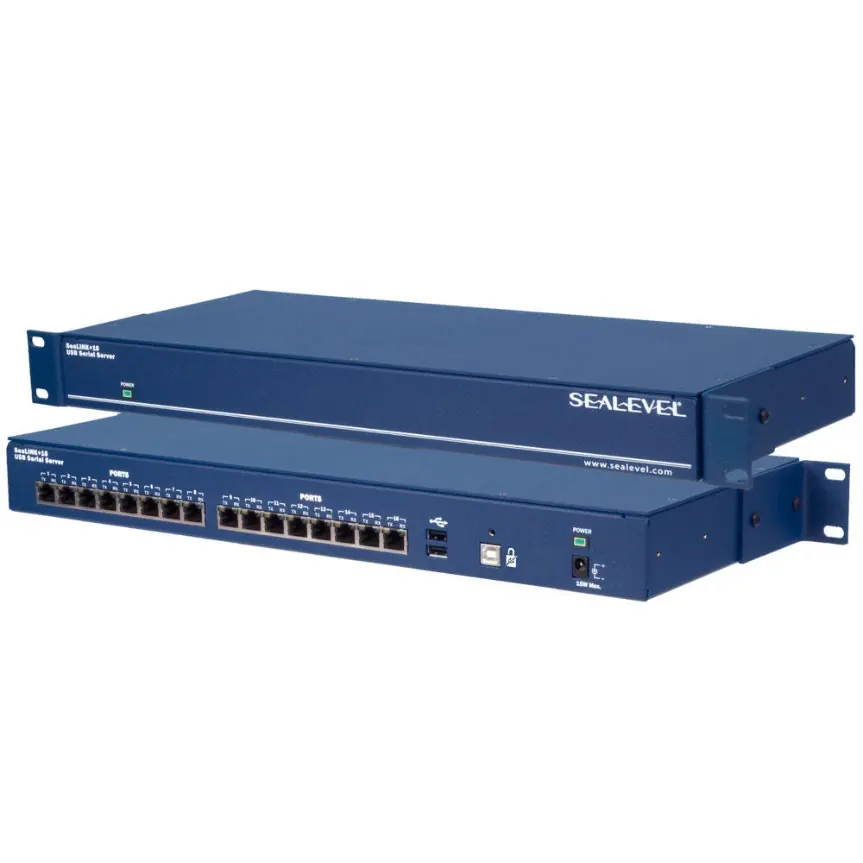
The Sealevel SeaLINK+16/USB 2163 series provides 16 USB to asynchronous serial ports. Crucial: Do not connect the device to a USB port until the software has been fully installed. The device requires a high-power USB port (500mA per port) and is not compatible with Windows NT.
Software Installation
Before connecting the hardware, install the Sealevel SeaCOM software:
- Download the correct software from the Sealevel website.
- Run the setup file; it will detect the operating environment and install necessary components.
- If prompted about an unsigned driver, select 'Yes' to proceed.
- Once installed, the 'SeaCOM' program folder will be visible in the Start menu.
Hardware Installation
After software installation:
- Connect the SeaLINK+16 to an upstream type 'A' USB port on your PC or hub.
- The device is hot-pluggable; no need to power down the computer.
- The 'New Hardware Found' wizard will locate the drivers.
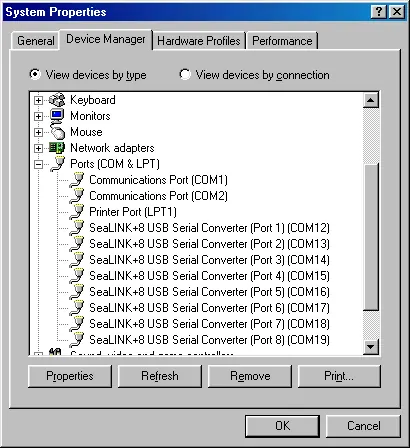
- Verify installation in the Windows Device Manager under 'Ports (COM & LPT)'.
Configuration
The device allows configuration of electrical interfaces (RS-232, RS-422, RS-485) via internal dipswitches. To access these:
- Remove the four screws that attach the two halves of the box.
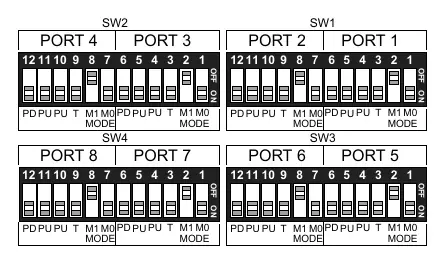
- Refer to the dipswitch diagrams on the PCB silk screen or the manual to set the desired mode (232, 422, 485 WE, 485 NE).
- The first two positions on each switch select the electrical interface mode.
- The last four positions control line termination and biasing (PD, PU, T).
Technical Description
The device utilizes eight USB UARTs with programmable baud rates. RS-422/485 supports data rates up to 921.6K baud, while RS-232 supports up to 460.8K baud. The device features LED status indicators for power and port activity.
Troubleshooting
If the adapter is not working:
- Ensure USB support is enabled in the System BIOS.
- Use the Sealevel WinSSD utility to perform a loopback test (connect TX and RX pins).
- Note: Loopback tests are not possible in 2-wire RS-485 mode with no echo, as the receiver is disabled.
- Always use the Sealevel diagnostic software to isolate issues.
Practical help
Common problems
Adapter not detected or not working
Ensure USB support is enabled in System BIOS and that the SeaCOM software is fully installed.
Loopback test fails
Ensure the adapter is configured for RS-422 mode for testing. 2-wire RS-485 mode with no echo disables the receiver, making loopback tests impossible.
Driver installation warning
If a 'Publisher cannot be determined' warning appears, select 'Yes' to proceed with the installation.
Before use
- Install SeaCOM software before connecting the hardware.
- Verify the operating system is Windows 7 or newer.
- Ensure the USB port can supply 500mA.
- Check System BIOS for USB support.
Images and diagrams
- Dipswitches SW1-SW4: Used to configure port modes and line termination/biasing.
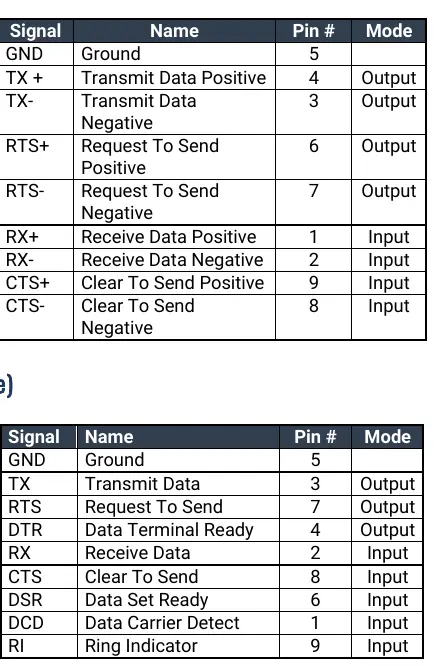
- DB-9 Pinouts: Defines signal assignments for RS-232 and RS-422/485 connectors.
Model compatibility
- Windows NT is not supported.
- Requires high-power USB root hub or self-powered hub.

Manual page author
David Miller
Documentation analyst
Organizes user manual content into clear summaries, with attention to model details, product context, and everyday usability.