Home Appliances / Vacuum Cleaners
User manual for Sencor SVC 1035TQ vacuum cleaner
Quick guide for the Sencor SVC 1035TQ bagless vacuum cleaner. Includes assembly instructions, usage tips, maintenance procedures for filters and dust container, and troubleshooting steps.
Table of contents
Manual images
Click an image to enlargeQuick guide from the manual
This vacuum cleaner is designed for household use. Before operating, ensure the power cord is undamaged and the voltage matches your socket. Important: Do not vacuum water, liquids, burning items (cigarettes, embers), or sharp objects like broken glass. Always disconnect the power plug before cleaning or performing maintenance. Empty the dust container when it reaches the MAX mark to maintain suction performance.
Description of the vacuum cleaner
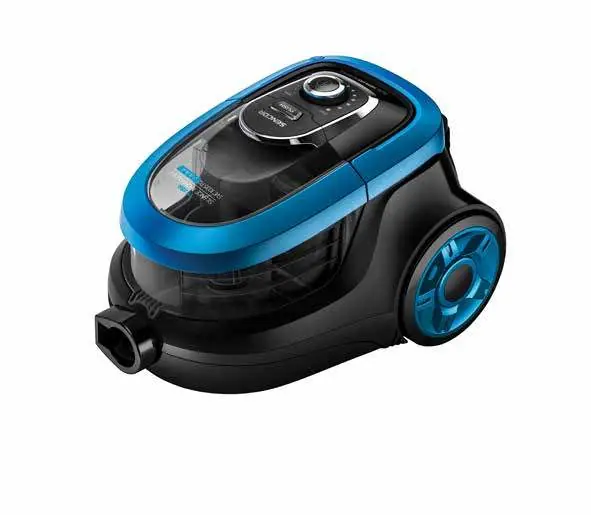
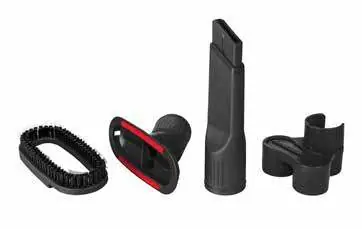
The vacuum cleaner consists of the main unit with a dust container (A7), suction power control (A3), and cord winding button (A1). Key accessories include the combination floor nozzle (A13), long flexible crevice nozzle (A29), crevice nozzle (A30), and upholstery nozzle (A31) with a brush attachment (A32).
Assembly
Follow these steps to prepare the vacuum cleaner for use:
- Hose: Press the clips on the hose end (A20) and insert it into the suction hole (A8) until it clicks.
- Telescopic tube: Attach the holder with the hose to the wider part of the telescopic tube (A11). Attach the floor nozzle (A13) to the narrower part.
- Adjusting length: Disengage the clip (A19), adjust the tube length, and release the clip to lock it in position.
Using the vacuum cleaner
Connect the power cord to a socket. Use the On/Off button (A2) to start. Suction power is adjustable via the control knob (A3) or the sliding flap (A10) on the handle. For floor surfaces, adjust the nozzle flap: retract bristles for carpets, extend them for hard floors.
Temporary interruption: Use the horizontal (A26) or vertical (A22) parking position by inserting the stopper (A18) on the floor nozzle into the slot on the vacuum cleaner.
Cleaning and Maintenance
Regular maintenance is essential for optimal performance:
- Emptying the dust container: Press the PUSH button (A4), remove the container (A7), open the lid (A6), and empty the contents. Rinse the container under lukewarm water if heavily soiled.
- Cleaning filters: Remove the inflow filter (A24) and foam pre-filter (A25) from the dust container. Wash them under lukewarm water and ensure they are completely dry before reinserting.
- Outflow filter: Remove the grille (A28) and replace the outflow filter (A27) as needed. Ensure the plastic grille faces outwards.
Troubleshooting
If the vacuum cleaner does not work correctly, check the following:
- Motor not starting: Ensure the power cord is inserted correctly and the vacuum is switched on.
- Weak suction: Check for clogs, clean the dust filter, and ensure the dust container is properly seated.
- Cord winding issues: If the cord does not wind completely, hold the cable under tension while pressing the winding button.
Technical Specifications
- Rated voltage: 220 – 240 V ~
- Rated frequency: 50 / 60 Hz
- Rated power input: 750 W
- Dust container capacity: 1 L
- Operating range: 10 m
- Noise level: 75 dB(A)
Manufacturer information
Sencor
Practical help
Common problems
The motor will not start
Check if the power cord is inserted correctly into the socket and the vacuum is switched on.
Suction power is weak
Remove any blockages, clean the dust filter, and ensure the dust container is closed and in the correct position.
The power cord is not winding in completely
Hold the cable under tension while pressing the winding button.
The dust container cannot be closed
Reinstall and secure the dust filter in the correct position.
Before use
- Check that the technical details on the rating label match the electrical voltage in the socket.
- Ensure all inflow and outflow filters are installed.
- Check that air outlets and the suction hole are not blocked.
- Ensure the power cord is not touching hot surfaces or sharp objects.
- Verify the dust container is empty and properly inserted.
Specs in practice
- Rated power input
- 750 W, indicating the power consumption of the motor.
- Dust container capacity
- 1 L, the maximum volume of dust the container can hold before needing to be emptied.
- Operating range
- 10 m, the maximum distance from the power socket the vacuum can reach.
Images and diagrams
- Page 3 provides a detailed diagram of the vacuum cleaner (A1-A23) showing buttons, wheels, and parking positions.
- Page 4 illustrates the filters (A24-A28) and accessories (A29-A32) for easy identification.
Model compatibility
- Designed for use in households, offices, and similar areas.
- Do not use in industrial surroundings.

Manual page author
Emily Carter
User documentation editor
Prepares concise manual descriptions and highlights the most useful setup, operation, and maintenance information for readers.