Plumbing / Sinks Faucets
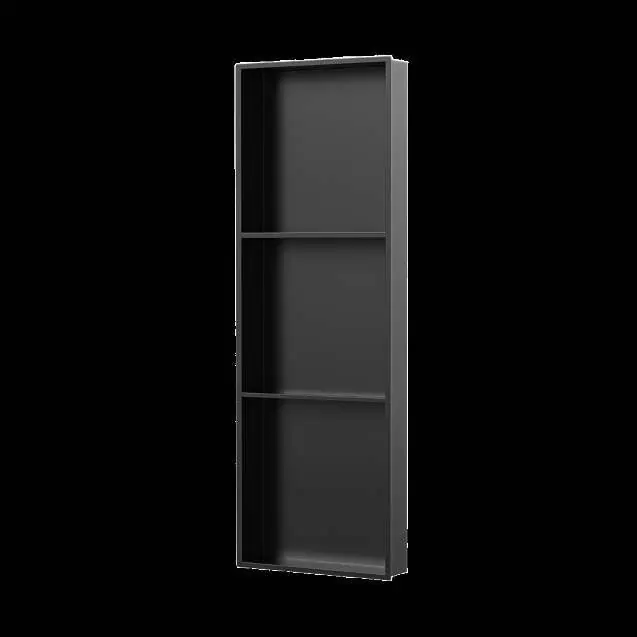
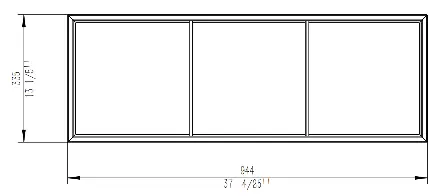
User Manual for SERA 1236-MB-NIC-3 Shower Niche
Quick guide for installing and maintaining the SERA 1236-MB-NIC-3 shower niche. Includes step-by-step installation instructions, waterproofing requirements, and care tips.
Table of contents
Manual images
Click an image to enlargeQuick Guide from the Manual
This document provides installation and maintenance instructions for the SERA 1236-MB-NIC-3 shower niche. The installation process involves cutting into the wall, framing, waterproofing, and sealing. Important: You must wait 48 hours for the sealant to cure before using the shower.
Installation Steps
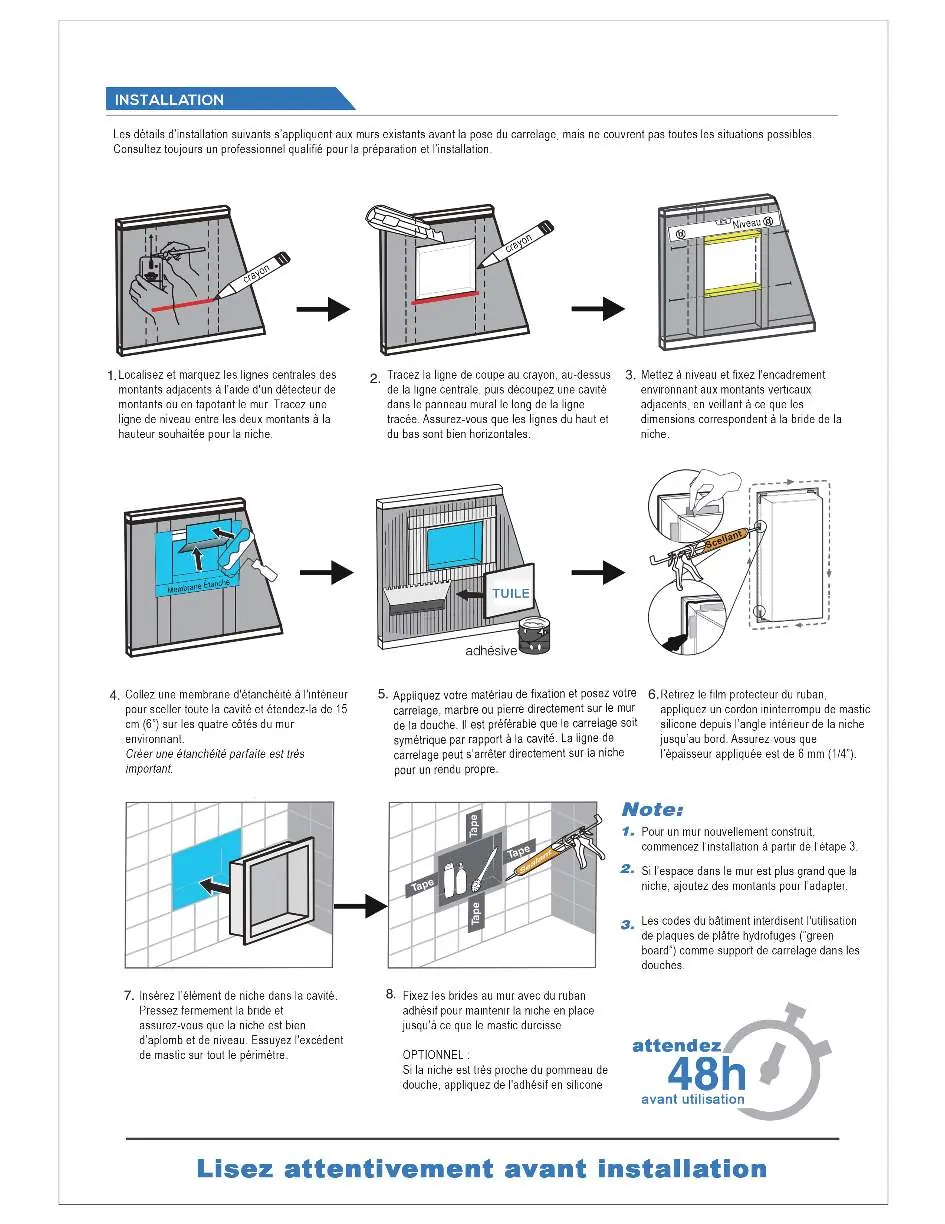
- Locate and Mark: Use a stud finder to locate adjacent framing studs. Mark the center lines and draw a level line at your desired height.
- Cut the Wall: Trace the cutline with a pencil above the center line and cut out the wall board.
- Level and Fasten: Level and fasten the surrounding framing to adjacent vertical studs, ensuring the dimensions match the niche flange.
- Waterproofing: Glue a waterproofing membrane inside to seal the whole cave and extend 6 inches to the four sides of the surrounding wall.
- Tile and Set: Apply setting material and set your tile, marble, or stone directly to the shower wall.
- Seal: Remove the protective film from the tape and apply an uninterrupted bead of silicone sealant from the inside corner of the niche to the edge.
- Insert Niche: Insert the niche fixture into the cave. Press the flange tightly and ensure the niche is plumb and level. Wipe off excess sealant.
- Finish: Tape the flanges to the wall to hold the niche in place until the sealant cures.
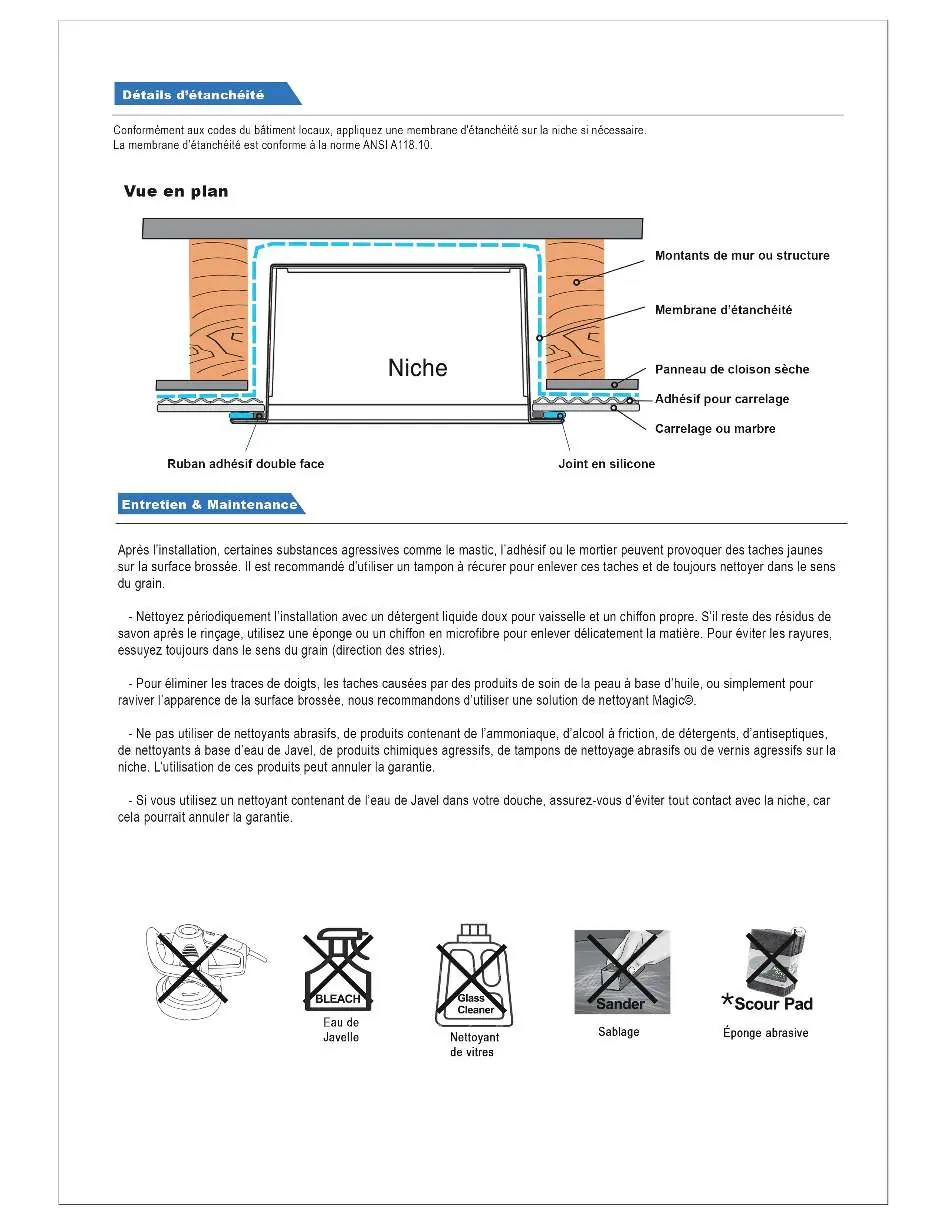
Waterproofing Details
In accordance with local building codes, apply waterproofing to the niche as required. The waterproofing membrane must meet ANSI A118.10 standards.
Care & Maintenance
To keep your shower niche in good condition, follow these guidelines:
- Cleaning: Periodically clean the fixture with mild liquid dish detergent and a clean rag.
- Removing Stains: If you encounter "yellow spots" on the brushed surface, use a scour pad to remove them, always brushing in the direction of the grain.
- Avoid: Do not use abrasive cleaners, ammoniated products, rubbing alcohol, detergents, astringents, chlorine bleach-based cleaners, or harsh polishes, as these may void the warranty.
- Chemicals: If using chlorine bleach in your shower, avoid contact with the niche surface and rinse immediately if any residue ends up on the niche.
Practical help
Common problems
Yellow spots on the brushed surface
Use a scour pad to remove the spot, ensuring you brush in the direction of the grain.
Soap scum buildup
Clean periodically with mild liquid dish detergent and a clean rag.
Before use
- Ensure the wall is properly waterproofed according to local codes.
- Verify the niche is level and plumb before final sealing.
- Apply a continuous bead of silicone sealant.
- Wait 48 hours for the sealant to cure before using the shower.
Specs in practice
- Waterproofing Membrane
- Must meet ANSI A118.10 standards.
- Sealant Thickness
- Ensure applied sealant thickness is approximately 1/4 inch.
Images and diagrams
- The installation diagrams illustrate the process of cutting the wall, framing, waterproofing, and sealing the niche.
Model compatibility
- For newly constructed walls, start installation from step 3.
- If the wall recess is greater than the niche, attach framing studs to accommodate the niche.
- Building codes prohibit the use of water-resistant gypsum wallboard ('green board') as the tile backer in showers.

Manual page author
Michael Turner
Technical manual editor
Reviews PDF manuals for structure, safety notes, and practical product details so readers can find the right information quickly.