Plumbing / Sinks Faucets
Installation and Maintenance Manual for Sanela SLKN 01 / SLKN 01L Floor Drain Trough
Quick guide for installing and maintaining the Sanela SLKN 01 and SLKN 01L stainless steel floor drain troughs. Includes installation steps, component lists, and maintenance advice.
Table of contents
Manual images
Click an image to enlargeQuick guide from the manual
Before beginning the installation of the Sanela SLKN 01 or SLKN 01L floor drain trough, it is essential to thoroughly familiarize yourself with the attached Safety Instructions. Ensure the installation surface is prepared with a minimum slope of 1% towards the drain to ensure proper water flow.
Supplied equipment
The package includes the following components (refer to the parts list on page 1):
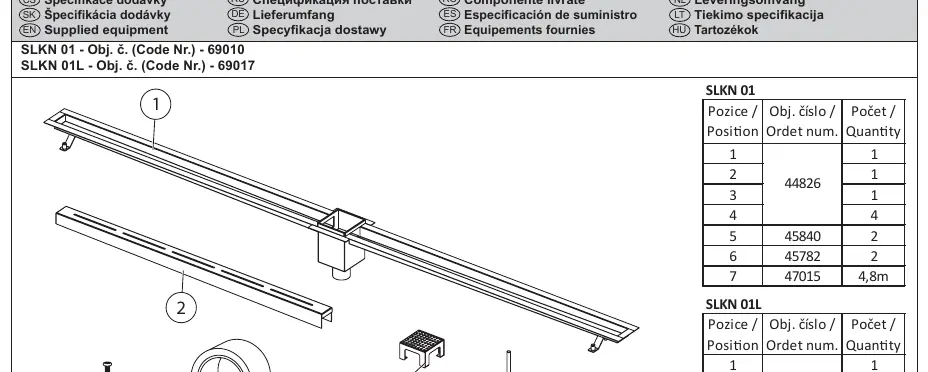
- Drain trough body
- Installation hardware (dowels, screws, etc.)
- Waste pipe connection components
Installation
Follow these steps for proper installation:

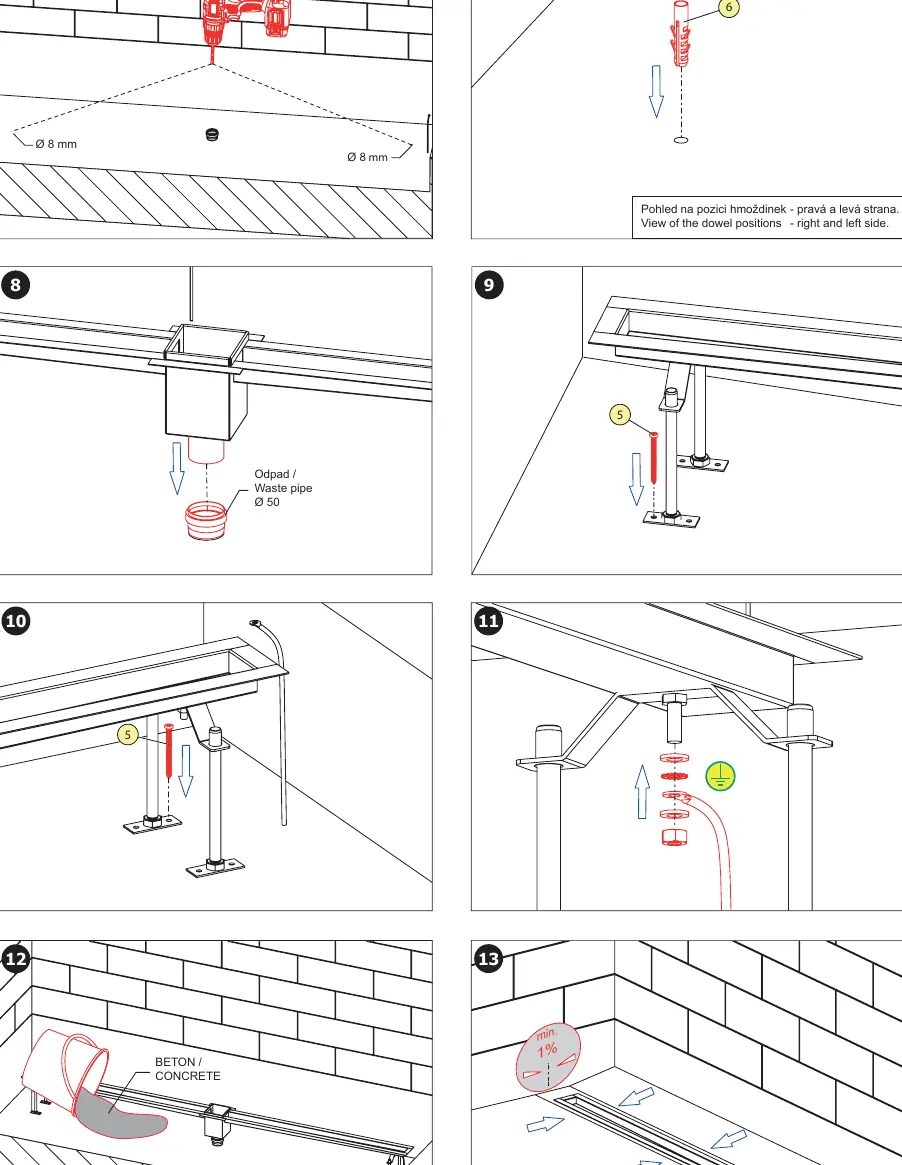
- Positioning: Place the drain trough in the desired location and ensure it is level.
- Drilling: Mark and drill holes for the installation hardware (8 mm diameter).
- Waste Connection: Connect the waste pipe (50 mm diameter) to the drain outlet.
- Securing: Insert dowels and secure the trough using the provided hardware.
- Concrete Pouring: Pour concrete around the drain trough, ensuring the surrounding floor maintains a minimum slope of 1% towards the drain.
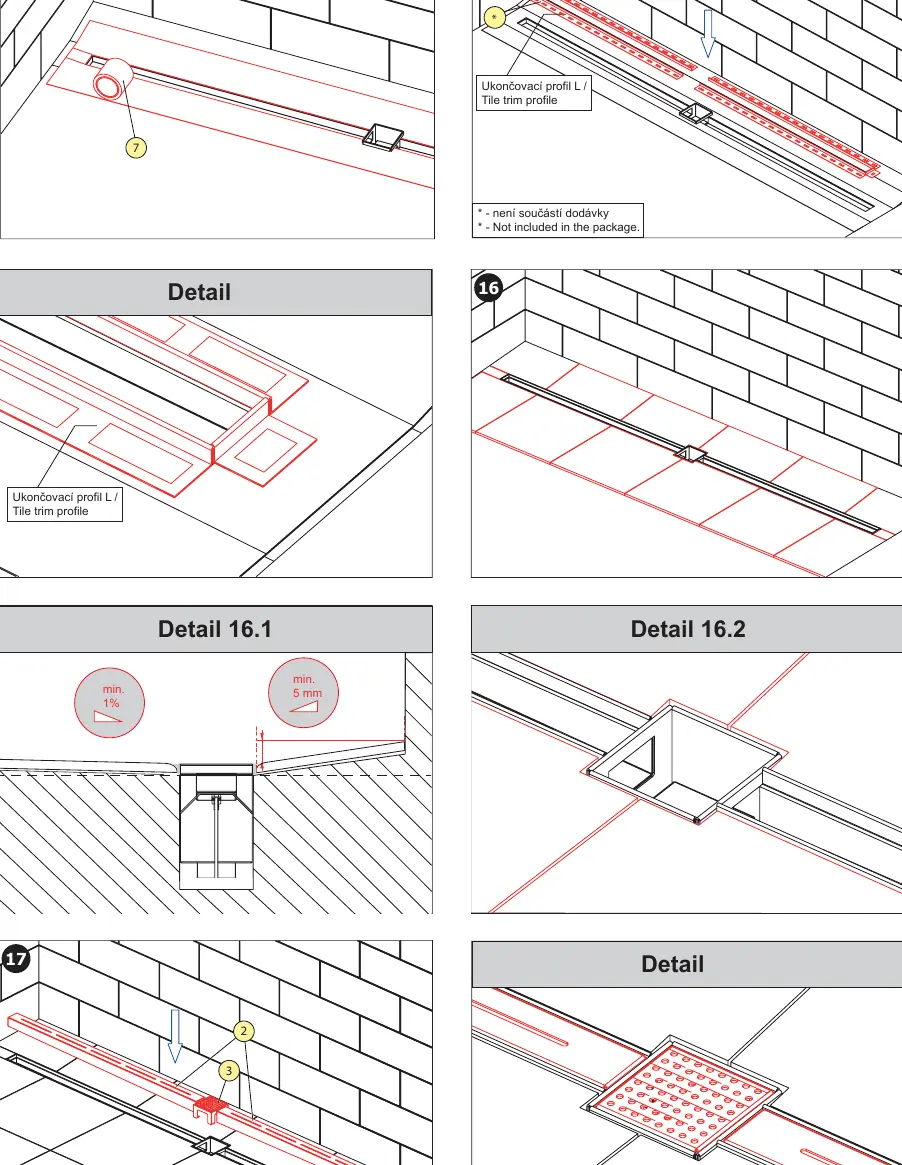
- Finishing: Install the tile trim profile (if applicable) and complete the tiling around the drain.
- Final Assembly: Place the grate and ensure all components are properly seated.
Maintenance
Regular maintenance is recommended to ensure the longevity and proper function of the drain. For technical support, service intervention, or fault resolution, please contact the installation company or visit www.sanela.eu/service. It is recommended to perform regular maintenance according to the Maintenance Instructions available at www.sanela.eu/service-download.
Official resources from the manual
Manufacturer information
SANELA spol. s r. o.
Practical help
Common problems
Water not draining properly
Ensure the floor has a minimum slope of 1% towards the drain.
Installation difficulties
Ensure you have read the separate Safety Instructions before starting the installation.
Before use
- Verify all parts from the supplied equipment list are present.
- Read the attached Safety Instructions.
- Ensure the installation surface is prepared.
- Check the slope of the floor (min 1%).
Images and diagrams
- Steps 1-5: Initial positioning, leveling, and preparation.
- Steps 6-13: Drilling, waste pipe connection, and concrete pouring.
- Steps 14-17: Finishing with tile trim and final assembly.
Model compatibility
- SLKN 01 is made of AISI 304 stainless steel.
- SLKN 01L is made of AISI 316L stainless steel.

Manual page author
Emily Carter
User documentation editor
Prepares concise manual descriptions and highlights the most useful setup, operation, and maintenance information for readers.