Toys / RC Models & Drones
Sharper Image 2411S LED Dual Camera Drone User Manual
Comprehensive user guide for the Sharper Image 2411S LED Dual Camera Drone. Includes instructions for battery charging, remote pairing, flight controls, app connectivity, and maintenance.
Quick answers from the manual
Quick answer
- To fly the Sharper Image 2411S drone, charge the battery, install remote batteries, pair the remote by moving the left stick up and down, place the drone on a flat surface, and press the One-Key Take-off button. p. 1
Key actions
- Pairing the remote p. 1
- Performing a reset p. 1
- Replacing propellers p. 1
First start
- Charge the drone battery using the USB cable until the light turns off. p. 1
- Install 3 AA batteries in the remote. p. 1
Show 4 more answers Show less
Problems and fixes
Drone behaves erratically
Perform a gyroscope reset.
p. 1Maintenance and reset
- Reset the gyroscope by holding both sticks in the bottom-right corner. p. 1
Technical specifications
| Parameter | Value | Meaning | Pages |
|---|---|---|---|
| Battery | 3.7V 1200mAh Li-Po | Drone power source | p. 1 |
| Charging Time | 90 minutes | Time to fully charge battery | p. 1 |
| Flight Time | 10 minutes | Approximate flight duration | p. 1 |
Where to find it in the PDF
- Instruction Manual p. 1
Table of contents
Manual images
Click an image to enlargeQuick Guide from the Manual
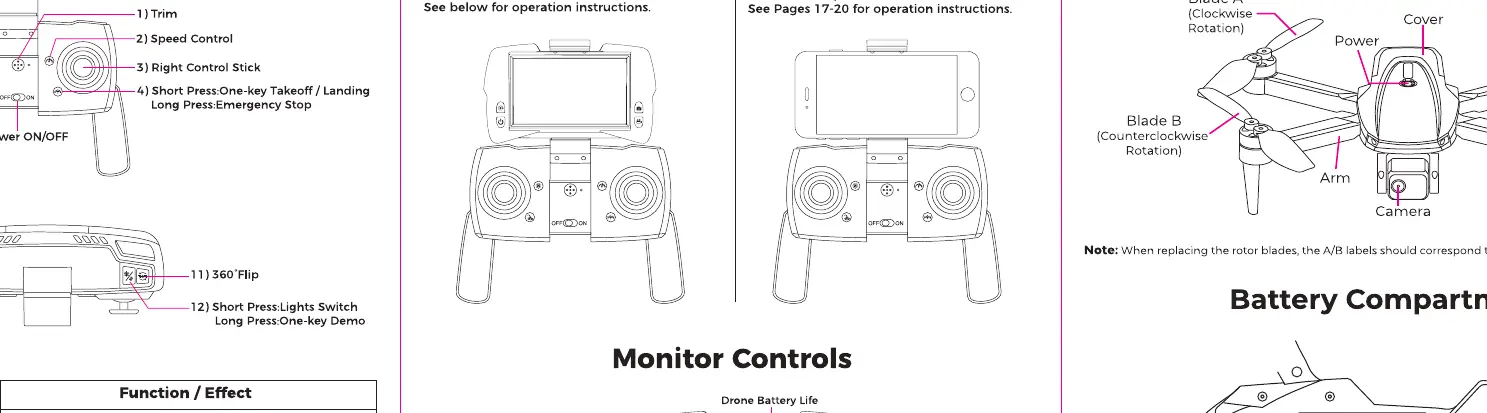
Before flying your Sharper Image 2411S drone, ensure you have completed the following steps:
- FAA Registration: Check if your drone weight requires FAA registration in your region.
- Battery Charging: Fully charge the drone battery using the provided USB cable.
- Remote Setup: Install 3 x 1.5V AA batteries (not included) into the remote control.
- Calibration: Always calibrate the drone on a flat, level surface before take-off.
- Propellers: Ensure all propellers are securely attached and undamaged.
Charging the Batteries
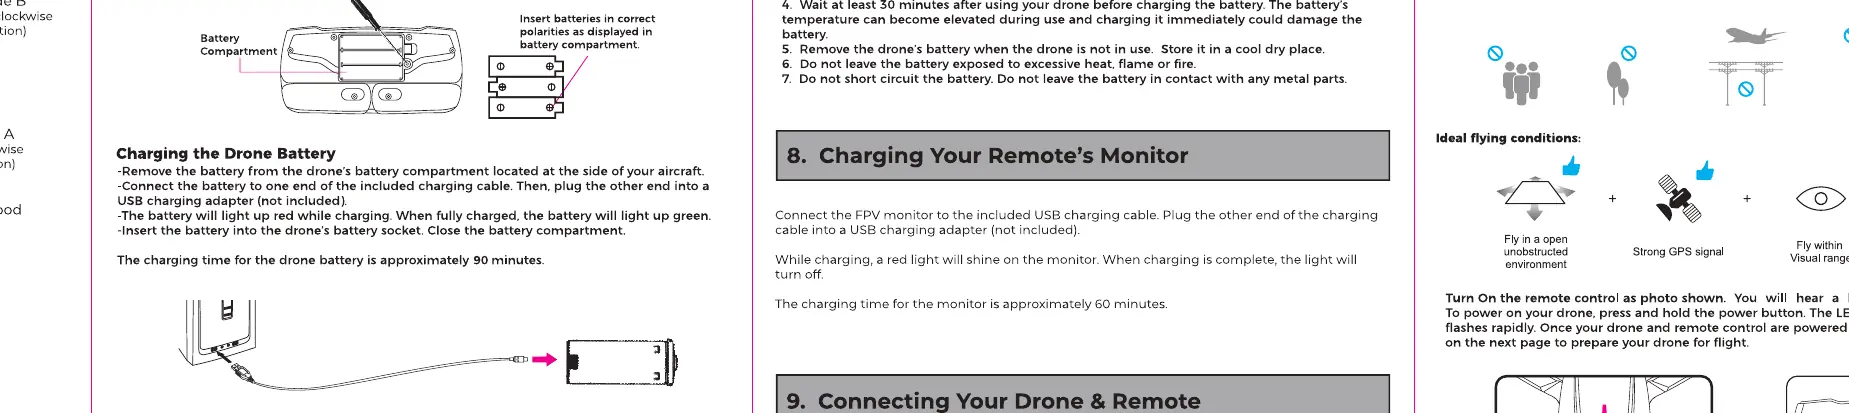
Drone Battery
Connect the drone battery to the provided USB charging cable. The light on the cable will turn on while charging and turn off when fully charged. The charging time is approximately 90 minutes.
Remote Control
Open the battery compartment on the back of the remote and insert 3 x 1.5V AA batteries. Ensure correct polarity.
Flight Operations
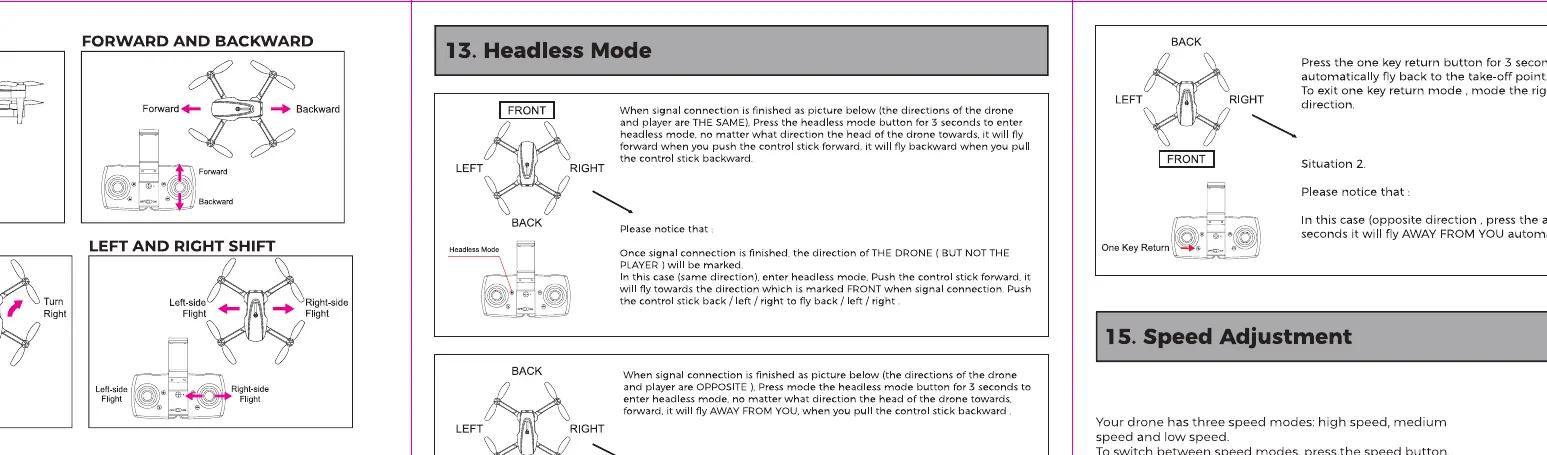
Pairing and Take-off
- Turn on the drone and the remote control.
- Push the left control stick up and then down to pair.
- Place the drone on a flat surface.
- Press the One-Key Take-off button to start the motors and lift off.
Flight Controls
- Left Stick: Controls altitude (up/down) and rotation (left/right).
- Right Stick: Controls forward, backward, and side-to-side movement.
Advanced Features
- Headless Mode: Allows the drone to fly relative to the pilot's orientation, regardless of where the drone's "nose" is pointing.
- Speed Adjustment: Toggle between three speed modes using the speed button.
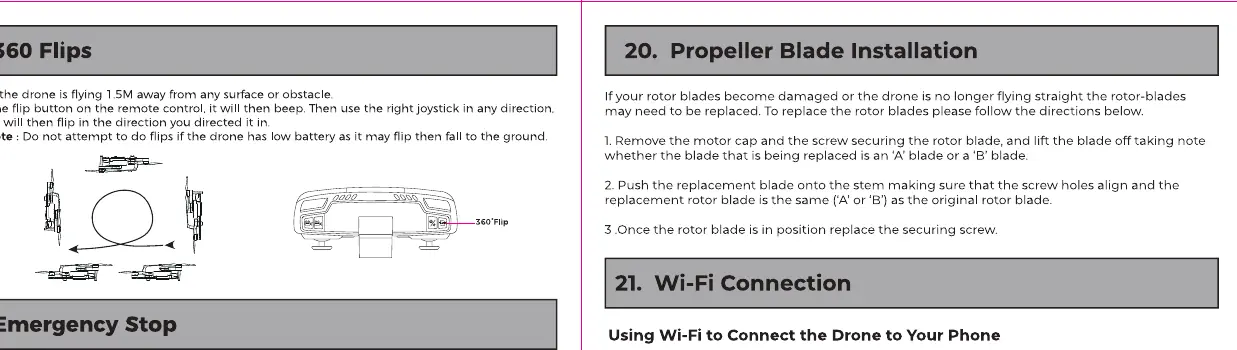
- 360 Flips: Use the flip button and the right stick to perform aerial stunts.
- Emergency Stop: Hold the Emergency Stop button for 3 seconds to immediately cut power to the motors.
Maintenance
If a propeller becomes damaged, it must be replaced. Use the provided screwdriver to remove the screw, replace the blade with a new one, and tighten the screw securely. Ensure the correct blade (A or B) is used for the corresponding motor position.
Troubleshooting
If the drone behaves erratically or does not respond, perform a reset. Place the drone on a flat surface, push both control sticks to the bottom-right corner, and hold until the drone lights blink. This recalibrates the internal gyroscope.
Manufacturer information
Sharper Image
Practical help
Common problems
Drone drifts or flies erratically
Perform a gyroscope reset by placing the drone on a flat surface and holding both control sticks in the bottom-right corner.
Drone does not pair with remote
Ensure both the drone and remote are turned on. Push the left control stick up and then down to initiate pairing.
Battery not charging
Check that the USB charging cable is securely connected to the battery and a power source.
Before use
- Register drone with FAA if required by local regulations
- Charge the drone battery fully (approx. 90 minutes)
- Install 3 x 1.5V AA batteries in the remote
- Calibrate the drone on a flat, level surface
- Check propellers for damage and correct installation
Show more Show less
Specs in practice
- Drone Battery
- 3.7V 1200mAh Lithium Polymer battery
- Charging Time
- Approximately 90 minutes for a full charge
- Remote Power
- Requires 3 x 1.5V AA batteries (not included)
Images and diagrams
- The remote control features a power switch, speed control, and dedicated buttons for take-off, landing, and emergency stop.
- The drone battery compartment is located on the underside of the drone.
- Propellers are labeled A and B; ensure they are installed on the correct motor arms.
Model compatibility
- Requires a smartphone for FPV (First Person View) and app-based features.
- App is compatible with iOS and Android devices.

Manual page author
David Miller
Documentation analyst