Power / EV Chargers
Installation Guide for Stylish Minimalist TV Stand with Electric Fireplace
Step-by-step installation guide for the Stylish Minimalist TV Stand with Electric Fireplace. Includes assembly instructions, safety warnings, and maintenance tips.
Table of contents
Quick guide from the manual
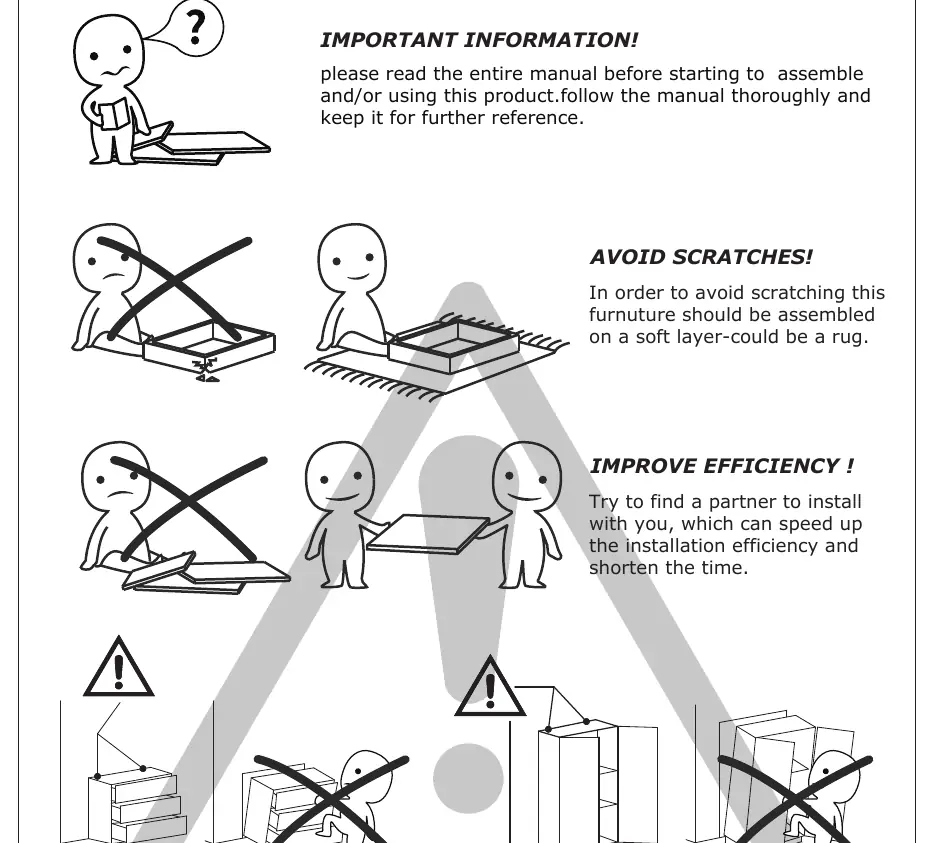
This manual provides instructions for assembling the Stylish Minimalist TV Stand with Electric Fireplace. Key requirements for a successful installation include having a partner to assist with assembly, working on a soft surface (such as a rug) to prevent scratches, and avoiding the use of electric screwdrivers to prevent damage to the boards. It is critical to re-tighten all screws two weeks after assembly and every three months thereafter to ensure stability.
Preparation and tools
Before beginning the assembly, ensure you have the following tools ready:
- Pencil
- Screwdriver
- Hammer
- Drill
Verify that all parts (labeled A through K) are present. Note that the manual includes spare parts, indicated by "+2" in the parts list. When installing, carefully confirm that each screw corresponds to the manual, as accessories with similar shapes are distinguished by size.
Assembly instructions
The assembly process involves connecting various boards using eccentric rods (A), cam locks (B), and wooden dowels (C). Follow these general steps:
- Prepare boards: Screw eccentric rods (A) into the designated boards as shown in the specific steps.
- Connect boards: Attach boards using wooden dowels (C) and secure them with cam locks (B). Turn cam locks clockwise to tighten.
- Install lighting: Stick the light strip (H) to board 1 using the provided buckles (F) and screws (G).
- Attach fireplace: Fix the fireplace unit to the main structure using parts (D) and (J) as indicated in the diagrams.
Maintenance and cleaning
To maintain the furniture, follow these guidelines:
- Frame: Use a rag dipped in neutral detergent to wipe the frame, then dry with a clean rag.
- Glass materials: Wipe with a rag dampened with water glass cleaner, then dry with a dry rag.
- Stability: Re-tighten all screws 2 weeks after assembly and once every 3 months.
Safety warnings
Anti-Topple Warning: Overturned furniture can cause serious or fatal crush injuries. Always use the wall attachment provided. If the attachment is not included or does not fit your wall, purchase a suitable wall anchor and seek professional advice if unsure.
Warranty and support
The product includes a 30-day warranty for broken furniture or functional issues, starting from the date of purchase. The warranty covers sheet parts and electrical parts for 1 month. Damage caused by misuse, user error, or loss of parts during installation is not covered. For after-sales support, contact the manufacturer via email at [email protected] or by phone at 208-820-0068.
Practical help
Common problems
Board breaks during installation
Do not use an electric screwdriver and do not apply excessive force, as the boards are fragile.
Furniture feels unstable or wobbly
Re-tighten all screws 2 weeks after initial assembly and once every 3 months.
Scratches on the furniture surface
Assemble the furniture on a soft layer, such as a rug, to protect the finish.
Missing or damaged parts
Contact the after-sales support team at 208-820-0068 with your purchase order number and details of the problem.
Before use
- Find a partner to assist with assembly to improve efficiency.
- Prepare necessary tools: pencil, screwdriver, hammer, and drill.
- Clear a workspace and cover the floor with a soft material (e.g., a rug).
- Verify all parts (A-K) are present and identified by size.
- Ensure you have a wall attachment device for anti-toppling safety.
Specs in practice
- Eccentric rod (A)
- Main connector screw used to join boards.
- Wooden dowel (C)
- Alignment pin used to join boards before locking.
Images and diagrams
- The manual uses numbered circles to identify specific boards.
- Arrows indicate the direction of rotation for tightening cam locks (180 degrees).
- Icons show the correct tool usage (e.g., manual screwdriver vs. electric drill).
Model compatibility
- The warranty covers sheet parts and electrical parts for 1 month from the date of purchase.
- The warranty is valid for products bought in the US.

Manual page author
Emily Carter
User documentation editor
Prepares concise manual descriptions and highlights the most useful setup, operation, and maintenance information for readers.