Industrial / Access Equipment
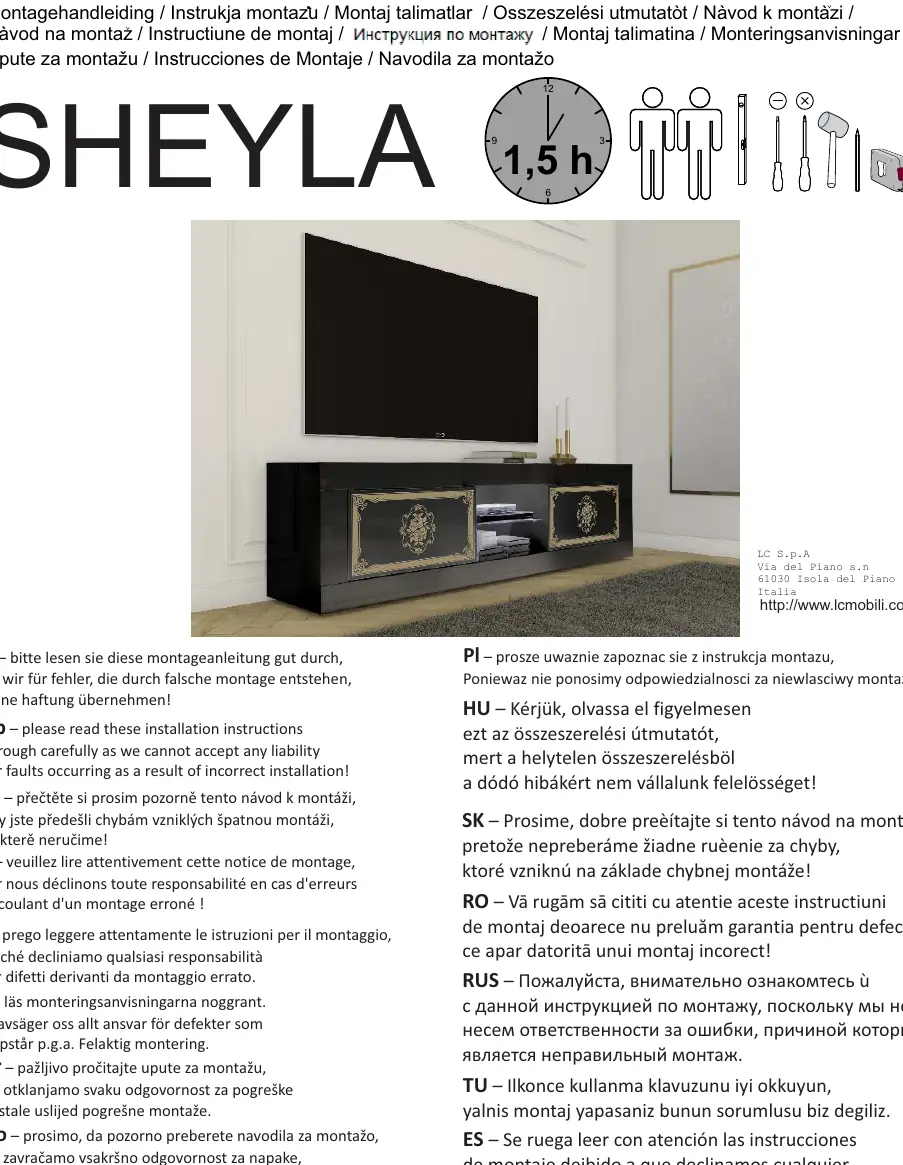
ADEO 02P2 SHEYLA TV Stand Assembly Instructions
Complete assembly guide for the ADEO 02P2 SHEYLA TV stand. Includes parts identification, hardware lists, step-by-step installation procedures, and weight capacity limits.
Table of contents
Manual images
Click an image to enlargeQuick guide from the manual
This document provides the assembly instructions for the ADEO 02P2 SHEYLA TV stand. The estimated assembly time is approximately 1.5 hours. It is highly recommended to perform the assembly with two people to ensure safety and ease of construction.
Safety and preparation
Please read the installation instructions carefully before beginning. The manufacturer does not accept liability for faults or defects occurring as a result of incorrect assembly. Ensure you have a clear, flat workspace and the necessary tools (typically a screwdriver) before starting.
Parts and hardware
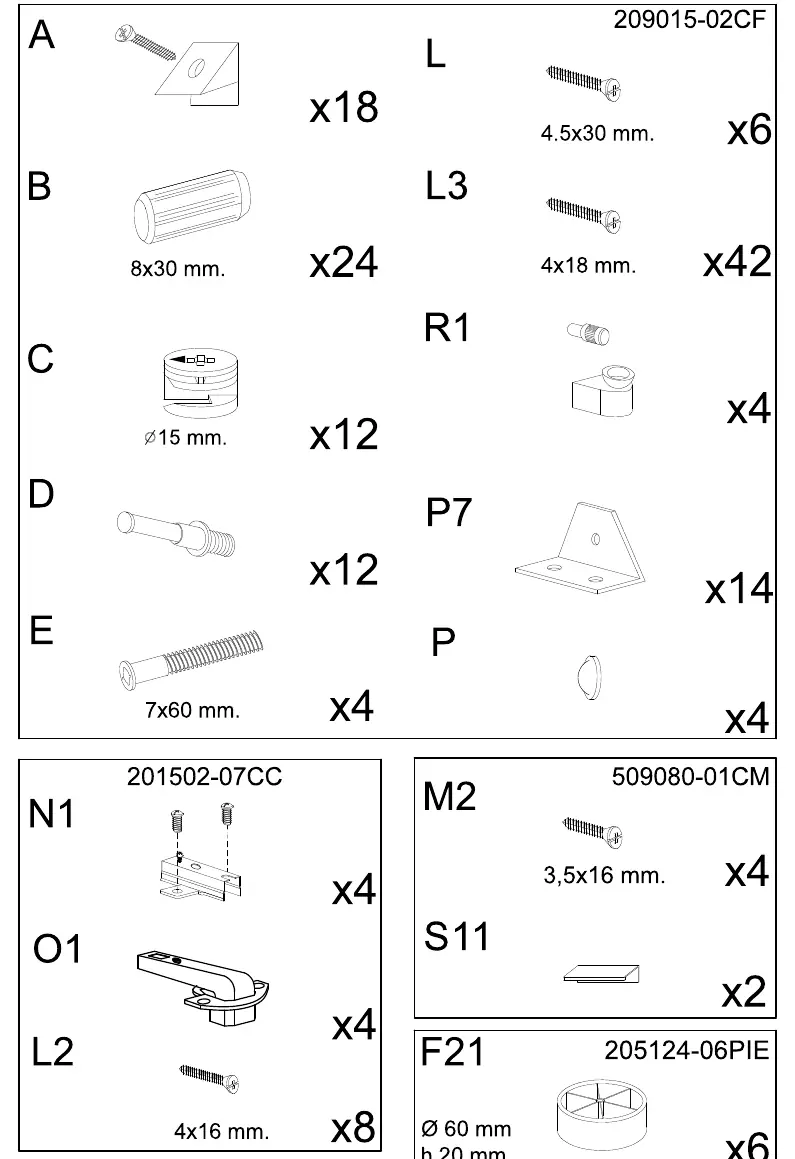
Before beginning assembly, verify that all components are present. The manual provides a detailed parts list (pages 3) and a hardware list (page 4) including screws, cam locks, and dowels. Ensure all quantities match the list provided in the manual before starting the assembly process.
Assembly instructions
Follow the steps 1 through 13 in the order presented in the manual:

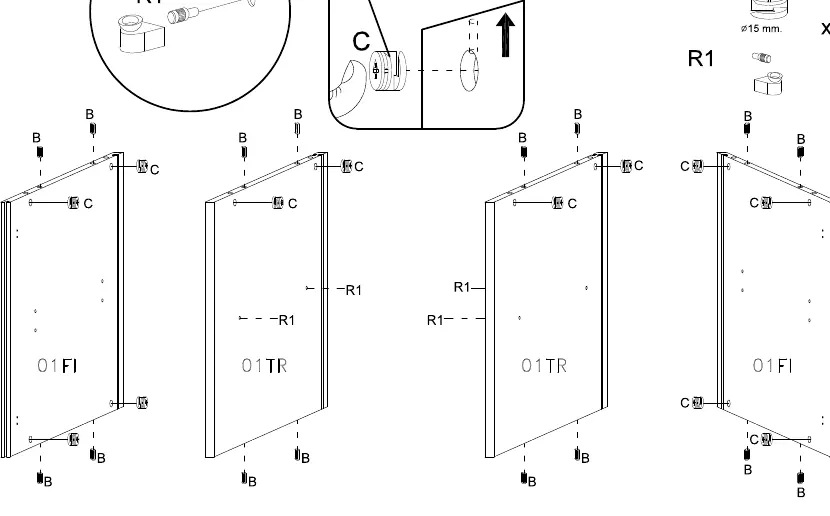

- Steps 1-2: Prepare the top and bottom panels by inserting the necessary hardware (cam bolts and dowels).
- Steps 3-4: Assemble the vertical dividers and side panels. Ensure cam locks are tightened correctly.
- Steps 5-6: Connect the top panel to the vertical structure and secure the back panels.
- Steps 7-9: Assemble the internal shelf components and attach the support brackets.
- Steps 10-11: Finalize the main frame assembly and secure all structural connections.
- Steps 12-13: Attach the hinges and doors. Adjust the hinges as shown in the diagrams to ensure proper door alignment.
Load capacity and maintenance
To ensure the longevity and safety of the unit, adhere to the following weight limits:
- Maximum load for the top surface: 30 kg
- Maximum load for the internal shelf: 5 kg
Regularly check that all screws and fittings remain tight over time.
Manufacturer information
ADEO
Practical help
Common problems
Door misalignment
Use the adjustment screws on the hinges (shown in step 13) to align the doors horizontally and vertically.
Unstable unit
Ensure all cam locks are fully tightened and the unit is assembled on a perfectly flat surface.
Before use
- Verify all panels (02TO, 01FI, 01TR, 02FO, 01SP, 02FAS, 01FAL, 01PET, 02SCH, 01SCHS) are present.
- Check all hardware quantities (A, B, C, D, E, L, L3, R1, P7, P, N1, O1, L2, M2, S11, F21) against the list on page 4.
- Clear a large, flat area for assembly.
- Have a screwdriver ready for assembly.
- Ensure two people are available for lifting and positioning panels.
Specs in practice
- Max Top Load
- 30 kg - Do not exceed this weight on the top surface.
- Max Shelf Load
- 5 kg - Do not exceed this weight on the internal shelf.
- Assembly Time
- Approximately 1.5 hours.
Images and diagrams
- Page 3: Exploded view of all wooden panels and their identification codes.
- Page 4: Detailed list of all screws, dowels, and fittings required.
- Pages 5-11: Step-by-step visual guide for assembly.
Model compatibility
- For indoor use only.

Manual page author
Emily Carter
User documentation editor
Prepares concise manual descriptions and highlights the most useful setup, operation, and maintenance information for readers.