Garden / Gazebos & Canopies
Installation Guide for Home Depot 13X15FT Wooden Gazebo Netting and Curtain
Quick installation guide for the Home Depot 13X15FT Wooden Gazebo Netting and Curtain. Includes parts list, step-by-step assembly instructions for rails, curtains, and netting.
Table of contents
Manual images
Click an image to enlargeQuick guide from the manual
This document provides installation instructions for the 13X15FT Wooden Gazebo Netting and Curtain. Before starting, verify all parts against the accessory catalogue. If you encounter missing parts or have questions, contact support via email at [email protected].
Accessory Catalogue
Ensure you have all components before beginning assembly. Key parts include:
- Q: Sliders (88 pcs)
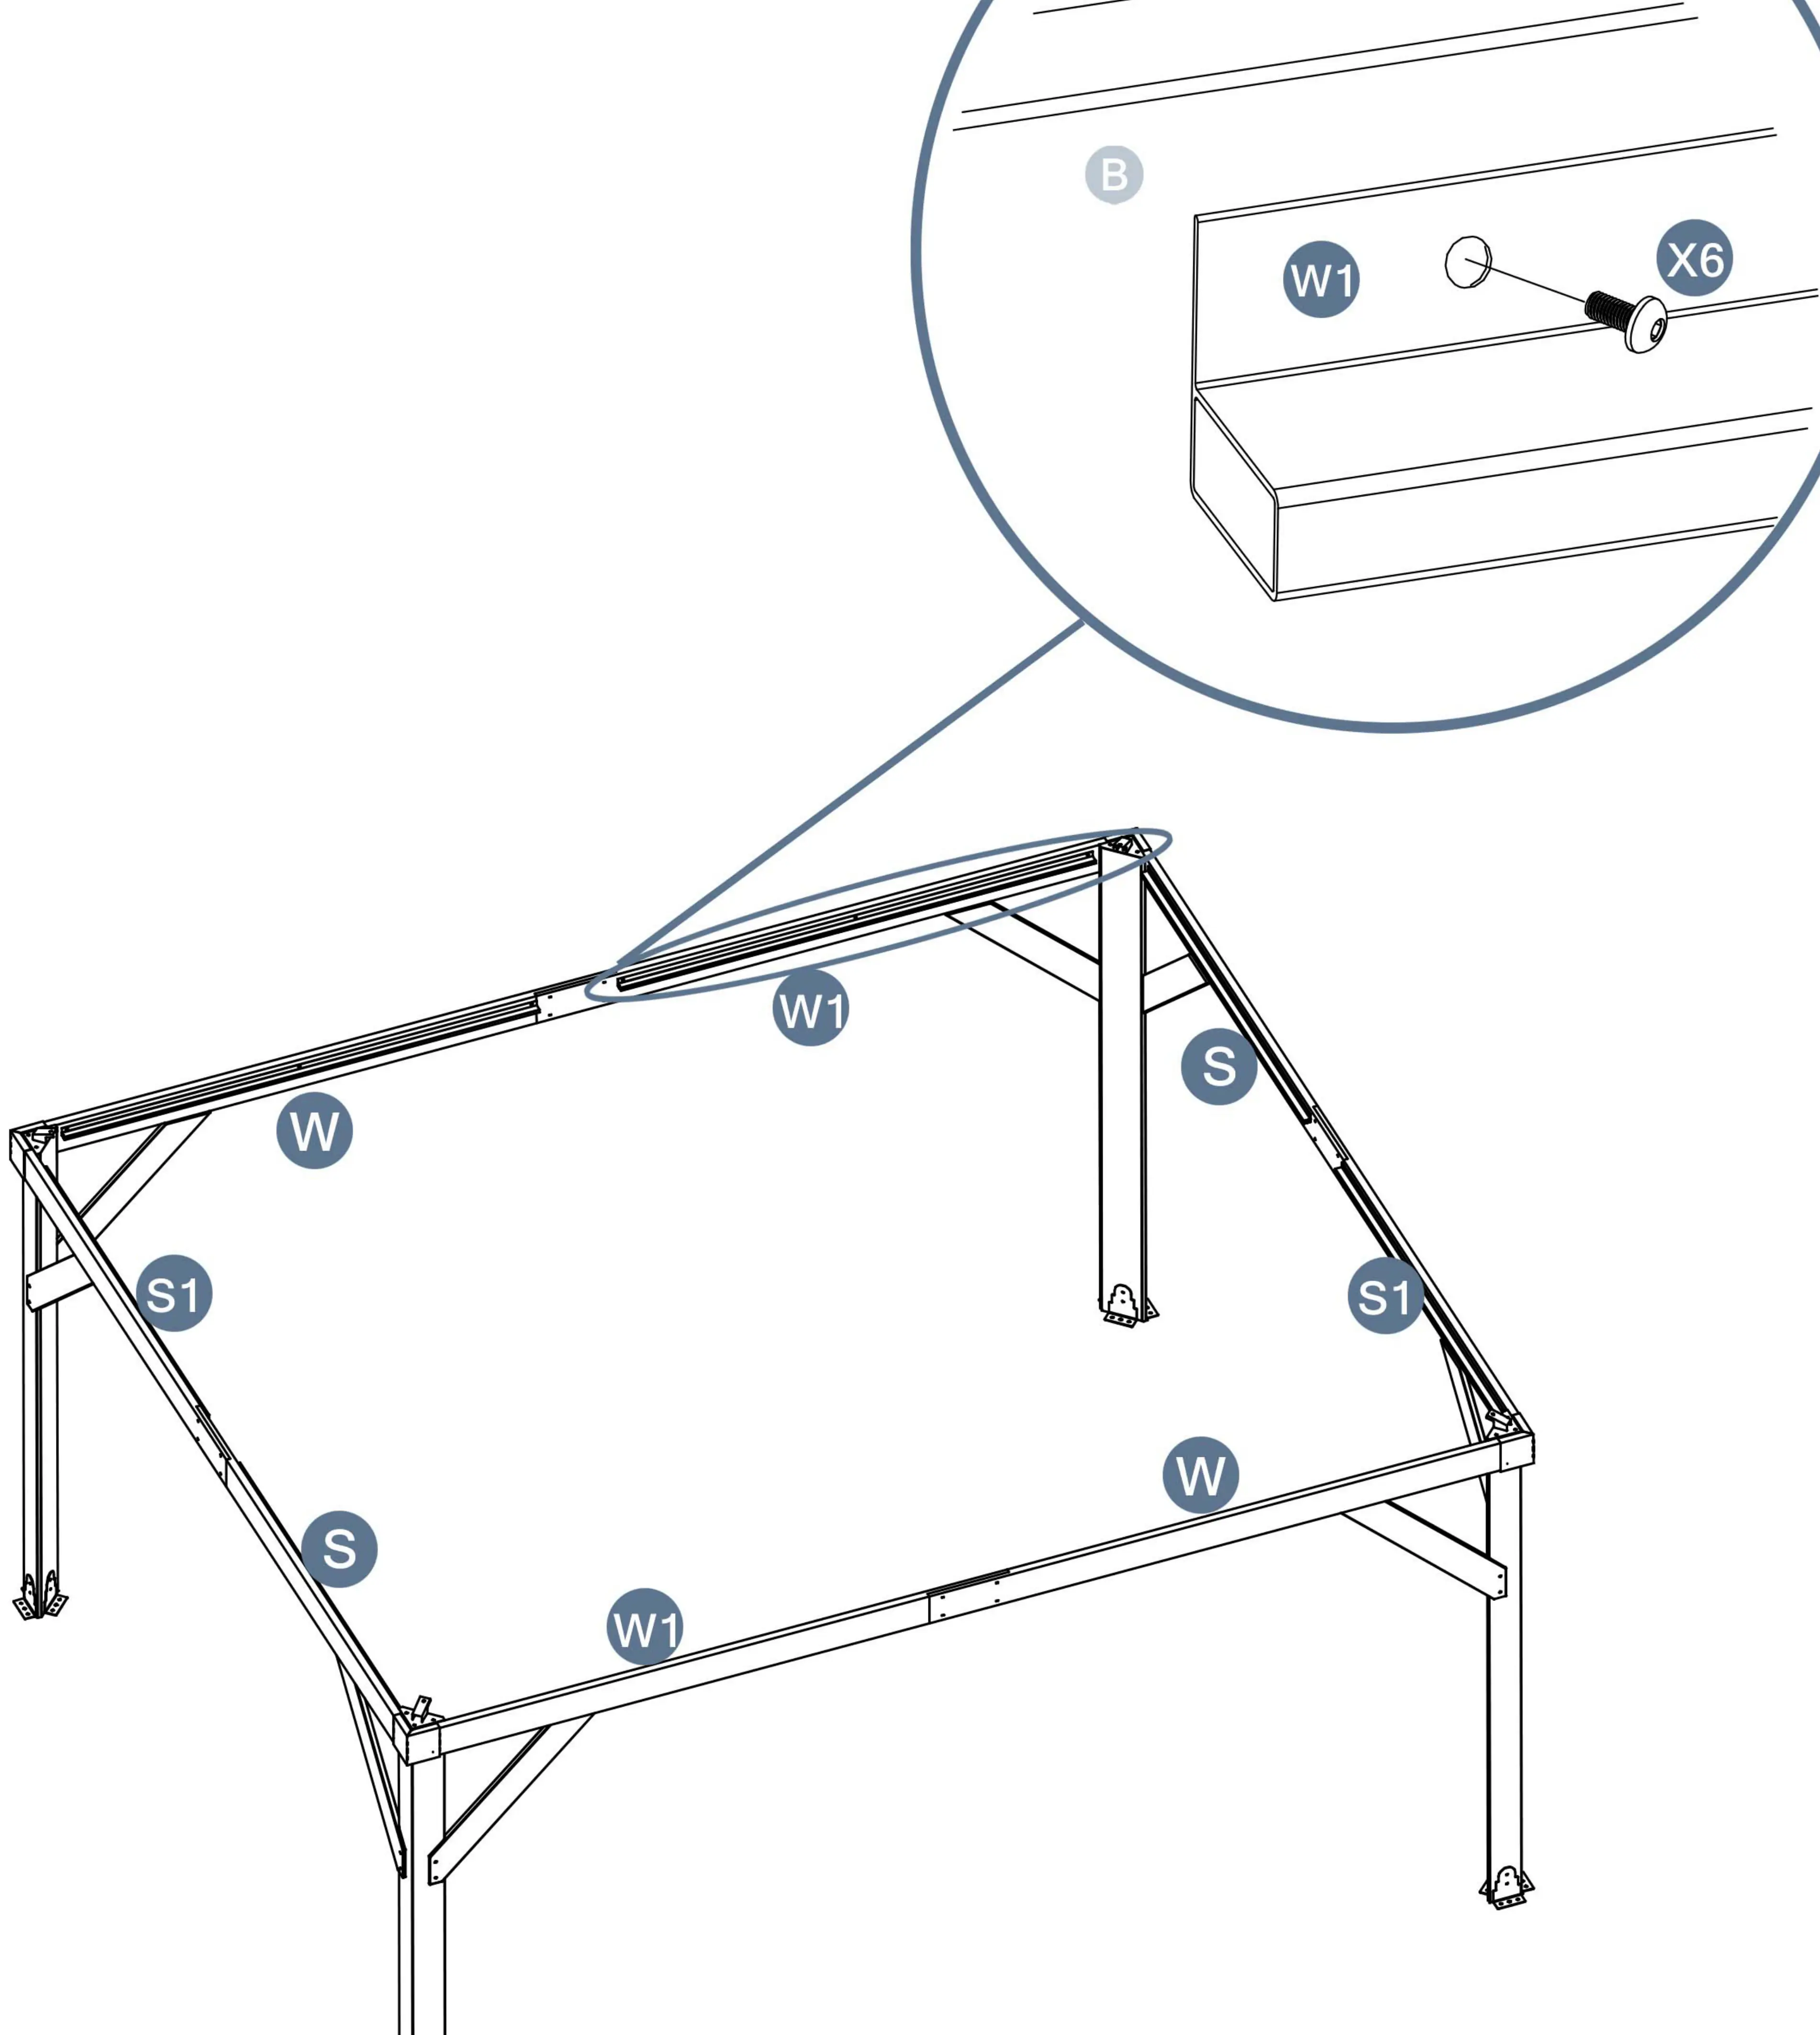
- W, W1, S, S1: Rail components
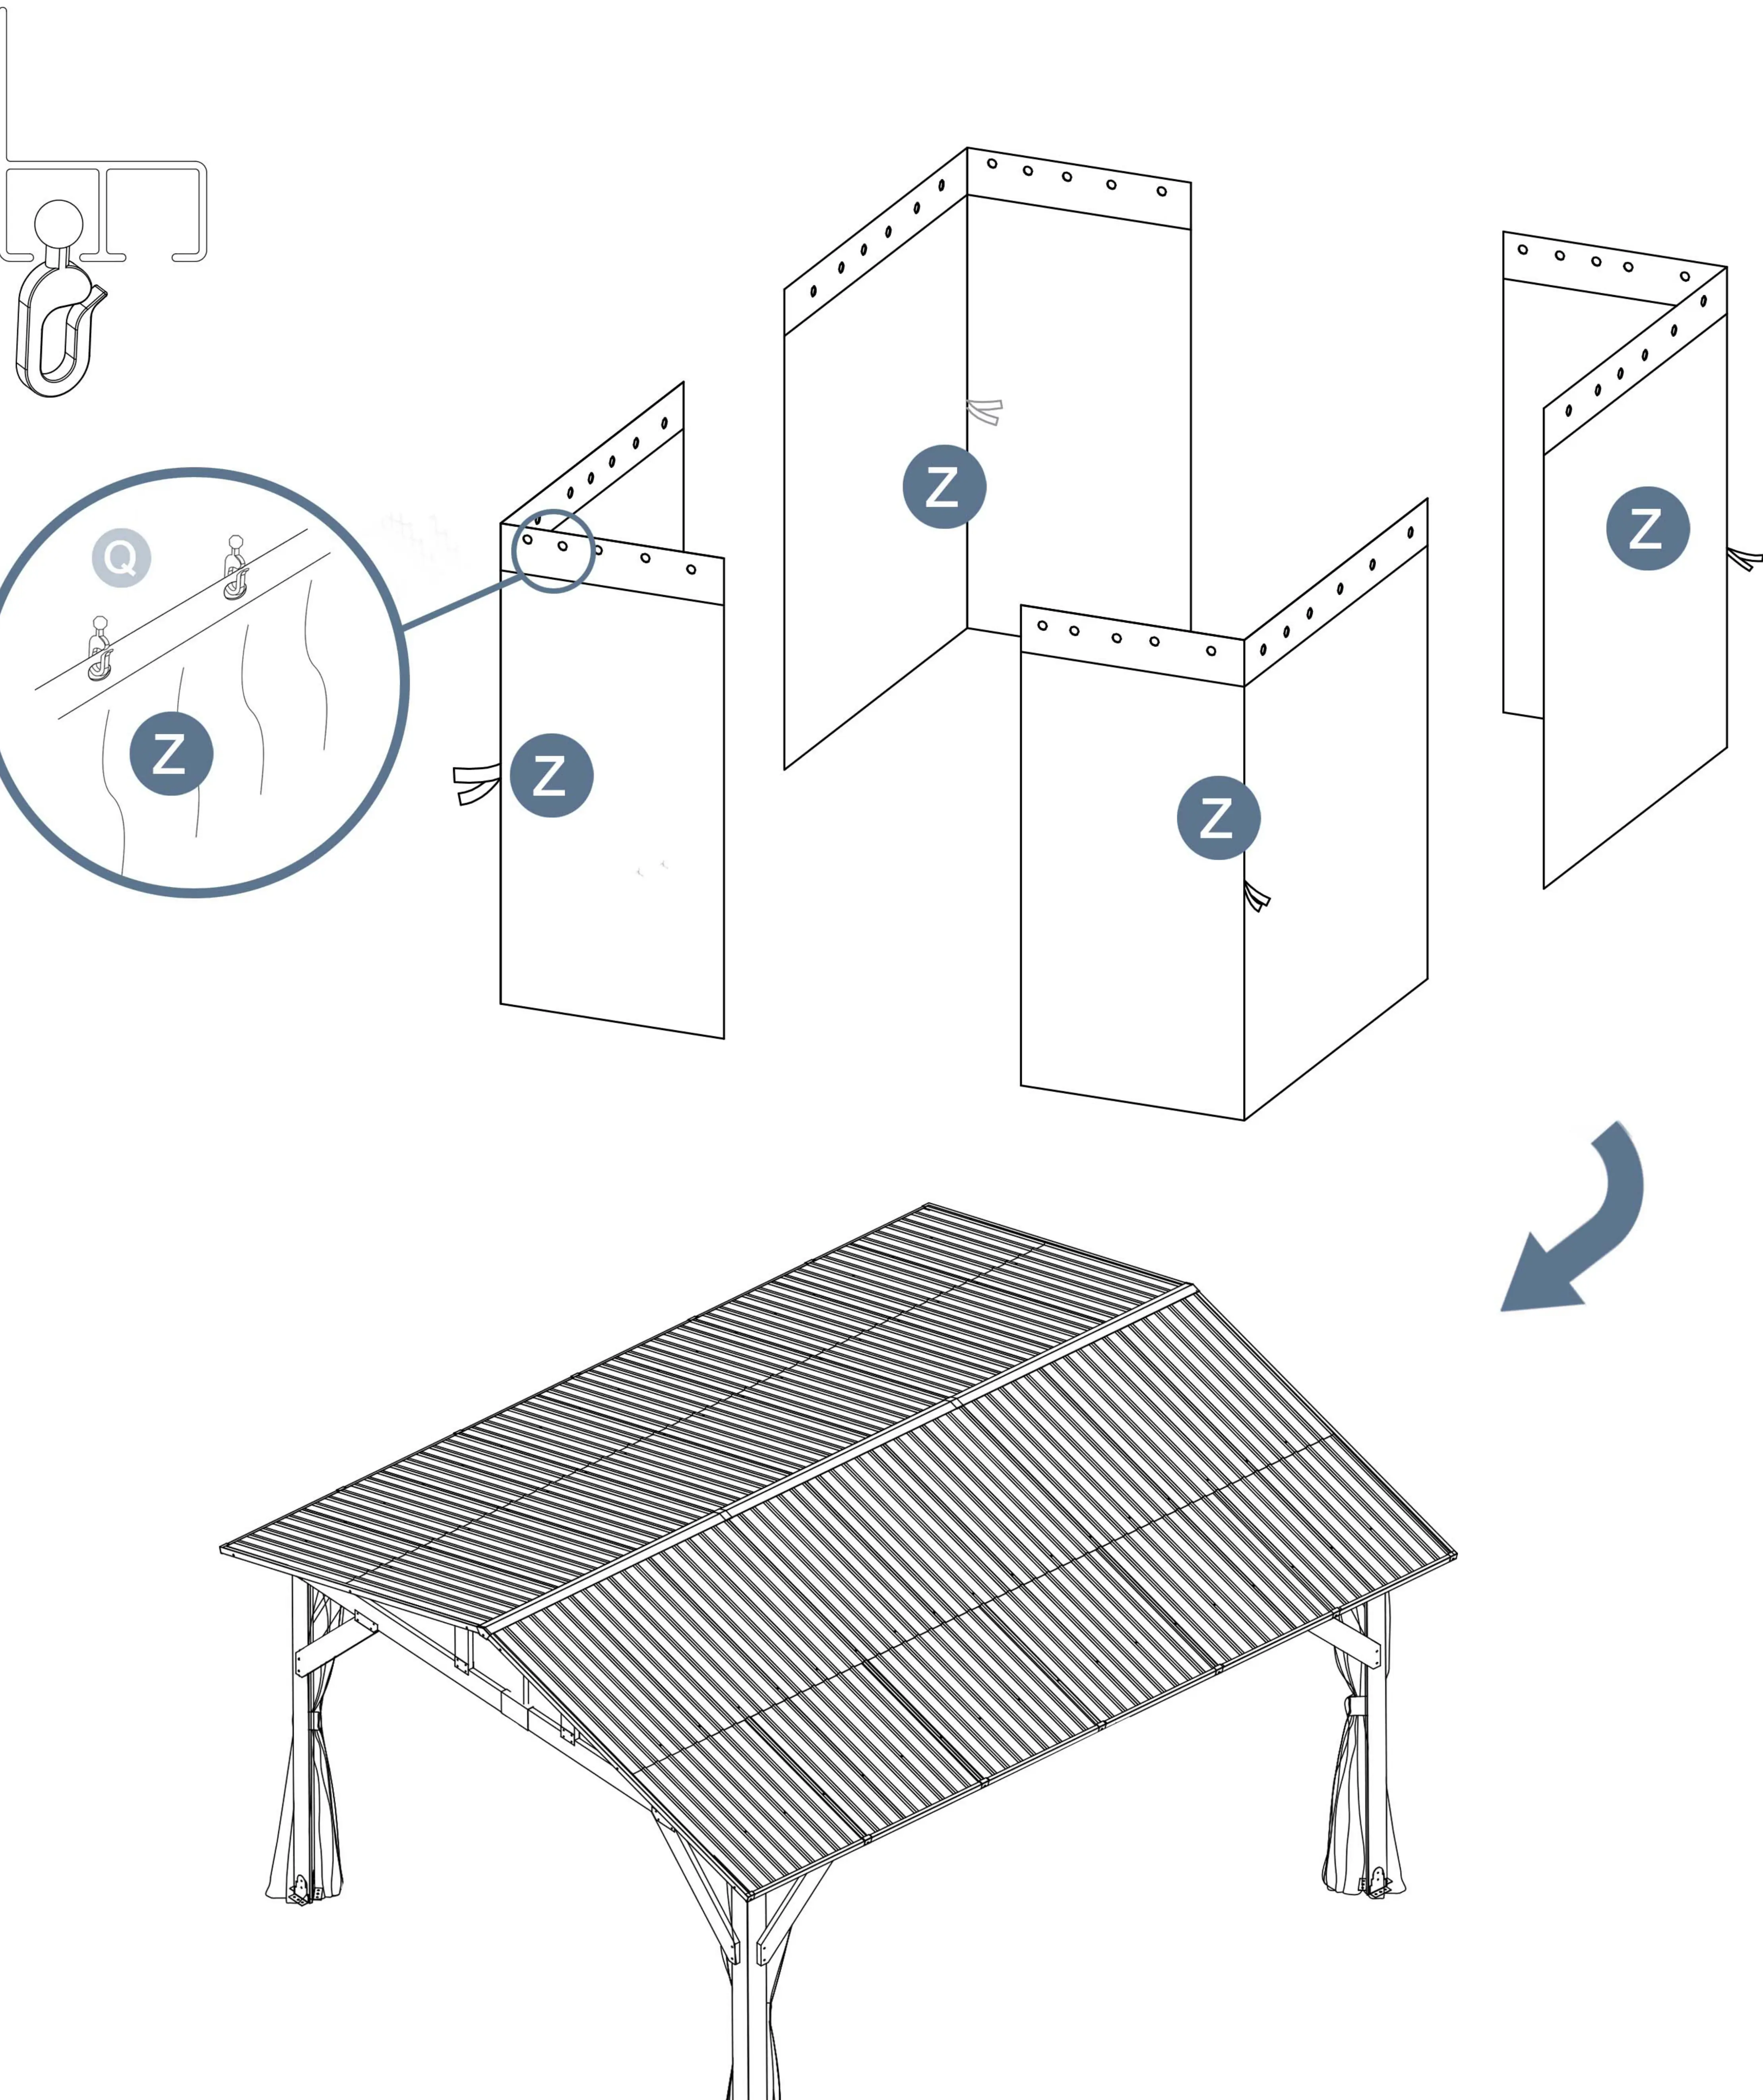
- Z: Curtains
- Z1: Netting
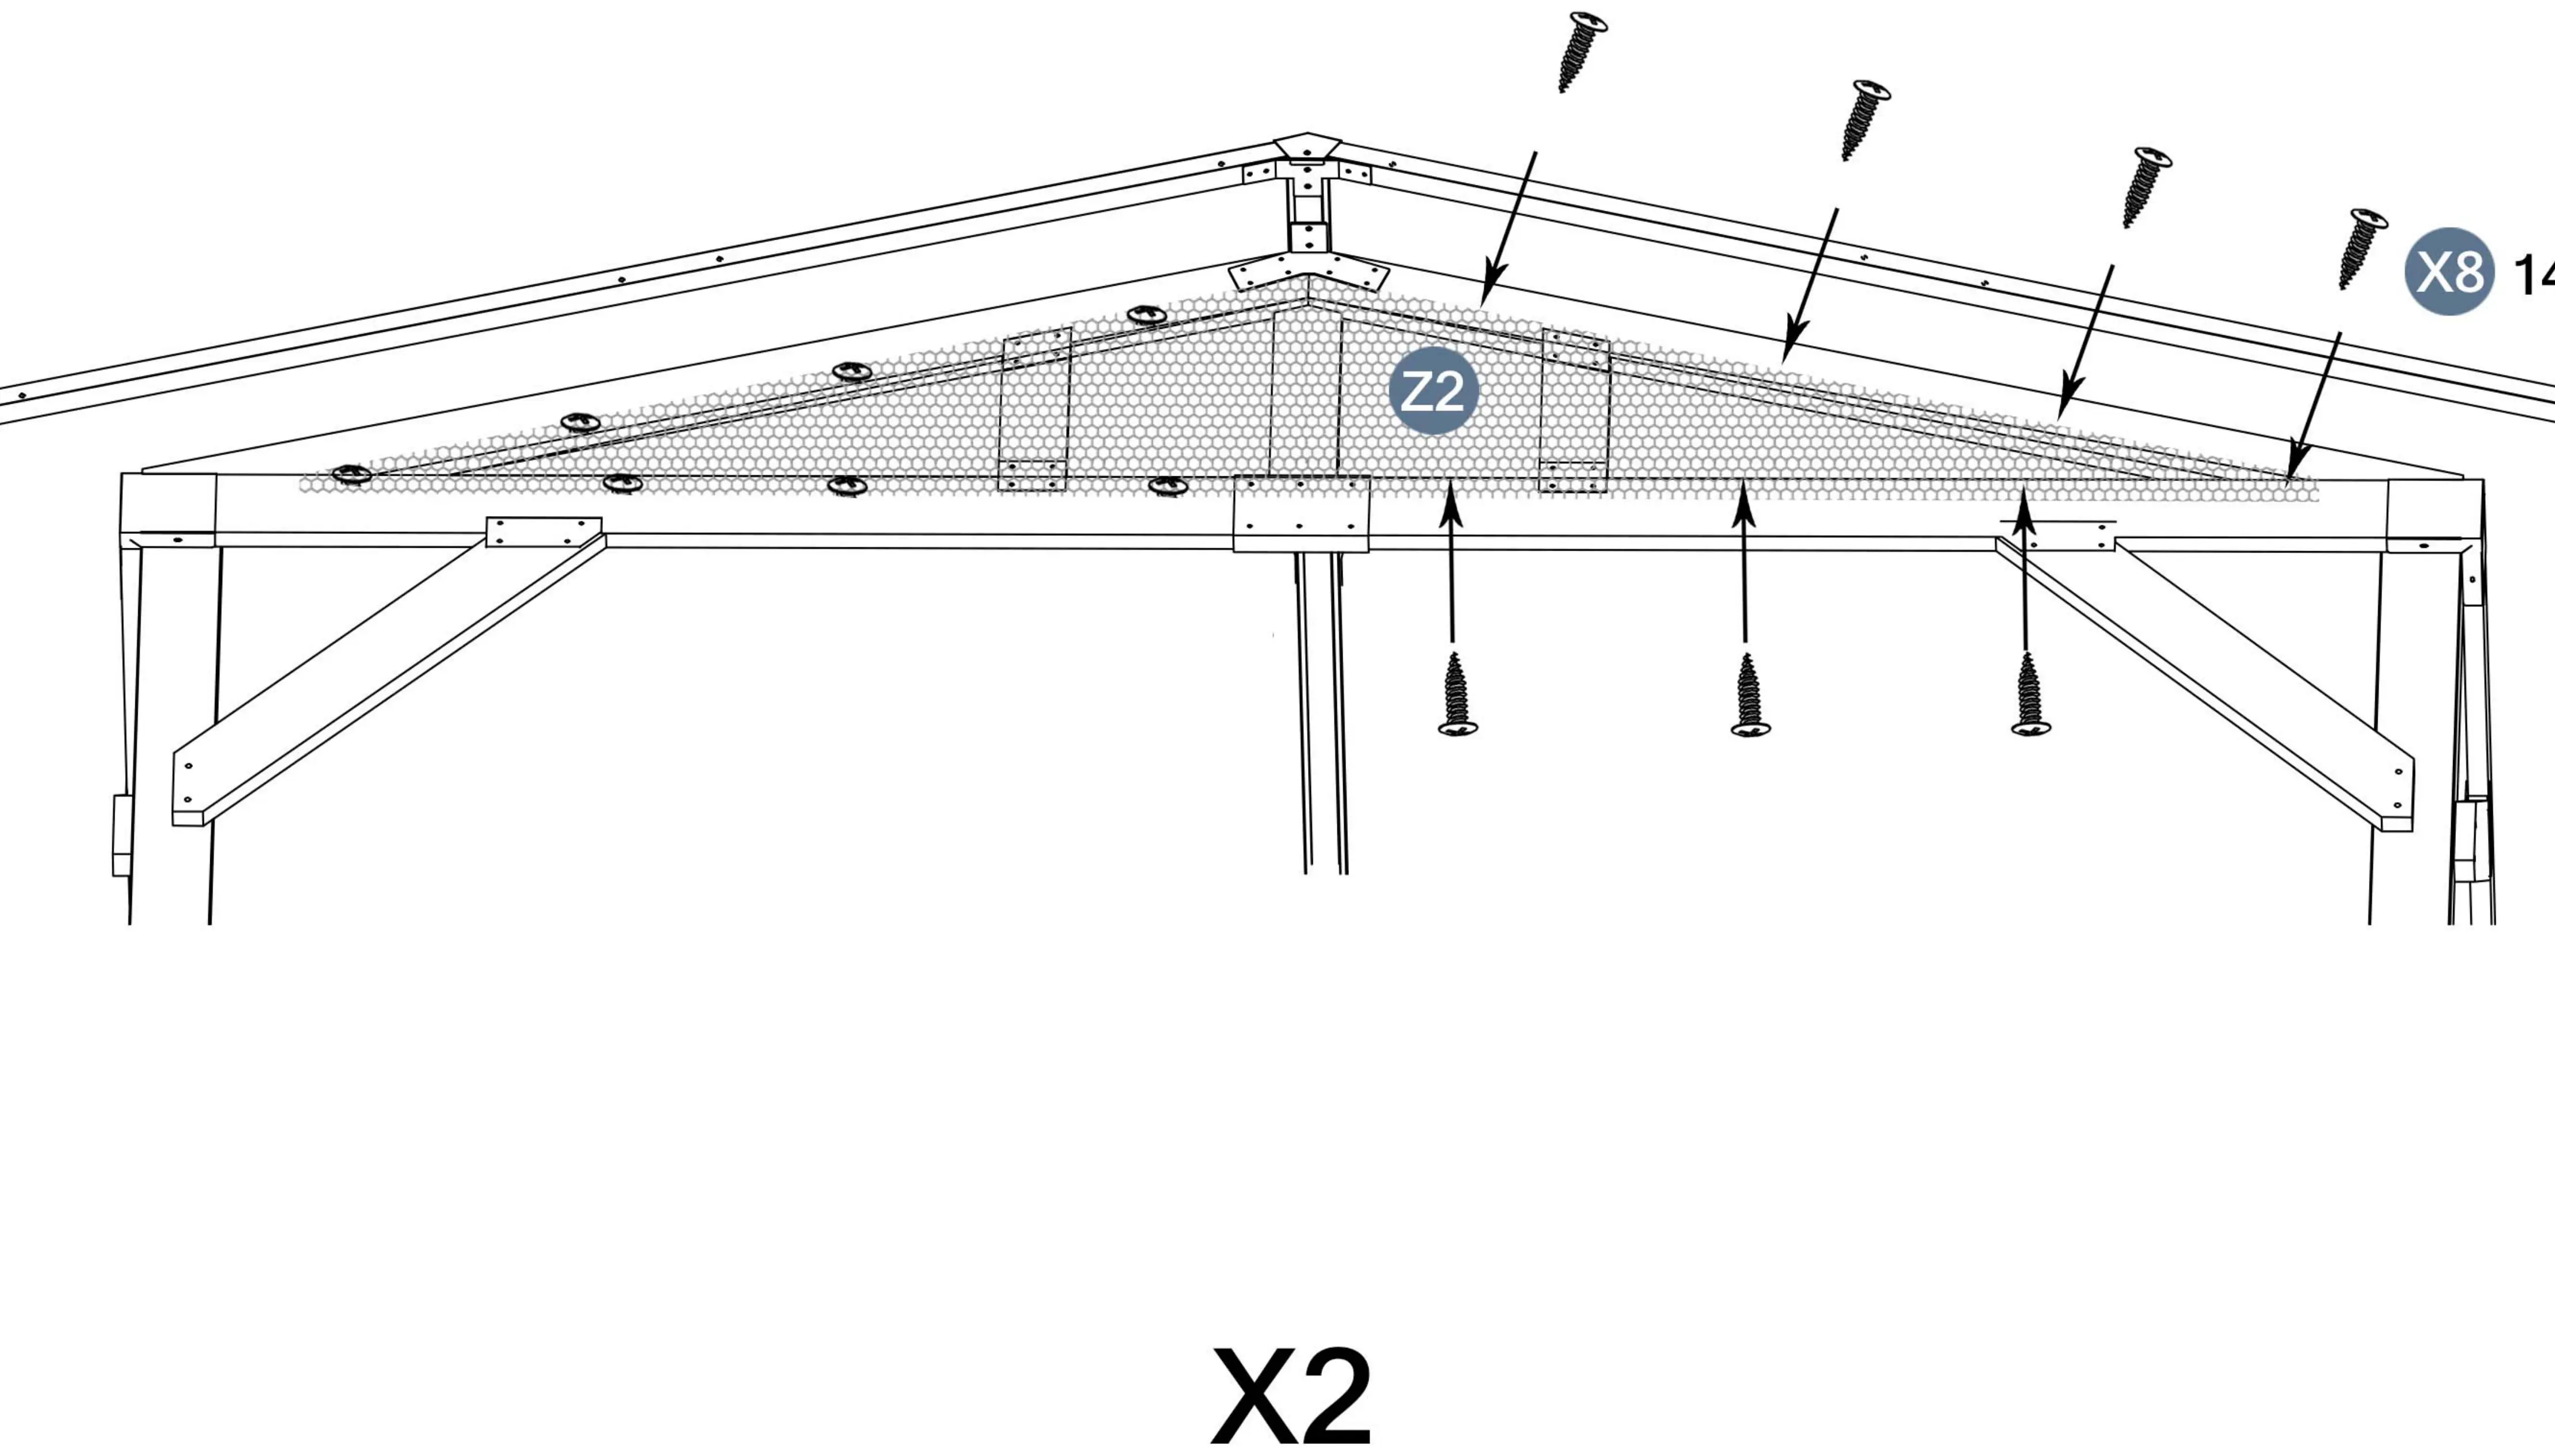
- Z2: Top netting
- X6: M6x15mm bolts
- X8: M4x15mm screws
Installation Steps
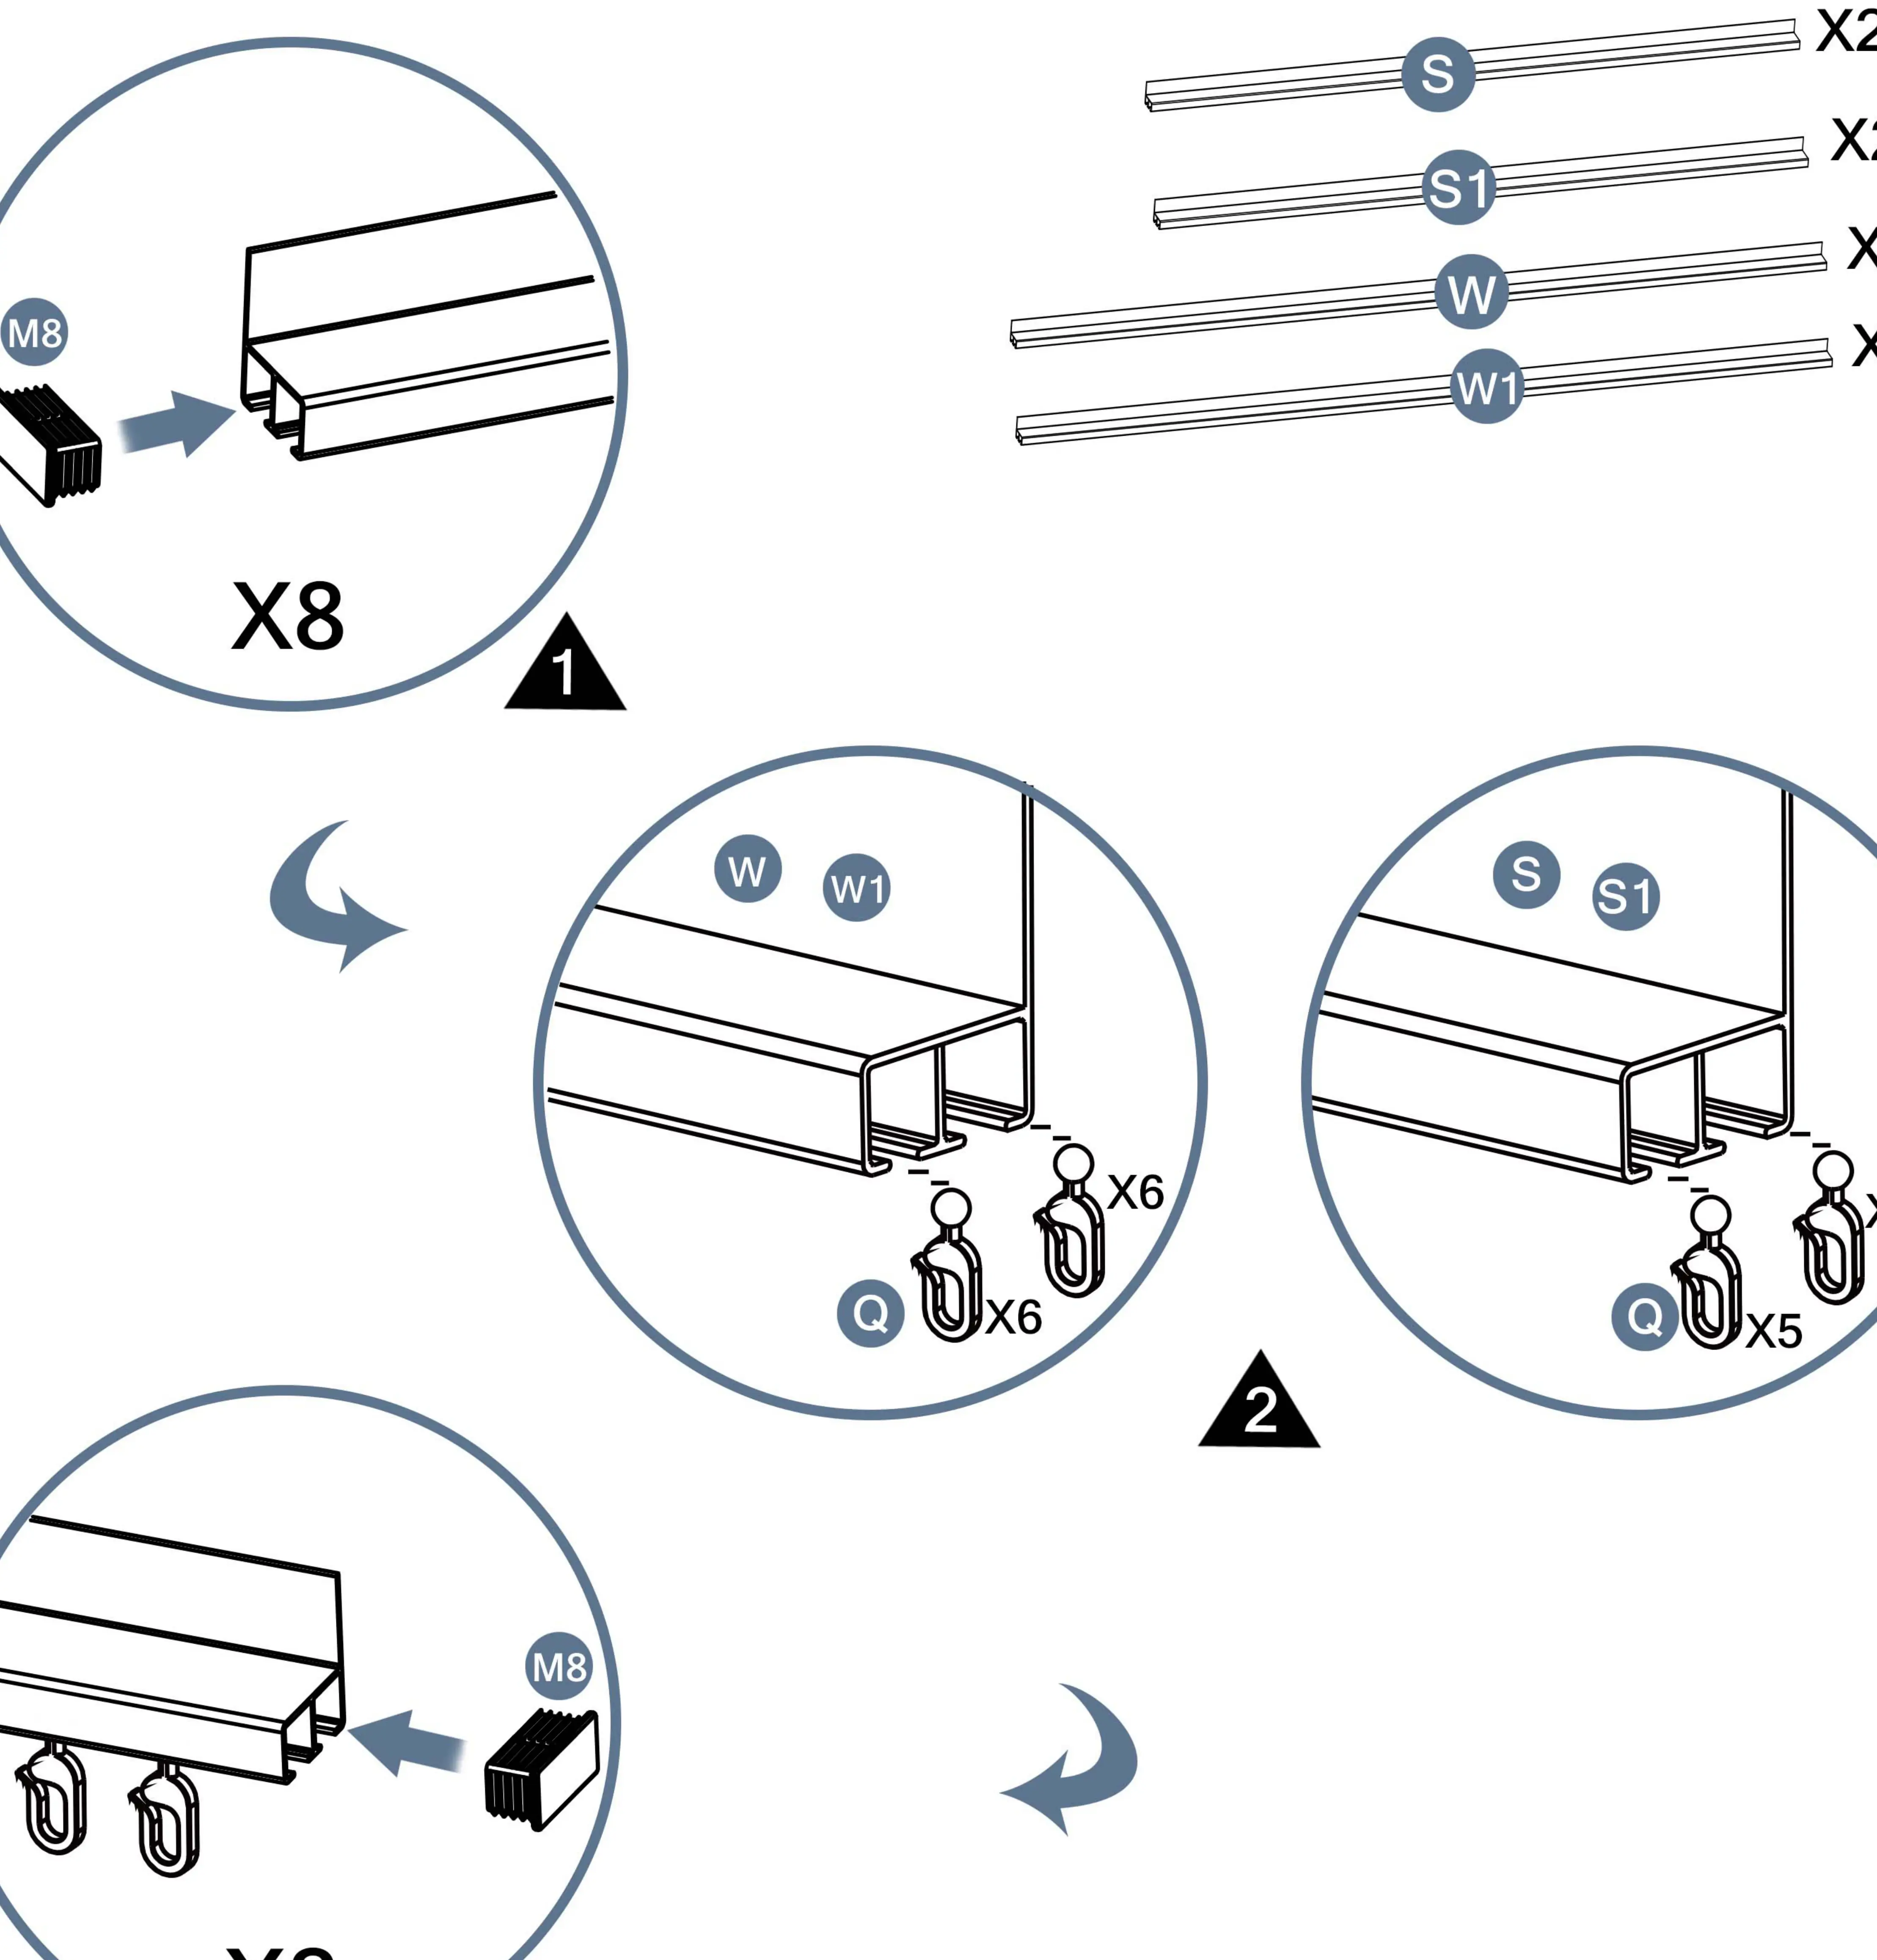
Step 1: Preparing the Rails
Insert the sliders (Q) and end caps (M8) into the rail sections (W, W1, S, S1). Ensure the correct number of sliders are placed in each rail as indicated in the diagram.
Step 2: Assembling the Frame
Align the inner three holes of the rail parts (W, W1, S, S1) before screwing them together using the M6x15mm bolts (X6).
Step 3: Installing Curtains
Attach the curtains (Z) to the previously installed sliders (Q) on the rails.
Step 4: Installing Netting
Attach the netting (Z1) to the sliders (Q) on the rails.
Step 5: Installing Top Netting
Secure the triangular top netting (Z2) to the frame using the M4x15mm screws (X8).
Support
If you have any concerns about the gazebo installation, please feel free to contact us. We will reply within 24 hours. E-mail: [email protected]
Manufacturer information
The Home Depot
Practical help
Common problems
Missing parts
Check the accessory catalogue on page 2. If parts are missing, contact support via email at [email protected].
Before use
- Unpack all items carefully
- Verify parts against the accessory catalogue
- Ensure you have the correct tools for assembly
- Align holes before screwing parts together
Images and diagrams
- Step 1 shows how to insert sliders (Q) and end caps (M8) into the rails (W, W1, S, S1).
- Step 2 illustrates aligning the rails before securing with M6x15mm bolts.
- Step 5 shows the installation of the triangular top netting (Z2) using M4x15mm screws.
Model compatibility
- Designed specifically for 13X15FT wooden gazebos.

Manual page author
David Miller
Documentation analyst
Organizes user manual content into clear summaries, with attention to model details, product context, and everyday usability.