Garden / Gazebos & Canopies
Assembly Instructions for Veikous 12x24FT Hardtop Gazebo
Comprehensive assembly guide for the Veikous 12x24FT Hardtop Gazebo. Includes detailed parts lists, step-by-step installation procedures, hardware requirements, and safety guidelines for proper setup.
Table of contents
Manual images
Click an image to enlargeImportant Information
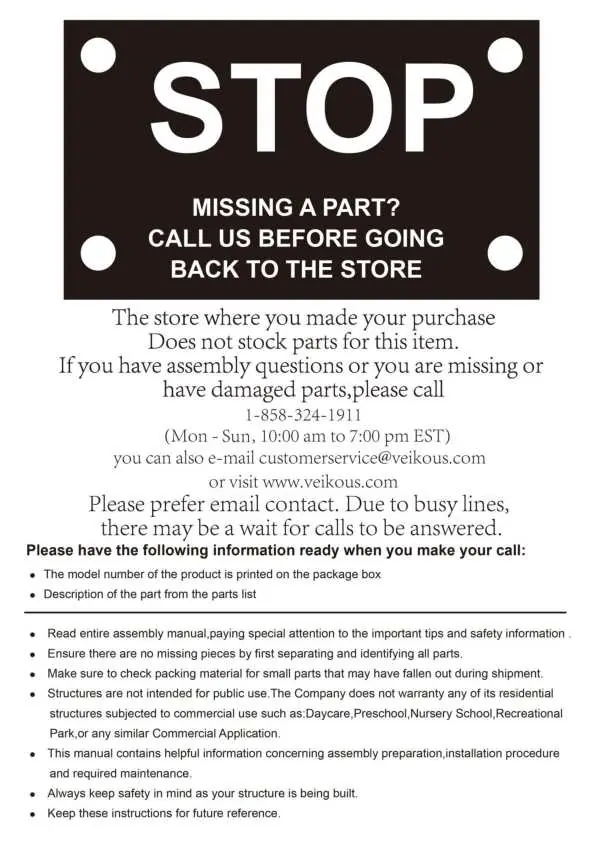
Before beginning assembly, please verify that you have all parts listed in the manual. If you are missing parts or have damaged components, do not return to the store. Please contact customer service at 1-858-324-1911 or email [email protected]. Have your order number and model number ready when contacting support.
Safety Warning: This structure is intended for residential use only. It is not designed for commercial applications such as daycares, preschools, nurseries, or recreational parks.
Parts Identification
The gazebo components are organized into seven boxes. Refer to the Parts List on pages 3 through 10 to identify all panels, beams, and hardware. Ensure all packing material is checked for small parts that may have fallen out during shipment.
Assembly Instructions
Assembly should be performed in the following sequence:
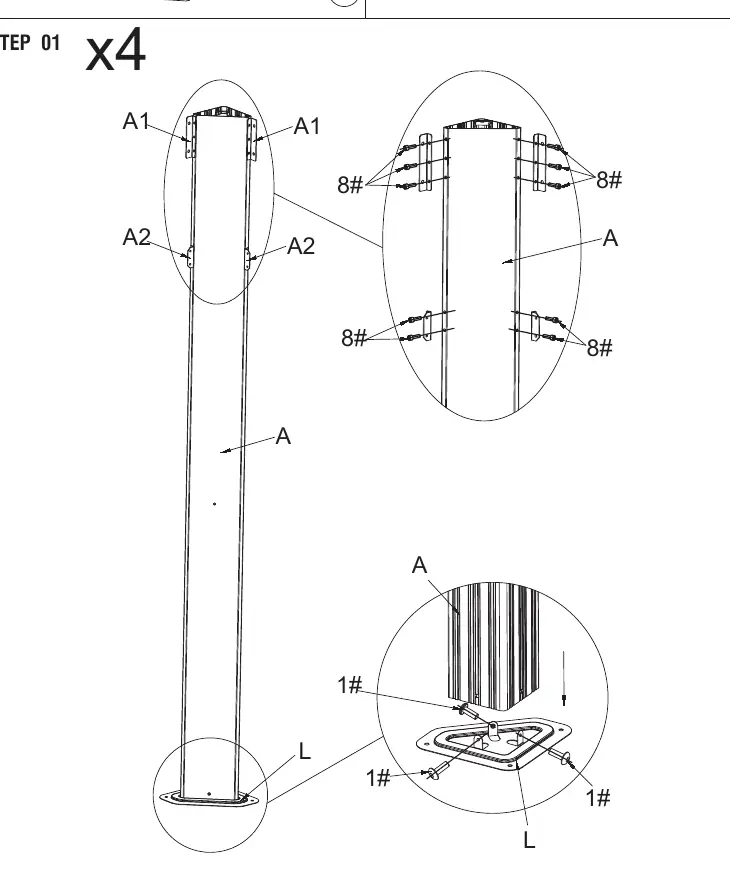

- Posts and Base: Connect parts A1 and A2 to the top of posts A, and attach base plates L and L1 to the bottom (Steps 1-2).
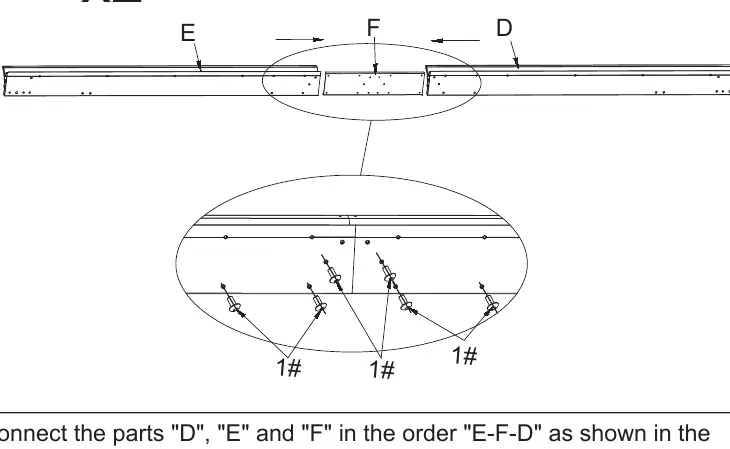
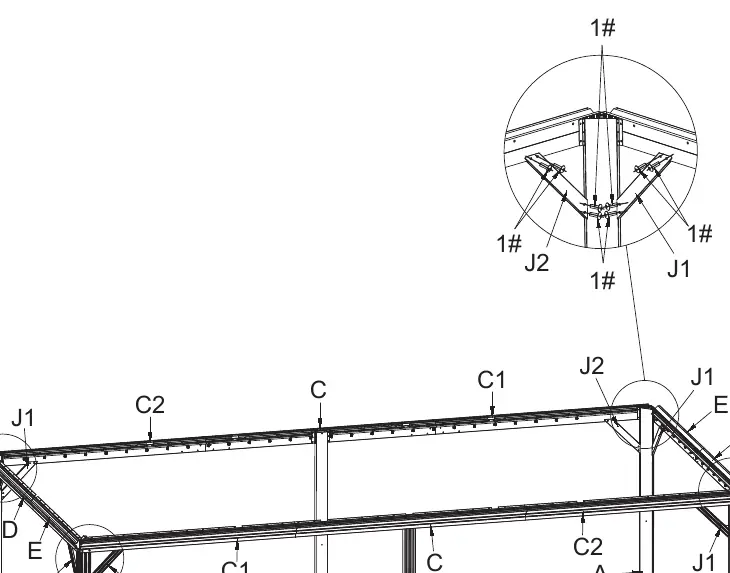
- Roof Frame: Assemble the main roof frame using parts D, E, F, C, C1, and C2. Ensure all screw holes are aligned before tightening (Steps 3-8).
- Frame Connection: Attach the assembled roof frame to the posts (Steps 9-11).
- Brackets and Reinforcements: Install corner brackets J1 and J2, and secure the frame with parts G and H (Steps 12-13).
- Roof Structure: Assemble the roof support beams (K, K1, K2, M, M1) and attach them to the frame (Steps 14-16).
- Roof Panels: Install the roof panels (V, W, X series) using the provided hardware. If you encounter difficulty installing panels V4 or V6, push part K up to create space (Steps 17-30).
- Curtains and Netting: Attach the curtains (Ya, Y1a) and netting (Y, Y1) to the frame (Steps 31-33).
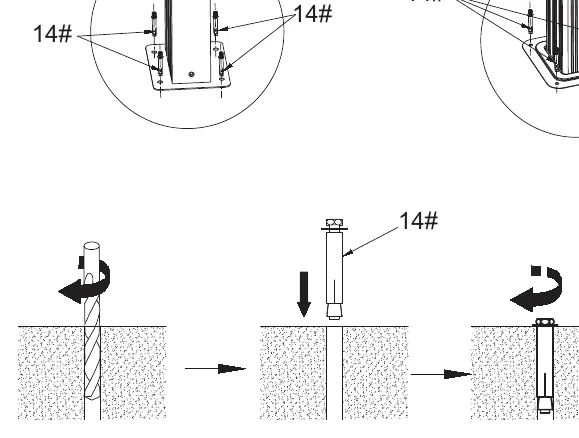
Anchoring and Safety
Once the structure is fully assembled, it must be securely anchored to the ground. Use the provided hardware (14#) to bolt the base plates to the surface (Step 34). Ensure all screws are tightened securely after the final assembly steps.
Practical help
Common problems
Missing or damaged parts
Contact customer service at 1-858-324-1911 or [email protected] before returning the product to the store.
Difficulty installing roof panels V4 or V6
Push part K up to create additional space for insertion.
Frame alignment issues
Ensure all screw holes are perfectly aligned before tightening screws. Do not fully tighten screws until instructed.
Before use
- Verify all parts against the parts list (Boxes 1-7).
- Check for damaged parts before starting.
- Ensure you have adequate space for assembly.
- Have your order number and model number ready.
- Read the entire manual before beginning.
Specs in practice
- Residential Use Only
- The structure is not warranted for commercial use (e.g., schools, daycares).
Images and diagrams
- Parts List (Pages 3-10): Visual reference for all components and hardware quantities.
- Assembly Steps (Pages 11-45): Detailed diagrams showing the sequence of construction.
Model compatibility
- Not intended for public or commercial use.

Manual page author
David Miller
Documentation analyst
Organizes user manual content into clear summaries, with attention to model details, product context, and everyday usability.