Garden / Gazebos & Canopies
Assembly Guide for Veikous 14x24 Hardtop Gazebo
Comprehensive assembly guide for the Veikous 14x24 Hardtop Gazebo. Includes step-by-step installation instructions, required tools, safety precautions, and anchoring procedures for secure setup.
Table of contents
Manual images
Click an image to enlargeImportant Information for Assembly
Before beginning assembly, please read the entire manual. This structure requires at least three people to assemble safely. Do not fully tighten screws until the entire structure is assembled to ensure proper alignment of parts.
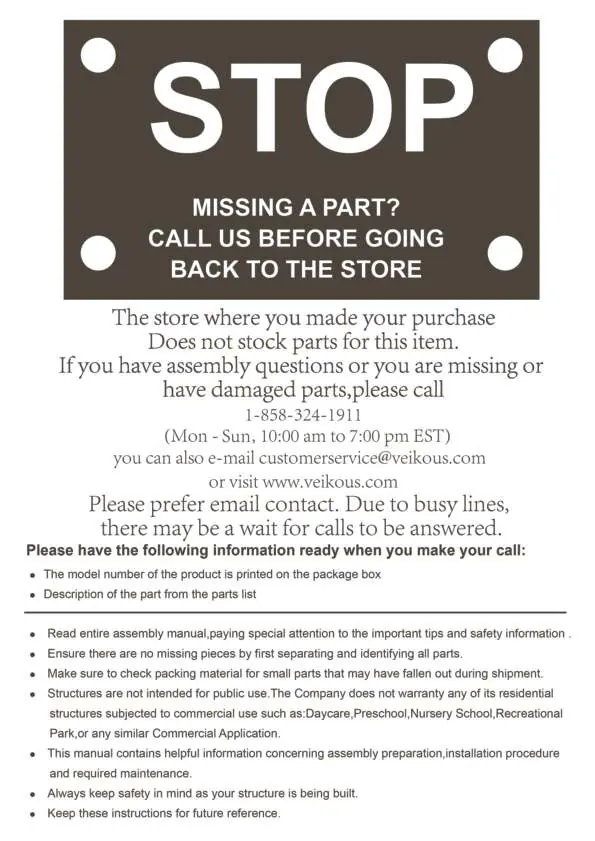
If you are missing parts or have damaged components, contact customer service before returning the product to the store. Keep your order number and model number ready when contacting support.
Tools Required
- Drill
- Allen key (included)
- Stepladder (6.5ft or more)
- Safety hat
- Gloves
- Phillips screwdriver
- Safety goggles
Assembly Overview
The assembly process is divided into 29 steps. Key phases include:
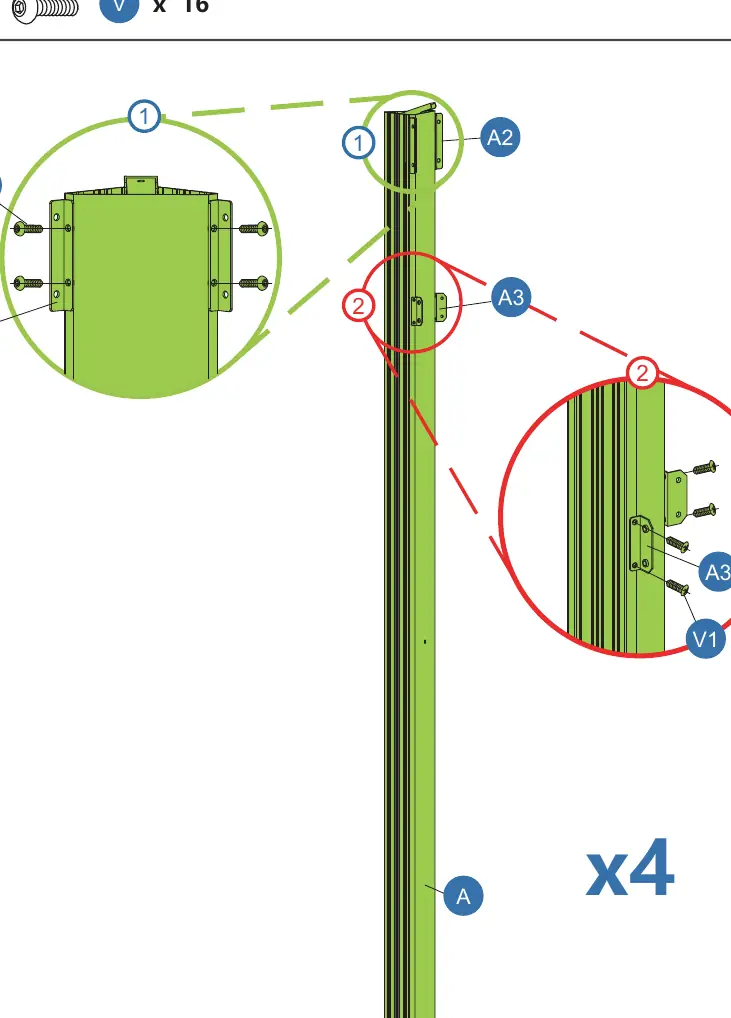
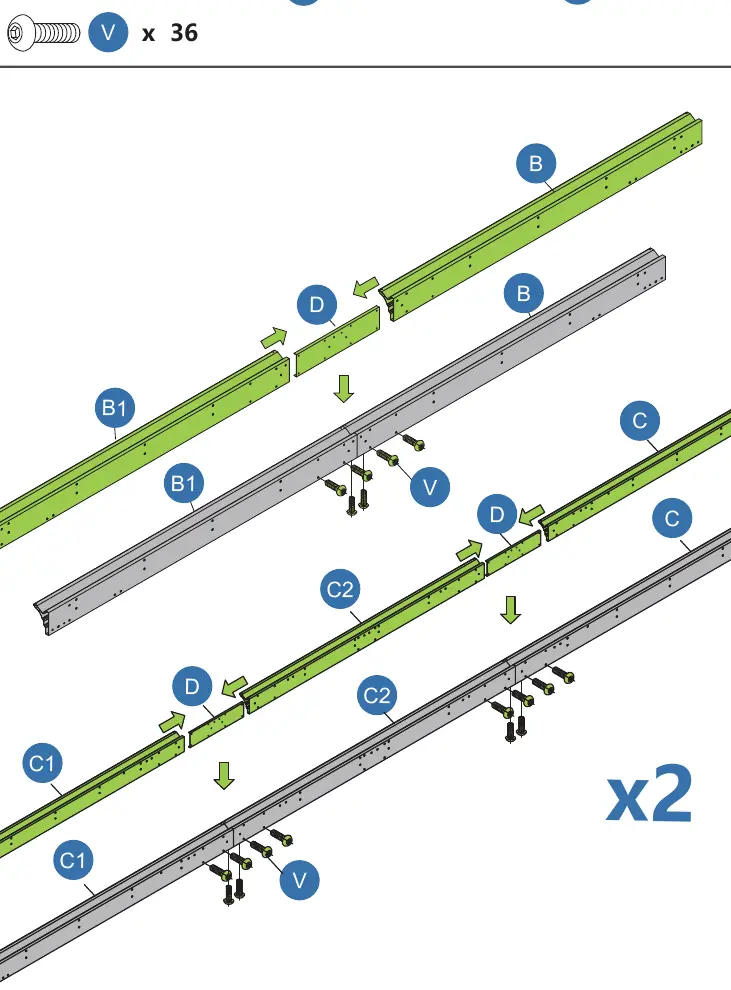
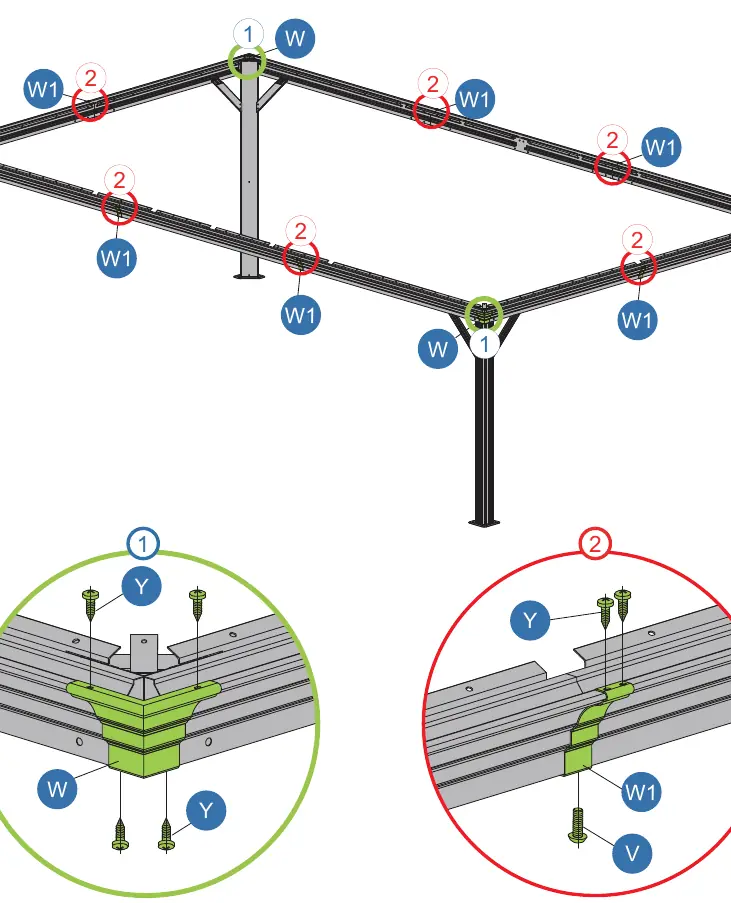
- Frame Assembly: Constructing the main support posts and beams (Steps 1-10).
- Roof Structure: Installing the roof support beams and rafters (Steps 11-17).
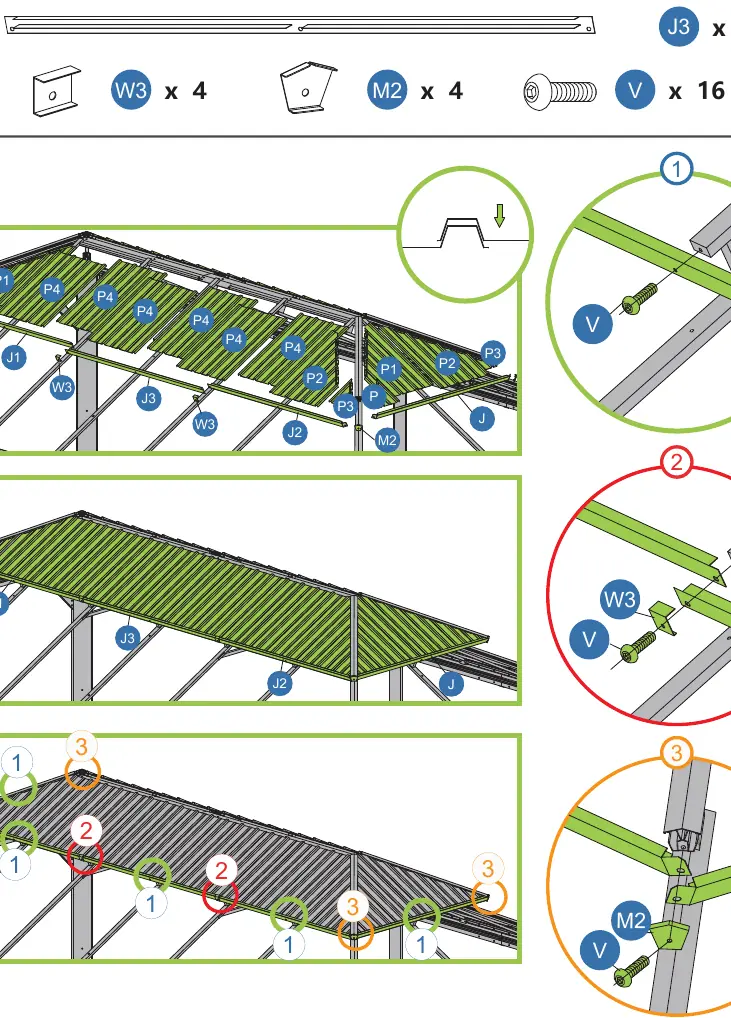
- Roof Panels: Installing the metal roof panels, ensuring proper overlap as shown in the diagrams (Steps 18-27).
- Netting: Attaching the sidewall netting (Step 28).
- Anchoring: Securing the gazebo to the ground (Step 29).
Anchoring and Safety
To improve wind resistance, you must complete the anchoring step. Failure to install expansion screws or ground nails may cause the gazebo to topple in strong winds.
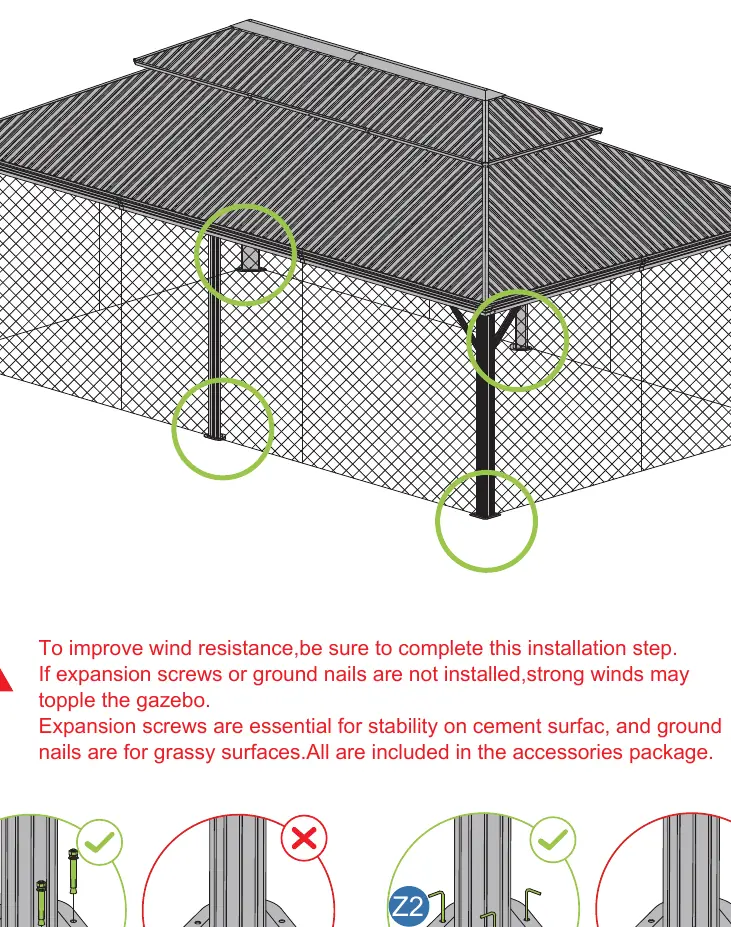
- Cement Surfaces: Use expansion screws (Z1).
- Grassy Surfaces: Use ground nails (Z2).
This structure is not intended for commercial use, such as in daycares, preschools, or recreational parks.
Customer Support
For assistance, please contact Veikous customer service:
Phone: 1-858-324-1911 (Mon - Sun, 10:00 am to 7:00 pm EST)Email: [email protected]: www.veikous.com
Official resources from the manual
Practical help
Common problems
Missing or damaged parts
Contact customer service at 1-858-324-1911 or email [email protected] before returning to the store.
Difficulty aligning screw holes
Do not fully tighten screws until the entire structure is assembled. Ensure all parts are properly aligned before tightening.
Gazebo instability in wind
Ensure the gazebo is properly anchored using expansion screws for cement or ground nails for grass.
Before use
- Check all parts against the parts list to ensure nothing is missing.
- Ensure you have at least 3 people available for assembly.
- Prepare the required tools: Drill, Allen key, 6.5ft+ stepladder, gloves, and safety goggles.
- Clear a large, flat area for assembly.
- Read the entire manual and safety information.
Images and diagrams
- Exploded views show the connection of frame parts (A, B, C, etc.) and roof panels (P, N, etc.).
- Numbered steps indicate the sequence of assembly.
- Green highlights in diagrams indicate specific parts being installed in that step.
Model compatibility
- Not intended for commercial use (e.g., daycare, school, recreational park).
- Anchoring method depends on surface type: expansion screws for cement, ground nails for grass.

Manual page author
Michael Turner
Technical manual editor
Reviews PDF manuals for structure, safety notes, and practical product details so readers can find the right information quickly.