Power / EV Chargers
Installation Guide for Tesla Model Y Mud Flap Kit
Step-by-step installation instructions for the Tesla Model Y Mud Flap Kit. This guide covers preparation, required tools, and the procedure for mounting the mud flaps to protect your vehicle from road debris.
Table of contents
Manual images
Click an image to enlargeQuick Guide from the Manual
The Mud Flap Kit is designed to provide added protection against rocks and small road debris that can accelerate elemental wear and tear on your vehicle’s body and paint. This kit is recommended for vehicles driven on roads where heavy salt, sand, or gravel are commonly used.
Preparing for Installation
Before beginning the installation, ensure you have the following:
- Required Tools: Push clip removal tool or a flathead screwdriver.
- Preparation: Clean the installation area thoroughly with alcohol and allow it to fully dry before proceeding.
Installation Procedure
Follow these steps to install the mud flaps on your vehicle:
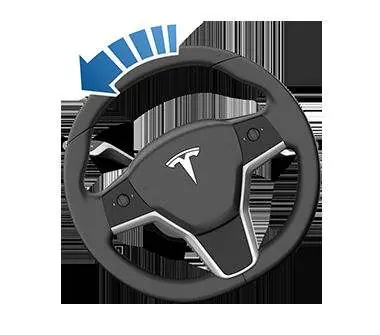
- Turn the steering wheel fully to the left to provide access to the working area.
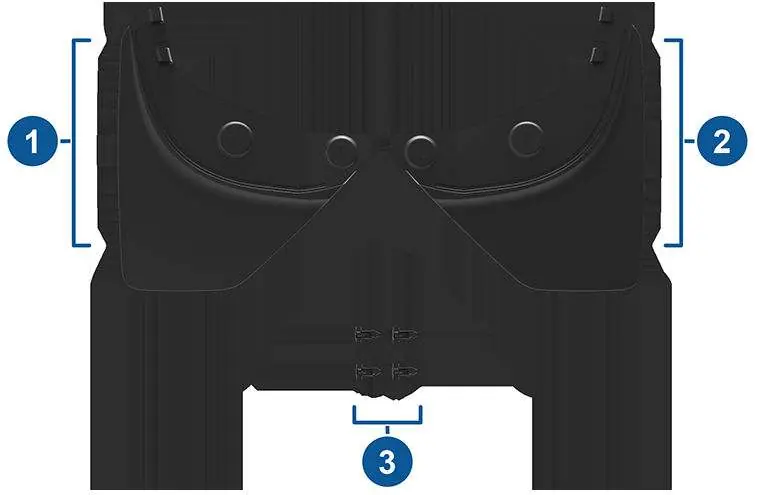
- Carefully use a push clip removal tool or flathead screwdriver to remove the lower push clips (x2) that secure the front wheel arch liner. Caution: Discard the existing push clips; do not reuse them.
- Maneuver the mud flap into place so that the tabs on the mud flap hook onto the backside of the front fender garnish. Ensure the mud flap is aligned correctly with the holes in the front wheel arch liner and the body of the vehicle.
- Install the new push clip (with the plastic rivet pulled out) into the inboard hole, then push the plastic rivet in to close the clip. Note: Always install the inboard push clip first.
- Install the new push clip into the outboard hole and secure it by pushing the plastic rivet in.
- Repeat this procedure on the right side of the vehicle to install the right mud flap.
Practical help
Common problems
Difficulty removing existing clips
Use a dedicated push clip removal tool or a flathead screwdriver, applying gentle pressure to avoid damaging the wheel arch liner.
Mud flap does not align with holes
Ensure the tabs on the mud flap are properly hooked onto the backside of the front fender garnish before attempting to insert the clips.
Before use
- Push clip removal tool or flathead screwdriver
- Isopropyl alcohol for cleaning the installation area
- Ensure the vehicle is parked on a flat, stable surface
- Verify all kit components are present (2 mud flaps, 4 push clips)
Specs in practice
- Inboard hole
- The hole closest to the center of the vehicle; must be secured first.
- Outboard hole
- The hole closest to the outer edge of the vehicle; secured second.
Images and diagrams
- Steering wheel rotation provides necessary clearance for the installation area.
- The sequence of clip installation (inboard first, then outboard) ensures proper alignment.
Model compatibility
- Designed specifically for Tesla Model Y.

Manual page author
Emily Carter
User documentation editor
Prepares concise manual descriptions and highlights the most useful setup, operation, and maintenance information for readers.