Garden / Lawn Mowers
User Manual for Texas TME 1600 Electric Lawn Mower
Quick guide for the Texas TME 1600 electric lawn mower. Includes assembly instructions, operating procedures, maintenance tips, and safety guidelines.
Table of contents
Manual images
Click an image to enlargeQuick guide from the manual
The Texas TME 1600 is an electric lawn mower designed for residential use. Before operating, ensure the electric cable is undamaged and the lawn is free of stones or debris. Always wear strong footwear and long pants during operation. The mower must only be started when placed on grass, never on its side or upside down.
Assembly
Follow these steps to assemble your mower:
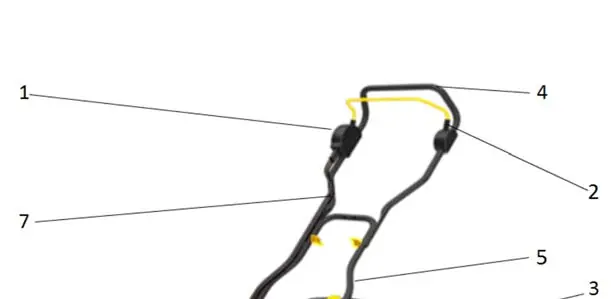
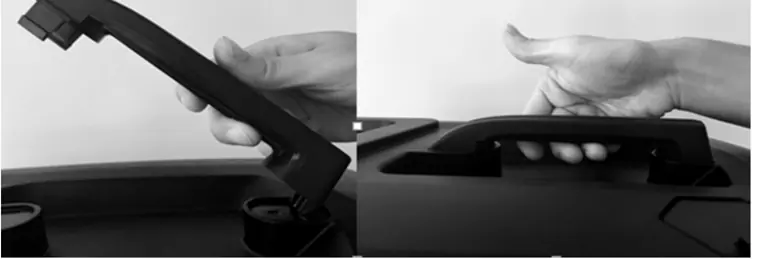

- Handle Assembly: Attach the lower handle to the machine body using the provided brackets and plastic covers. Secure with the locking bolts. Attach the upper handle to the lower handle using the supplied bolts, ensuring the cable hook is installed first.
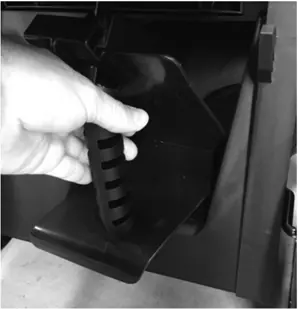
- Grass Box: Click the left and right parts of the grass box together, then attach the upper and lower sections. Finally, attach the handle to the collector and mount the assembled box under the rear guard of the mower.
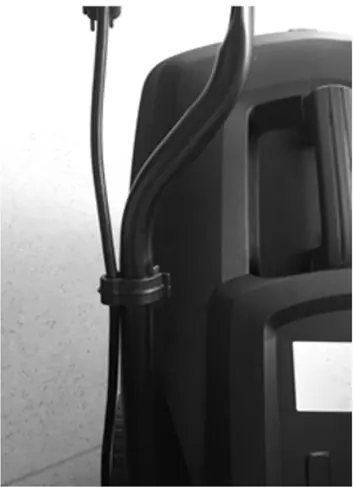
- Cable Management: Ensure the cable hook is fitted on the upper handlebar and use the cable holders to keep the power cord in place.
Operation
To start the mower:
- Press the safety switch (1).
- Pull the activation handle (2) towards the handlebar.
- Hold the handle (2) continuously while mowing. Releasing the handle will stop the motor immediately.
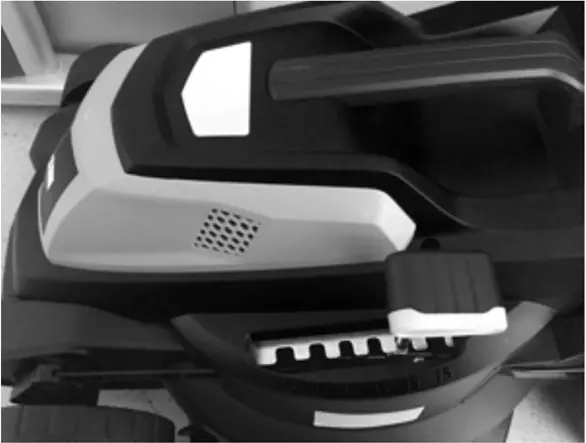
Cutting Height: Adjust the cutting height using the lever located on the side of the machine. There are 6 positions available (25-75 mm).
Maintenance
Regular maintenance ensures longevity and safety:
- Cleaning: Brush off grass clippings after every use. Do not use water to clean the mower.
- Blade Replacement: Loosen the blade bolt to remove the blade. Replace with a new blade and tighten the bolt securely. Always check that the blade is properly fastened and balanced before use.
- Storage: Keep the mower in a clean, dry place.
Troubleshooting
If the motor stops during use, it is likely due to overheating. The mower is equipped with a thermal switch that triggers if the motor is overloaded (e.g., cutting long/wet grass or if the grass box is full). If this happens, let the motor cool for 5 minutes before restarting. If the problem persists, increase the cutting height and mow at a slower speed.
Specifications
- Power: 1600W
- Voltage: 230-240V ~ 50 Hz
- Cutting Width: 38 cm
- Grass Box Capacity: 40 L
- Cutting Height: 6 positions (25-75 mm)
- Weight: 13 kg
Practical help
Common problems
Motor stops during operation
Thermal switch triggered due to overheating. Let the motor cool for 5 minutes before restarting.
Grass discharge hole blocked
Often caused by long or wet grass. Check and clean the discharge area frequently, even if the grass box is not full.
Excessive vibration
Check if the blade is damaged or unbalanced. Replace the blade if necessary.
Before use
- Check that the electric cable is undamaged.
- Ensure the lawn is free of stones and other objects.
- Verify all bolts and nuts are securely fastened.
- Wear strong footwear and long pants.
- Ensure the grass box is correctly attached.
- Check that the blade is sharp and balanced.
Specs in practice
- Cutting Width
- 38 cm path width.
- Cutting Height
- Adjustable in 6 steps from 25 mm to 75 mm.
Images and diagrams
- Illustration 1: Parts identification including safety switch, activation handle, and height adjustment.
- Illustration 2-3: Handle assembly and locking bolt installation.
- Illustration 4: Grass box assembly steps.
- Illustration 6: Starting procedure using the safety switch and activation handle.
- Illustration 10: Blade removal and replacement procedure.
Model compatibility
- Use only original spare parts.
- Extension cable must have a minimum diameter of 1.5mm² and a maximum length of 50 meters.

Manual page author
David Miller
Documentation analyst
Organizes user manual content into clear summaries, with attention to model details, product context, and everyday usability.