Lighting / Fixtures
J Adams and Co Orbit Wall Light 10B039C5 Instruction Manual
Quick guide for the J Adams and Co Orbit Wall Light (10B039C5). Includes assembly steps, wiring instructions, and installation requirements for your wall sconce.
Table of contents
Manual images
Click an image to enlargeQuick guide from the manual
This document provides assembly and installation instructions for the J Adams and Co Orbit Wall Light (Model 10B039C5). Before beginning, ensure the electricity is turned off at the main fuse box or circuit breaker. The installation requires basic tools and knowledge of electrical wiring. Ensure your supply conductors are rated for at least 90°C.
Package contents
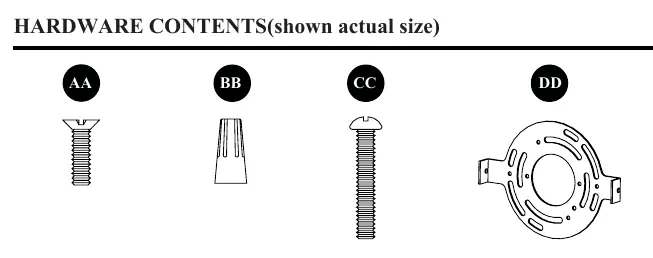
- Fixture body
- Glass shade
- Hardware: Crossbar, short mounting screws, long mounting screws, wire nuts
Tools required
- Flathead screwdriver
- Phillips screwdriver
- Pliers
- Electrical tape
- Wire cutters
- Safety glasses
- Helpful tools: Wire strippers, step ladder
Assembly instructions
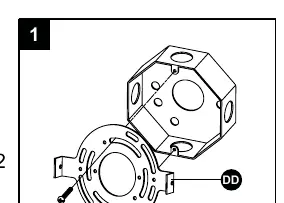
1. Prepare the outlet box
Attach the crossbar (DD) to the outlet box using the long mounting screws (CC).
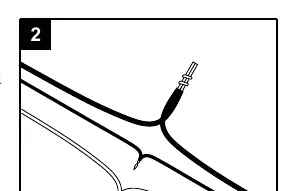
2. Wiring
Strip 3/4 inch of insulation from the wire ends. Twist the stripped ends together with pliers. Connect black to black (power) and white to white (neutral). Attach the copper wire to the ground wire. If necessary, attach the copper ground wire to the grounded outlet box.
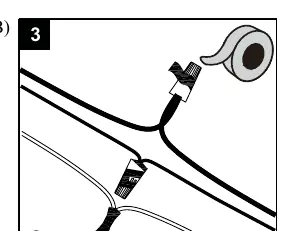
3. Secure connections
Attach the wire nuts (BB) to the connected wires. Secure the wire nuts and wires together using electrical tape.
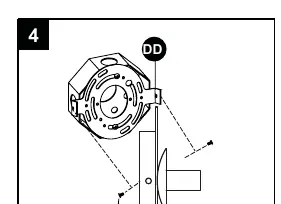
4. Mount the fixture
Place the fixture body (A) onto the crossbar (DD) and secure it using the short mounting screws (AA).
5. Final installation
Install the E12 bulb (not included) into the socket, then screw on the glass shade (B).
Manufacturer information
The Home Depot
Practical help
Common problems
Fixture does not turn on
Verify the bulb is properly installed and that all wire connections are secure and correctly matched (black to black, white to white).
Fixture is loose on the wall
Ensure the short mounting screws are tightened securely to the crossbar.
Before use
- Turn off electricity at the main fuse box or circuit breaker.
- Verify all parts are present according to the package contents list.
- Ensure supply conductors are rated for at least 90°C.
- Gather all required tools (screwdrivers, pliers, wire cutters, etc.).
Images and diagrams
- Step 1: Attaching the crossbar to the outlet box.
- Step 2: Wiring connections (black to black, white to white).
- Step 3: Securing wire nuts with electrical tape.
- Step 4: Mounting the fixture body to the crossbar.
- Step 5: Installing the bulb and glass shade.
Model compatibility
- Requires one E12 bulb (not included).
- Requires a grounded outlet box.

Manual page author
Michael Turner
Technical manual editor
Reviews PDF manuals for structure, safety notes, and practical product details so readers can find the right information quickly.