Home Appliances / Washing Machines
User Manual for Thrustmaster T-LCM Pedals
Quick guide for Thrustmaster T-LCM Pedals. Learn how to calibrate, adjust pedal resistance, mount to a cockpit, and connect to PC or consoles.
Table of contents
Manual images
Jump to the sectionImportant Information
For safety reasons, never use the pedal set with bare feet or while wearing only socks. Thrustmaster disclaims all responsibility for injury resulting from use without shoes. Keep the pedal set out of the reach of children and avoid placing fingers near pedal arms during use.
Technical Features
The T-LCM Pedals feature a load cell force sensor and magnetic sensors for high precision. The set includes various springs (F10, F15, F20, F30) and spacers to customize brake resistance.
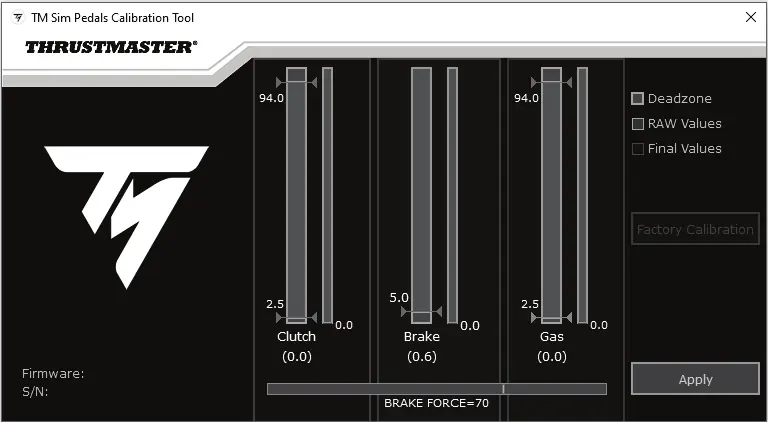
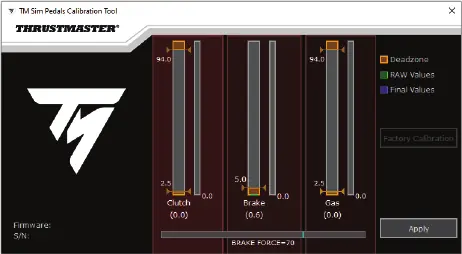
Calibration Software
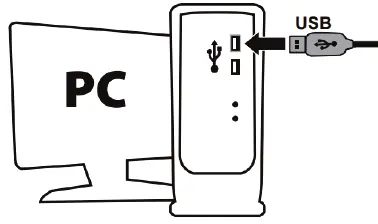
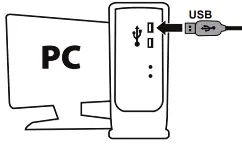
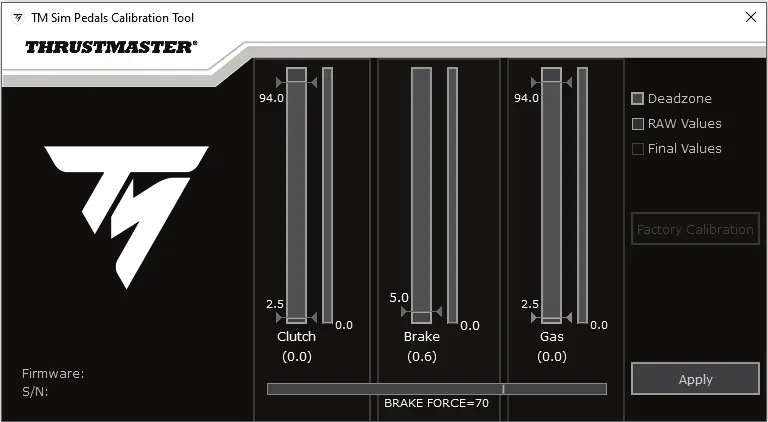
Connect the pedal set to a PC using the removable USB cable (1). The RJ12 cable (2) must not be connected during this procedure. Visit support.thrustmaster.com, select Racing Wheels / T-LCM Pedals, and download the calibration software. Use this to adjust deadzones and electronic brake force. Click APPLY to save settings to the pedal set's internal memory.
Updating Firmware
To update the firmware, connect the pedal set to a PC via the USB cable (1). Visit support.thrustmaster.com, select Racing Wheels / T-LCM Pedals, and follow the instructions for the firmware update.
Mounting the Pedal Set
The pedal set can be attached to compatible supports or cockpits using the five M6 screw threads located underneath the base. Ensure the length of the M6 screws does not exceed the thickness of your support by more than 12 mm to avoid damaging internal components.
Mechanical Settings
Use the included 2.5 mm Allen key (7) to adjust the following:
- Height: Adjust the metal pedal head (11) and plastic support (10).
- Spacing: Adjust the position of the three pedals.
- Inclination: Rotate the plastic pedal head support (10) 180 degrees.
- Alignment: Install or remove the plastic pedal head support (10) to move pedals forward or backward.
Changing Brake Pedal Resistance
Disconnect the pedal set from the PC or console. Push down firmly on the washer of the upper retaining head (G) and pull backward to free it from the metal arm. Remove elements from the holding rod (B). Replace or mix the main F springs (F10, F15, F20, F30) and appropriate spacers. After modifying, reconnect to a PC and recalibrate using the software.
Connection Guide
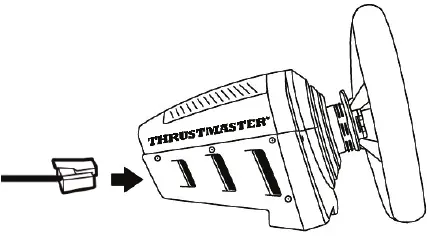
- On Game Console with Thrustmaster Racing Wheel: Use the removable RJ12 cable (2).
- On PC with Thrustmaster Racing Wheel: Use the removable RJ12 cable (2) or removable USB cable (1).
- On PC with non-Thrustmaster Racing Wheel: Use the removable USB cable (1).
Official resources from the manual
Practical help
Common problems
Pedal set not recognized as high-precision
Ensure the racing wheel base firmware is updated to the latest version via support.thrustmaster.com.
Brake pedal not functioning correctly after changing springs
You must recalibrate the brake pedal using the calibration software on a PC.
Pinching hazard
Keep fingers and other body parts away from pedal arms during gaming sessions.
Before use
- Wear shoes while using the pedals.
- Ensure the pedal set is mounted securely to a support or cockpit.
- Update the firmware of your racing wheel base if connecting via RJ12.
- Install the calibration software on your PC.
Specs in practice
- M6 screw threads
- Mounting points on the base for cockpit installation.
Images and diagrams
- General overview shows the pedal set, cables, springs, and tools.
- Mounting diagram indicates the five M6 screw locations.
- Brake resistance diagram shows the spring column assembly.
Model compatibility
- Compatible with PC, PS4, and Xbox One.
- Requires official Thrustmaster wheel rim when connected to a Thrustmaster base.
- Calibration software and firmware updates require a PC connection.

Manual page author
Michael Turner
Technical manual editor
Reviews PDF manuals for structure, safety notes, and practical product details so readers can find the right information quickly.