Home Appliances / Washing Machines
Thrustmaster T3PM 3 Pedals Add-On User Guide
Comprehensive user guide for the Thrustmaster T3PM 3 Pedals Add-On. Learn how to calibrate, adjust pedal height, spacing, and inclination, install brake springs, and mount the pedal set to a cockpit.
Table of contents
Manual images
Jump to the sectionQuick guide from the manual
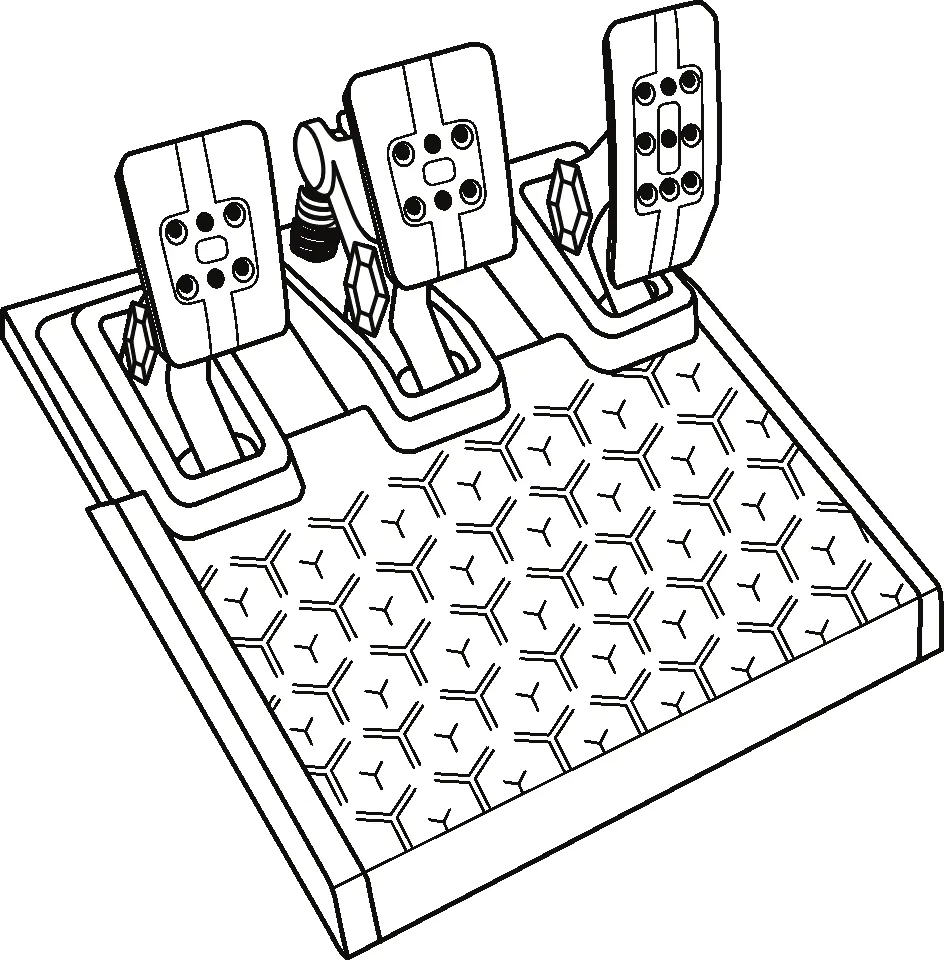
The Thrustmaster T3PM 3 Pedals Add-On is designed for high-performance racing simulation. Before using the device, ensure it is connected to your racing wheel base before connecting the wheel to your console or PC. Never connect or disconnect the pedal set while the wheel is powered on or during gameplay to avoid calibration issues. Always wear shoes while using the pedal set for safety reasons.
Technical features
The package includes the following components:
- Pedal set
- Additional hard spring (black)
- 2.5 mm Allen key
- Spring retaining rod
- Upper retaining head with washer
- Elastomer cushioning ring (white – Shore 70)
- Upper plastic spacer (red)
- Soft spring (silver – installed by default)
- Lower plastic spacer (red)
Safety warnings
To prevent injury, observe the following precautions:
- Keep the pedal set out of children's reach.
- Never place fingers on or near the sides of the pedals during gameplay.
- Never place fingers on or near the rear base of the pedals during gameplay.
- Never place fingers on or near the front base of the pedals during gameplay.
- Never use the pedal set with bare feet or while wearing only socks.
Automatic calibration
The pedals calibrate automatically after a few presses once the racing wheel's calibration is complete and the game has started. Do not press the pedals during the wheel's self-calibration phase or while a game is loading, as this can lead to improper calibration. If the pedals do not function correctly, power off your console or PC, disconnect the wheel completely, reconnect all cables, and restart your system.
Attaching the pedal set to a support or cockpit
The pedal set can be attached to compatible supports using the five M6-type threaded holes on the underside of the base. Use at least two M6 screws (not included) to secure the unit. Ensure the screw length does not exceed the thickness of your support by more than 12 mm to avoid damaging internal components.
Adjusting the pedal set
You can customize the pedals using the included 2.5 mm Allen key. Always disconnect the wheel's USB cable before making adjustments.
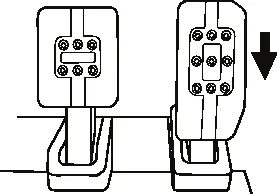
Adjusting the height of the gas pedal
Unscrew the two screws holding the metal head and its support in place. Select your preferred height position, then replace and tighten the screws.
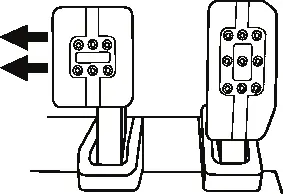
Adjusting the spacing of the three pedals
Unscrew the two screws holding the metal head and its support. Move the pedal head to the left, center, or right position, then replace and tighten the screws.
Adjusting the inclination of the pedals
Unscrew the two screws holding the metal head and its support. Turn the plastic head support 180 degrees, then replace and tighten the screws.
Included set of brake springs
You can adjust the brake pressure force using different configurations:
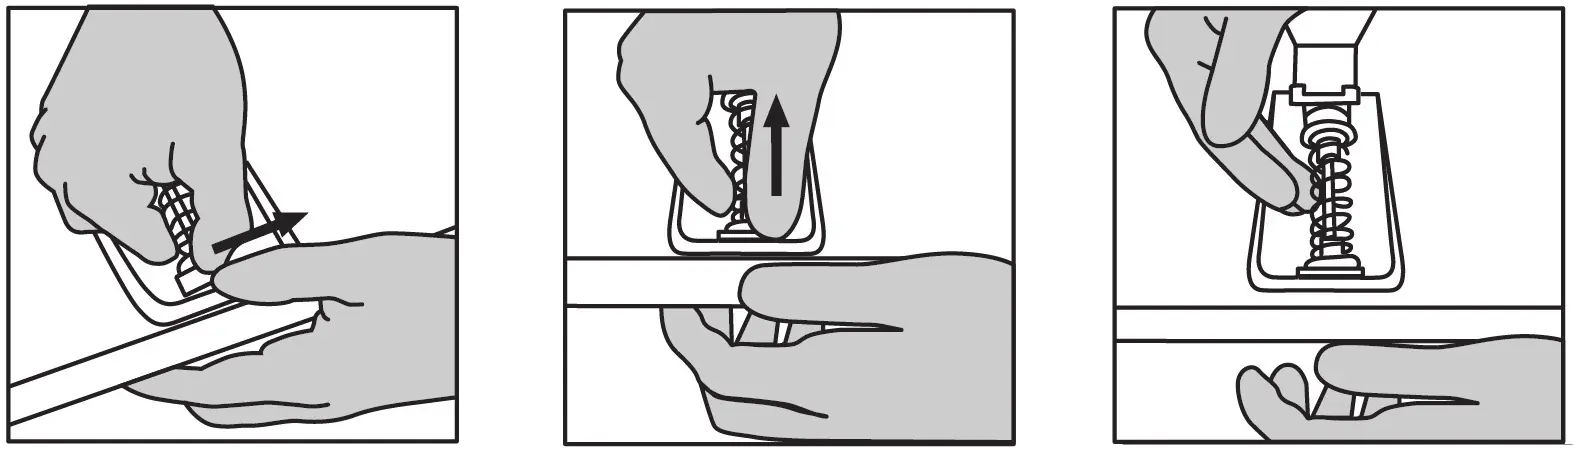
- Soft: Silver spring (8) - Recommended for desk use.
- Medium (default): Silver spring (8) + White elastomer ring (6) - Recommended for desk use.
- Hard: Black spring (2) - Recommended for pedal set support.
- Very Hard: Black spring (2) + White elastomer ring (6) - Recommended for cockpit use.
To change the spring, pull hard on the lower plastic spacer to compress the spring and remove the spring retaining rod. Reposition the elements on the rod, install the elastomer ring if needed, and compress the spring to reinsert the retaining rod.
Technical support
For further assistance, visit the official support website at https://support.thrustmaster.com. Contact numbers are available for the UK, US, and Canada on the support page.
Official resources from the manual
Practical help
Common problems
Pedals not functioning or improperly calibrated
Power off the console/PC, disconnect the wheel completely, reconnect all cables (including power and pedal set), and restart the system.
Pinch hazard during gameplay
Never place fingers on or near the sides, rear base, or front base of the pedals while playing.
Calibration issues
Ensure the pedal set is connected to the wheel base before connecting the wheel to the console or PC. Do not press pedals during wheel self-calibration.
Before use
- Connect the pedal set to the wheel base before powering on the console or PC.
- Wear shoes while using the pedal set.
- Ensure M6 mounting screws do not exceed support thickness by more than 12 mm.
- Disconnect the USB cable before making any physical adjustments to the pedals.
- Keep the pedal set out of reach of children.
Images and diagrams
- The pedal set features three pedals, each with adjustable height, spacing, and inclination.
- The brake pedal resistance can be modified by swapping the internal spring and elastomer ring.
- Mounting holes are located on the underside of the pedal base.
Model compatibility
- Compatible with various supports and cockpits (sold separately).
- Setup diagrams for specific cockpits are available on the Thrustmaster support website.

Manual page author
David Miller
Documentation analyst
Organizes user manual content into clear summaries, with attention to model details, product context, and everyday usability.